

As many of you might know, when you deploy a ELK stack on Amazon Web Services, you only get E and K in the ELK stack, which is Elasticsearch and Kibana. Here we will be dealing with Logstash on EC2.
What will we be doing
In this tutorial we will setup a Logstash Server on EC2, setup a IAM Role and Autenticate Requests to Elasticsearch with an IAM Role, setup Nginx so that logstash can ship logs to Elasticsearch.
I am not fond of working with access key's and secret keys, and if I can stay away from handling secret information the better. So instead of creating a access key and secret key for logstash, we will instead create a IAM Policy that will allow the actions to Elasticsearch, associate that policy to an IAM Role, set EC2 as a trusted entity and strap that IAM Role to the EC2 Instance.
Then we will allow the IAM Role ARN to the Elasticsearch Policy, then when Logstash makes requests against Elasticsearch, it will use the IAM Role to assume temporary credentials to authenticate. That way we don't have to deal with keys. But I mean you can create access keys if that is your preferred method, I'm just not a big fan of keeping secret keys.
The benefit of authenticating with IAM, allows you to remove a reverse proxy that is another hop to the path of your target.
Create the IAM Policy:
Create a IAM Policy that will allow actions to Elasticsearch:
{
    "Version": "2012-10-17",
    "Statement": [
        {
            "Sid": "VisualEditor0",
            "Effect": "Allow",
            "Action": [
                "es:ESHttpHead",
                "es:ESHttpPost",
                "es:ESHttpGet",
                "es:ESHttpPut"
            ],
            "Resource": "arn:aws:es:eu-west-1:0123456789012:domain/my-es-domain"
        }
    ]
}
Create Role logstash-system-es with "ec2.amazonaws.com" as trusted entity in trust the relationship and associate the above policy to the role.
Authorize your Role in Elasticsearch Policy
Head over to your Elasticsearch Domain and configure your Elasticsearch Policy to include your IAM Role to grant requests to your Domain:
{
  "Version": "2012-10-17",
  "Statement": [
    {
      "Effect": "Allow",
      "Principal": {
        "AWS": [
          "arn:aws:iam::0123456789012:role/logstash-system-es"
        ]
      },
      "Action": "es:*",
      "Resource": "arn:aws:es:eu-west-1:0123456789012:domain/my-es-domain/*"
    }
  ]
}
Install Logstash on EC2
I will be using Ubuntu Server 18. Update the repositories and install dependencies:
$ apt update && apt upgrade -y
$ apt install build-essential apt-transport-https -y
$ wget -qO - https://artifacts.elastic.co/GPG-KEY-elasticsearch | sudo apt-key add -
$ echo "deb https://artifacts.elastic.co/packages/6.x/apt stable main" | sudo tee -a /etc/apt/sources.list.d/elastic-6.x.list
$ apt update
As logstash requires Java, install the the Java OpenJDK Runtime Environment:
$ apt install default-jre -y
Verify that Java is installed:
$ java -version
openjdk version "11.0.3" 2019-04-16
OpenJDK Runtime Environment (build 11.0.3+7-Ubuntu-1ubuntu218.04.1)
OpenJDK 64-Bit Server VM (build 11.0.3+7-Ubuntu-1ubuntu218.04.1, mixed mode, sharing)
Now, install logstash and enable the service on boot:
$ apt install logstash -y
$ systemctl enable logstash.service
$ service logstash stop
Install the Amazon ES Logstash Output Plugin
For us to be able to authenticate using IAM, we should use the Amazon-ES Logstash Output Plugin. Update and install the plugin:
$ /usr/share/logstash/bin/logstash-plugin update
$ /usr/share/logstash/bin/logstash-plugin install logstash-output-amazon_es
Configure Logstash
I like to split up my configuration in 3 parts, (input, filter, output).
Let's create the input configuration: /etc/logstash/conf.d/10-input.conf
input {
  file {
    path => "/var/log/nginx/access.log"
    start_position => "beginning"
  }
}
Our filter configuration: /etc/logstash/conf.d/20-filter.conf
filter {
  grok {
    match => { "message" => "%{HTTPD_COMMONLOG}" }
  }
  mutate {
    add_field => {
      "custom_field1" => "hello from: %{host}"
    }
  }
}
And lastly, our output configuration: /etc/logstash/conf.d/30-outputs.conf:
output {
  amazon_es {
      hosts => ["my-es-domain.abcdef.eu-west-1.es.amazonaws.com"]
      index => "new-logstash-%{+YYYY.MM.dd}"
      region => "eu-west-1"
      aws_access_key_id => ''
      aws_secret_access_key => ''
  }
}
Note that the aws_ directives has been left empty as that seems to be the way it needs to be set when using roles. Authentication will be assumed via the Role which is associated to the EC2 Instance.
If you are using access keys, you can populate them there.
Start Logstash
Start logstash:
$ service logstash start
Tail the logs to see if logstash starts up correctly, it should look more or less like this:
$ tail -f /var/log/logstash/logstash-plain.log

[2019-06-04T16:38:12,087][INFO ][logstash.runner          ] Starting Logstash {"logstash.version"=>"6.8.0"}
[2019-06-04T16:38:14,480][INFO ][logstash.pipeline        ] Starting pipeline {:pipeline_id=>"main", "pipeline.workers"=>2, "pipeline.batch.size"=>125, "pipeline.batch.delay"=>50}
[2019-06-04T16:38:15,226][INFO ][logstash.outputs.elasticsearch] Elasticsearch pool URLs updated {:changes=>{:removed=>[], :added=>[https://search-my-es-domain-xx.eu-west-1.es.amazonaws.com:443/]}}
[2019-06-04T16:38:15,234][INFO ][logstash.outputs.elasticsearch] Running health check to see if an Elasticsearch connection is working {:healthcheck_url=>https://search-my-es-domain-xx.eu-west-1.es.amazonaws.com:443/, :path=>"/"}
Install Nginx
As you noticed, I have specified /var/log/nginx/access.log as my input file for logstash, as we will test logstash by shipping nginx access logs to Elasticsearch Service.
Install Nginx:
$ apt install nginx -y
Start the service:
$ systemctl restart nginx
$ systemctl enable nginx
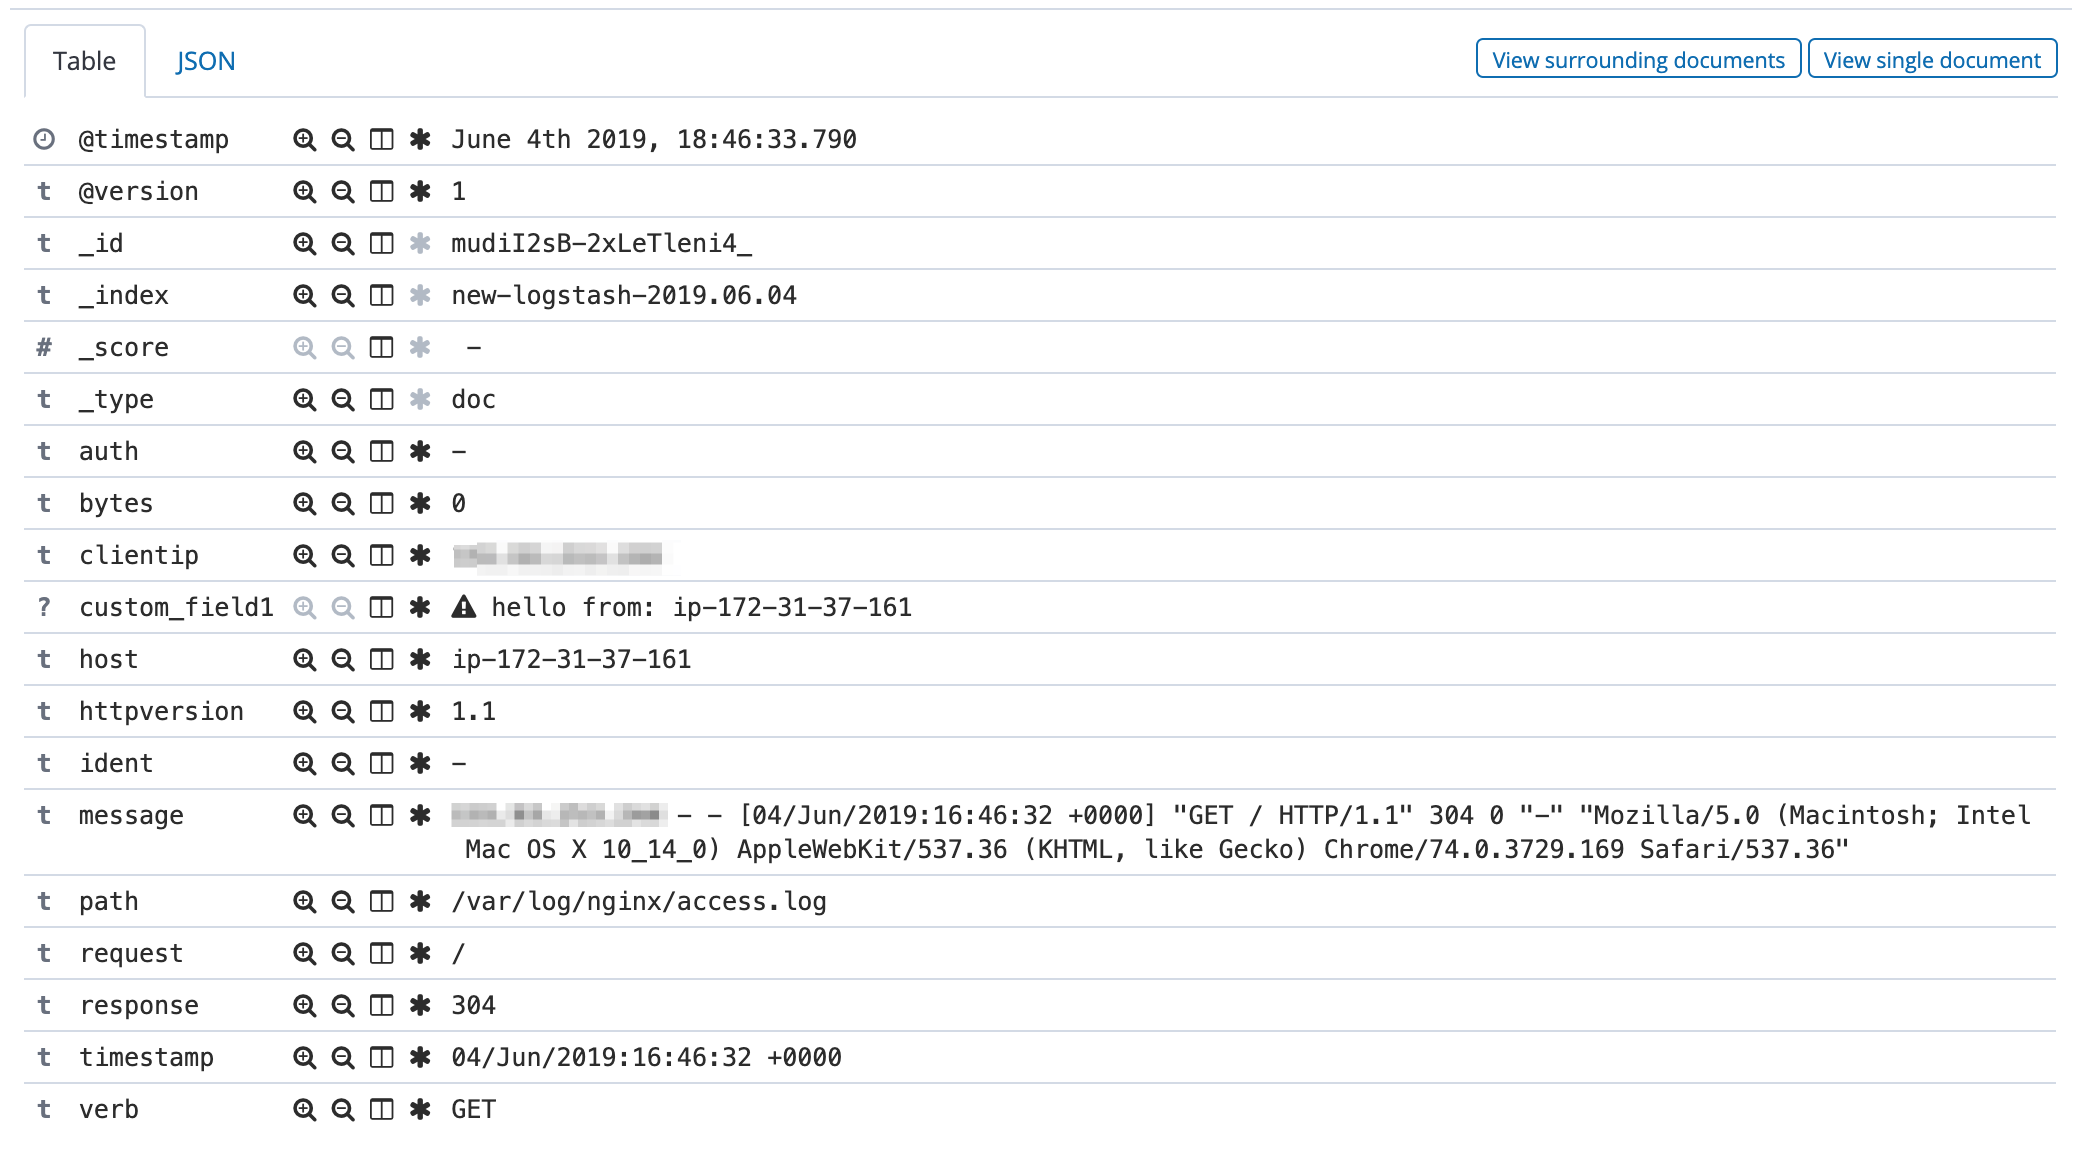
Make a GET request on your Nginx Web Server and inspect the log on Kibana, where it should look like this:
Comments