


Both gitea and drone is built on golang runs on multiple platforms including a raspberry pi and its super lightweight. Oh yes, and its awesome!
In this tutorial we will see how we can implement our own git service and cicd platform by setting up gitea and drone on docker and commit a python flask application to gitea and build a pipeline on drone.
Some definition
Gitea: will be your self hosted git server
Drone Server: will be server being responsible for the web service, repositories, secrets, users, etc.
Drone Agent: will be the workers that runs your builds, jobs etc.
Server Confguration
We will change our host's ssh port to something else as our git server's ssh method will be listening on port 22 and we would like to add our ssh key to gitea so that we can commit to our git server via ssh.
Change your server's ssh port to 2222, by opening /etc/ssh/sshd_config and edit the port to 2222 then restart sshd with:
$ /etc/init.d/sshd restart
Your ssh connection will still be established, but you can exit and ssh to your server by specifying the new port:
$ ssh -p 2222 user@host
Pre-Requirements
Make sure you have docker and docker-compose installed
Deploy Gitea and Drone
Below is the docker-compose file for our deployment. Note that we are running a postgres database which gitea will be configured on, you can also use other databases like mysql, sqlite etc. Visit their documentation for more info.
version: "2"

services:
  gitea-app:
    image: gitea/gitea:latest
    container_name: gitea-app
    environment:
      - USER_UID=1000
      - USER_GID=1000
      - ROOT_URL=http://gitea:3000
      - SSH_DOMAIN=mydomain.com
    restart: always
    volumes:
      - ./volumes/gitea_app:/data
    ports:
      - "3000:3000"
      - "22:22"
    networks:
      - appnet

  gitea-db:
    image: postgres:alpine
    container_name: gitea-db
    ports:
      - 5440:5432
    restart: always
    volumes:
      - ./volumes/gitea_db:/var/lib/postgresql/data
    environment:
      - POSTGRES_USER=postgres
      - POSTGRES_PASSWORD=postgres
      - POSTGRES_DB=gitea
    networks:
      - appnet

  drone-server:
    image: drone/drone:0.8
    container_name: drone-server
    ports:
      - 80:8000
      - 9000
    volumes:
      - ./volumes/drone:/var/lib/drone/
    restart: always
    depends_on:
      - gitea
    environment:
      - DRONE_OPEN=true
      - DRONE_HOST=http://drone-server:8000
      - DRONE_GITEA=true
      - DRONE_GITEA_URL=http://gitea:3000
      - DRONE_SECRET=secret
      - DRONE_NETWORK=appnet
    networks:
      - appnet

  drone-agent:
    image: drone/agent:0.8
    container_name: drone-agent
    command: agent
    restart: always
    depends_on:
      - drone-server
    volumes:
      - /var/run/docker.sock:/var/run/docker.sock
    environment:
      - DRONE_SERVER=drone-server:9000
      - DRONE_SECRET=secret
    networks:
      - appnet

volumes:
  gitea-app:
  gitea-db:

networks:
  appnet:
    external: true
Create the volumes path:
$ mkdir volumes
Create the external network:
$ docker network create appnet
Some key configuration,
Our SSH_DOMAIN will be the domain that gets used for things like cloning a repository. When you register your gitea account, you will use the same credentials to logon to drone.
Deploy your stack:
$ docker-compose up -d
Register on Gitea
When your deployment is done, access your gitea server which should be available on http://your-docker-ip:3000/ complete the registration, if you decide to go with postgres your username/password will be postgres and your host will be gitea-db:5432.
Make sure to complete the administrator account to get your admin credentials.
Setup SSH Key and Repo
Generate a ssh key that you will use for communicating to git over ssh. If you have already have an ssh key you can skip this step.
$ ssh-keygen -t rsa
# use the defaults
Login on gitea, once you are logged in, head over to profile / settings / ssh keys: http://your-docker-ip:3000/user/settings/keys.
Add a new ssh key, go back to your terminal and copy the public key which we will provide to gitea:
$ cat ~/.ssh/id_rsa.pub
<copy the contents to your clipboard>
Paste your public key and provide a descriptive title.
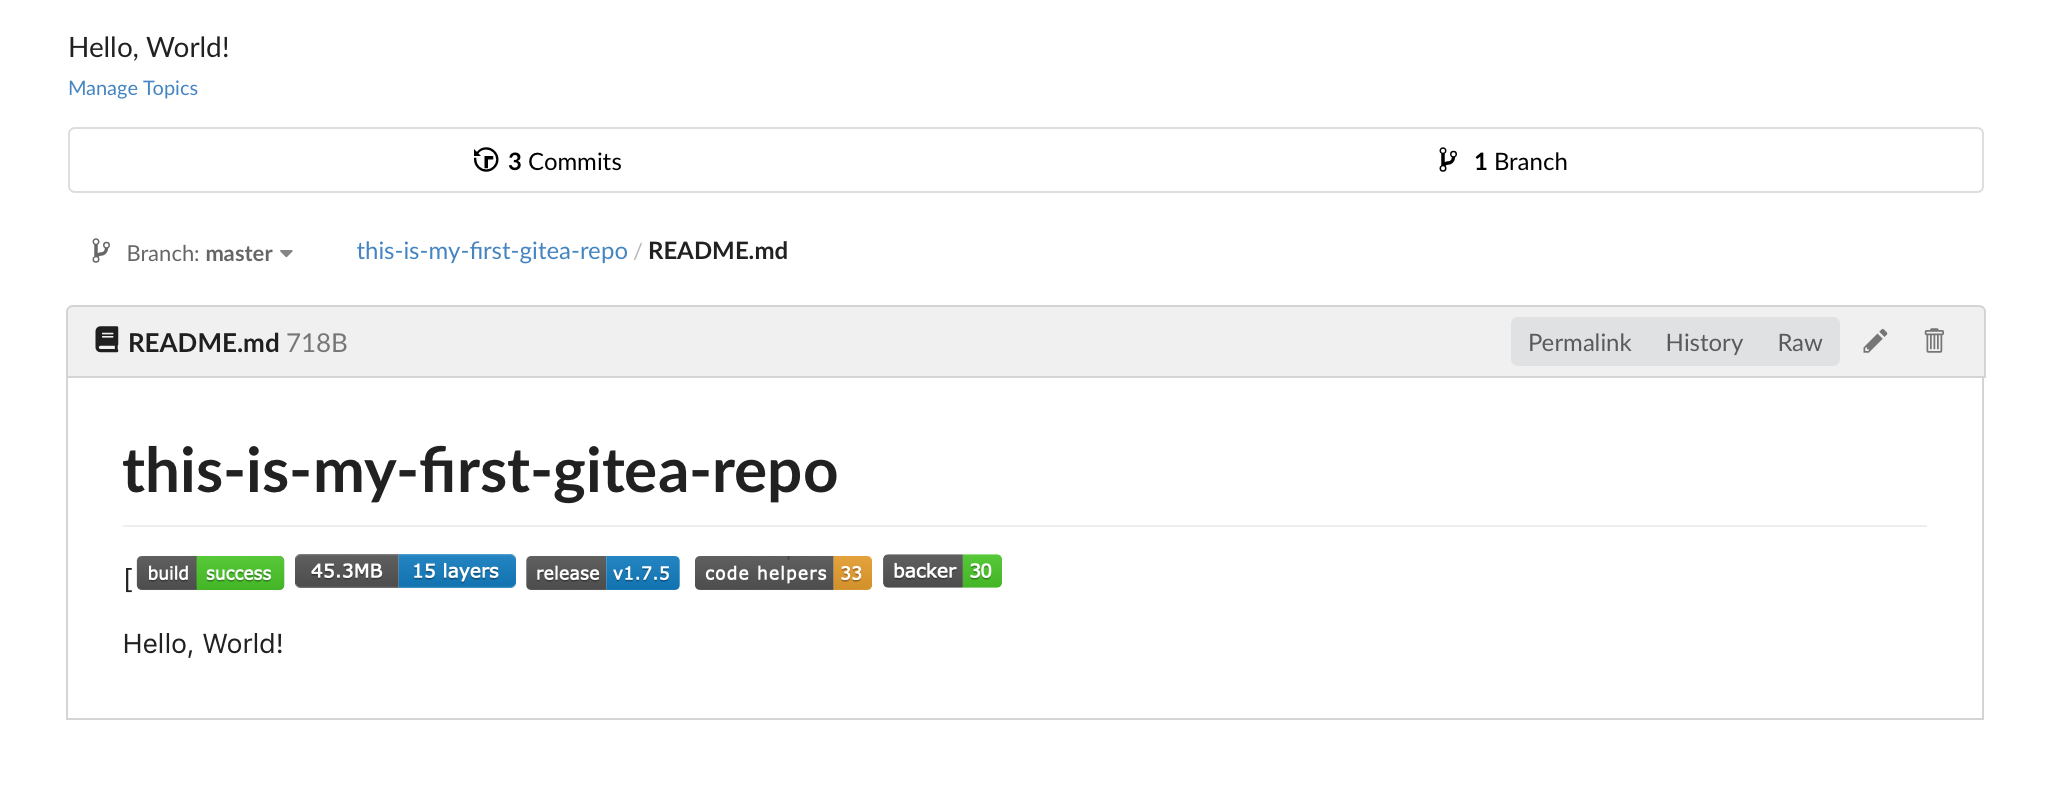
Head back to your dashboard and create your first repository:
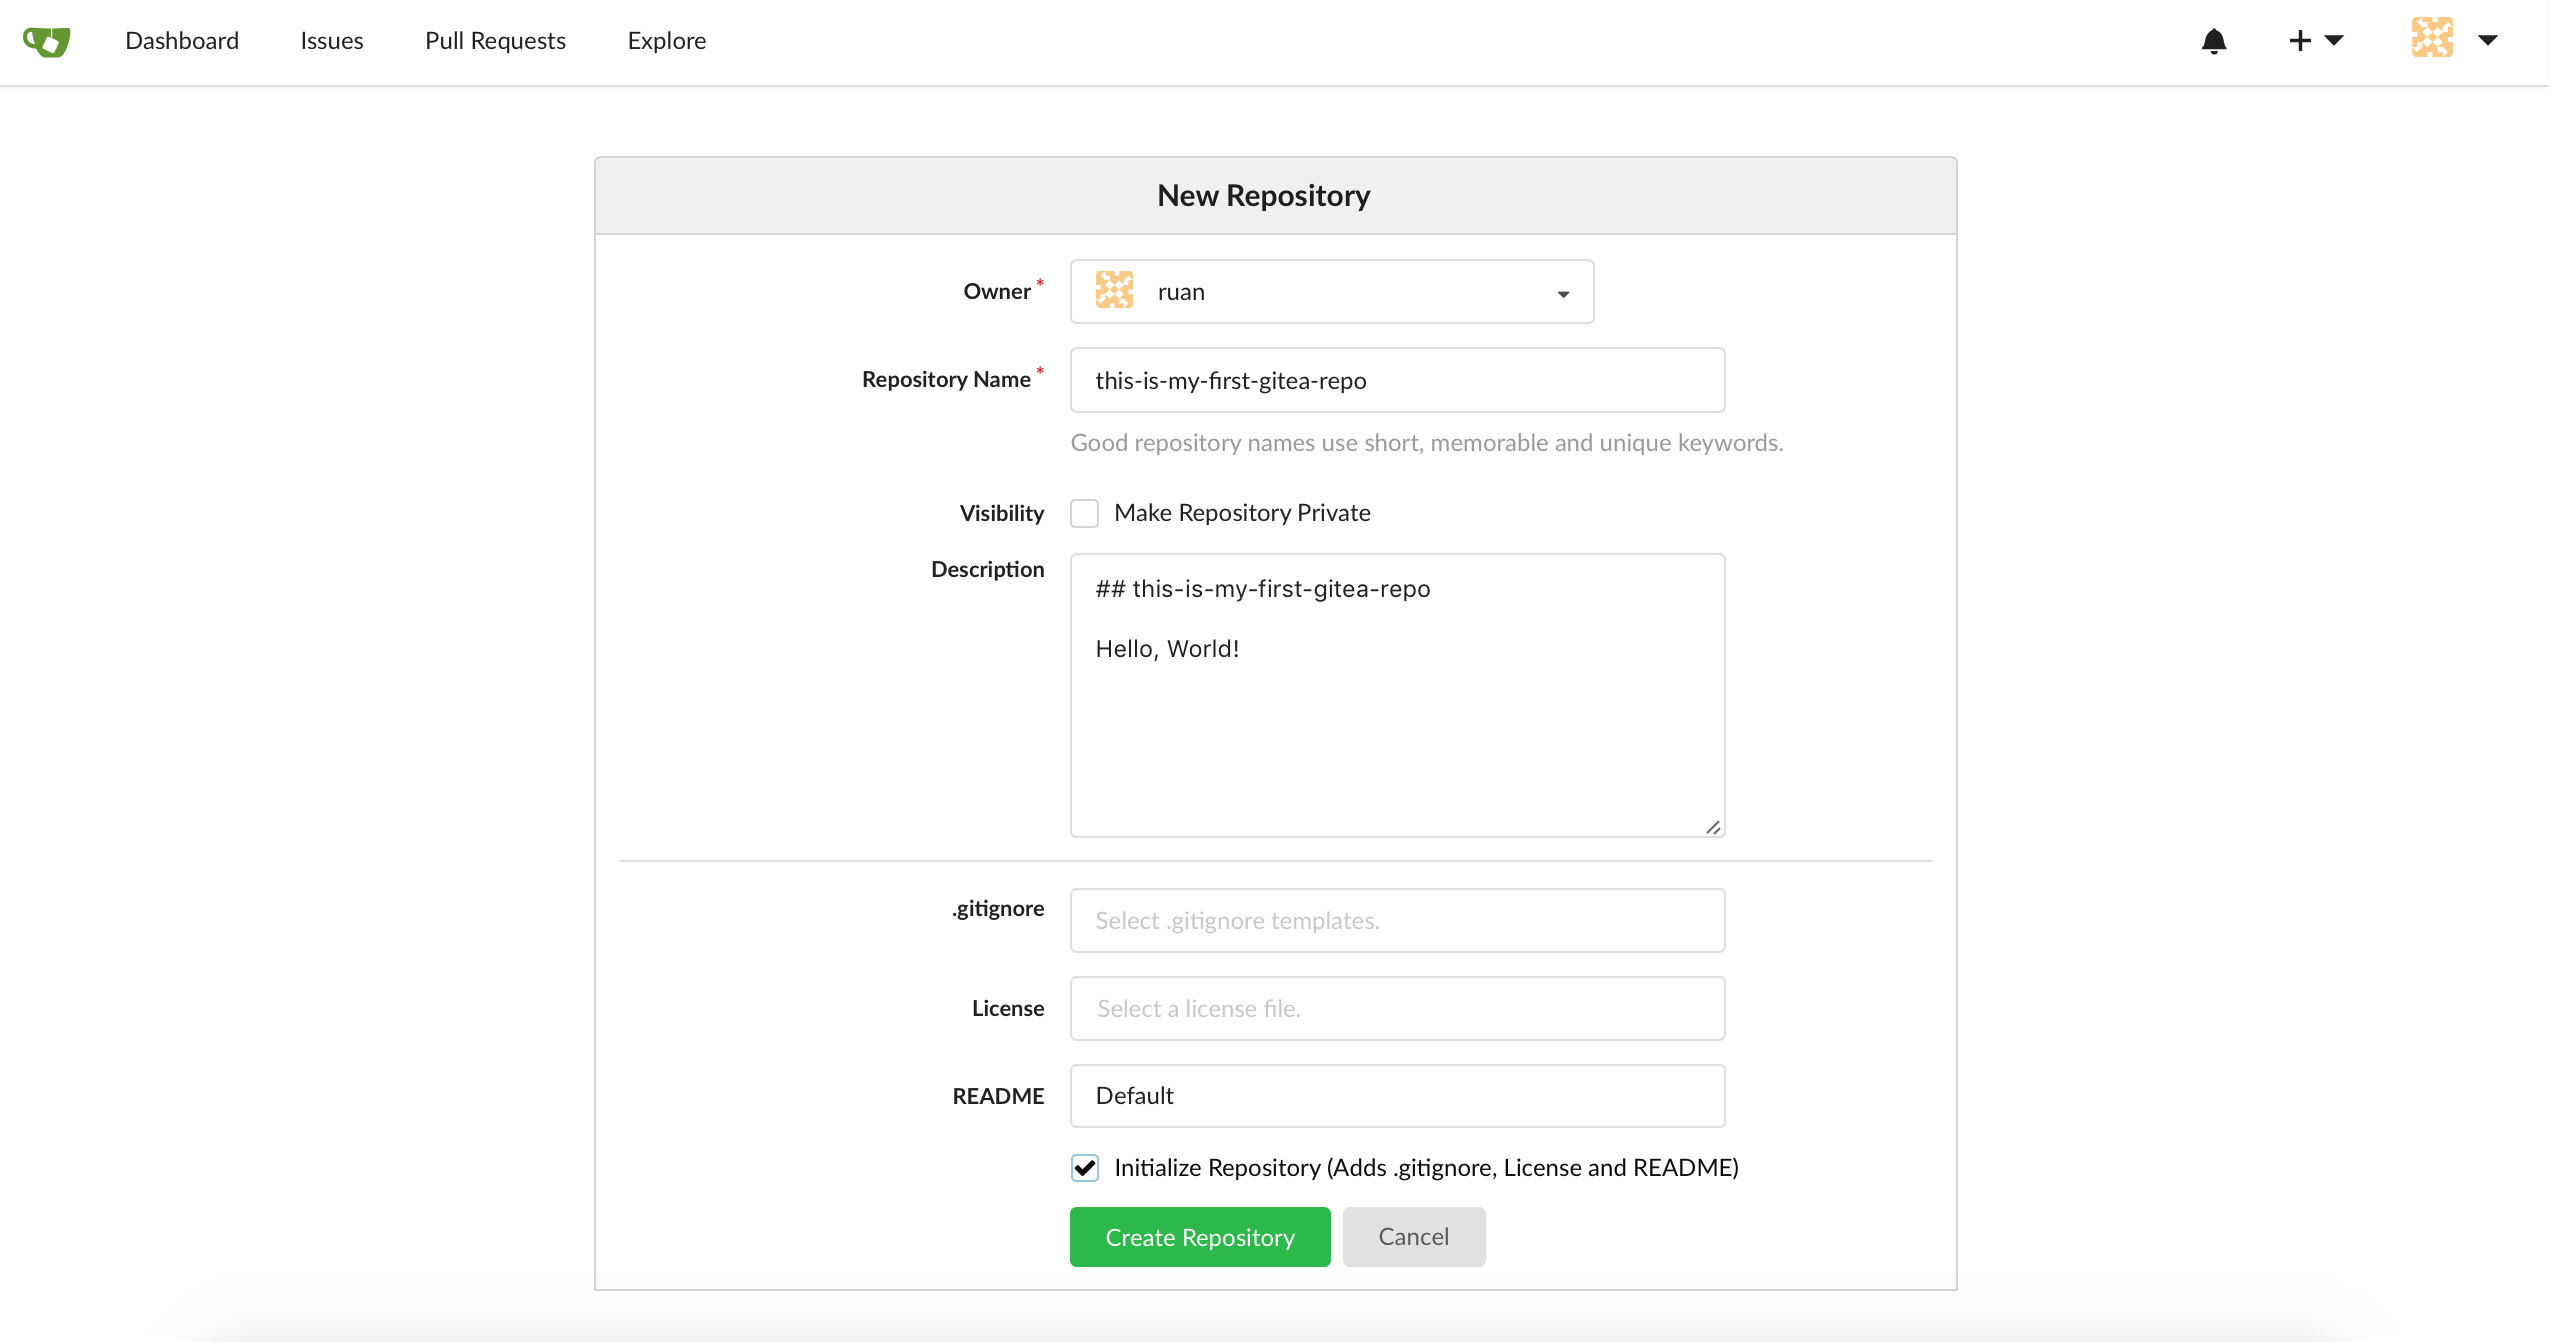
It should look more or less like this:
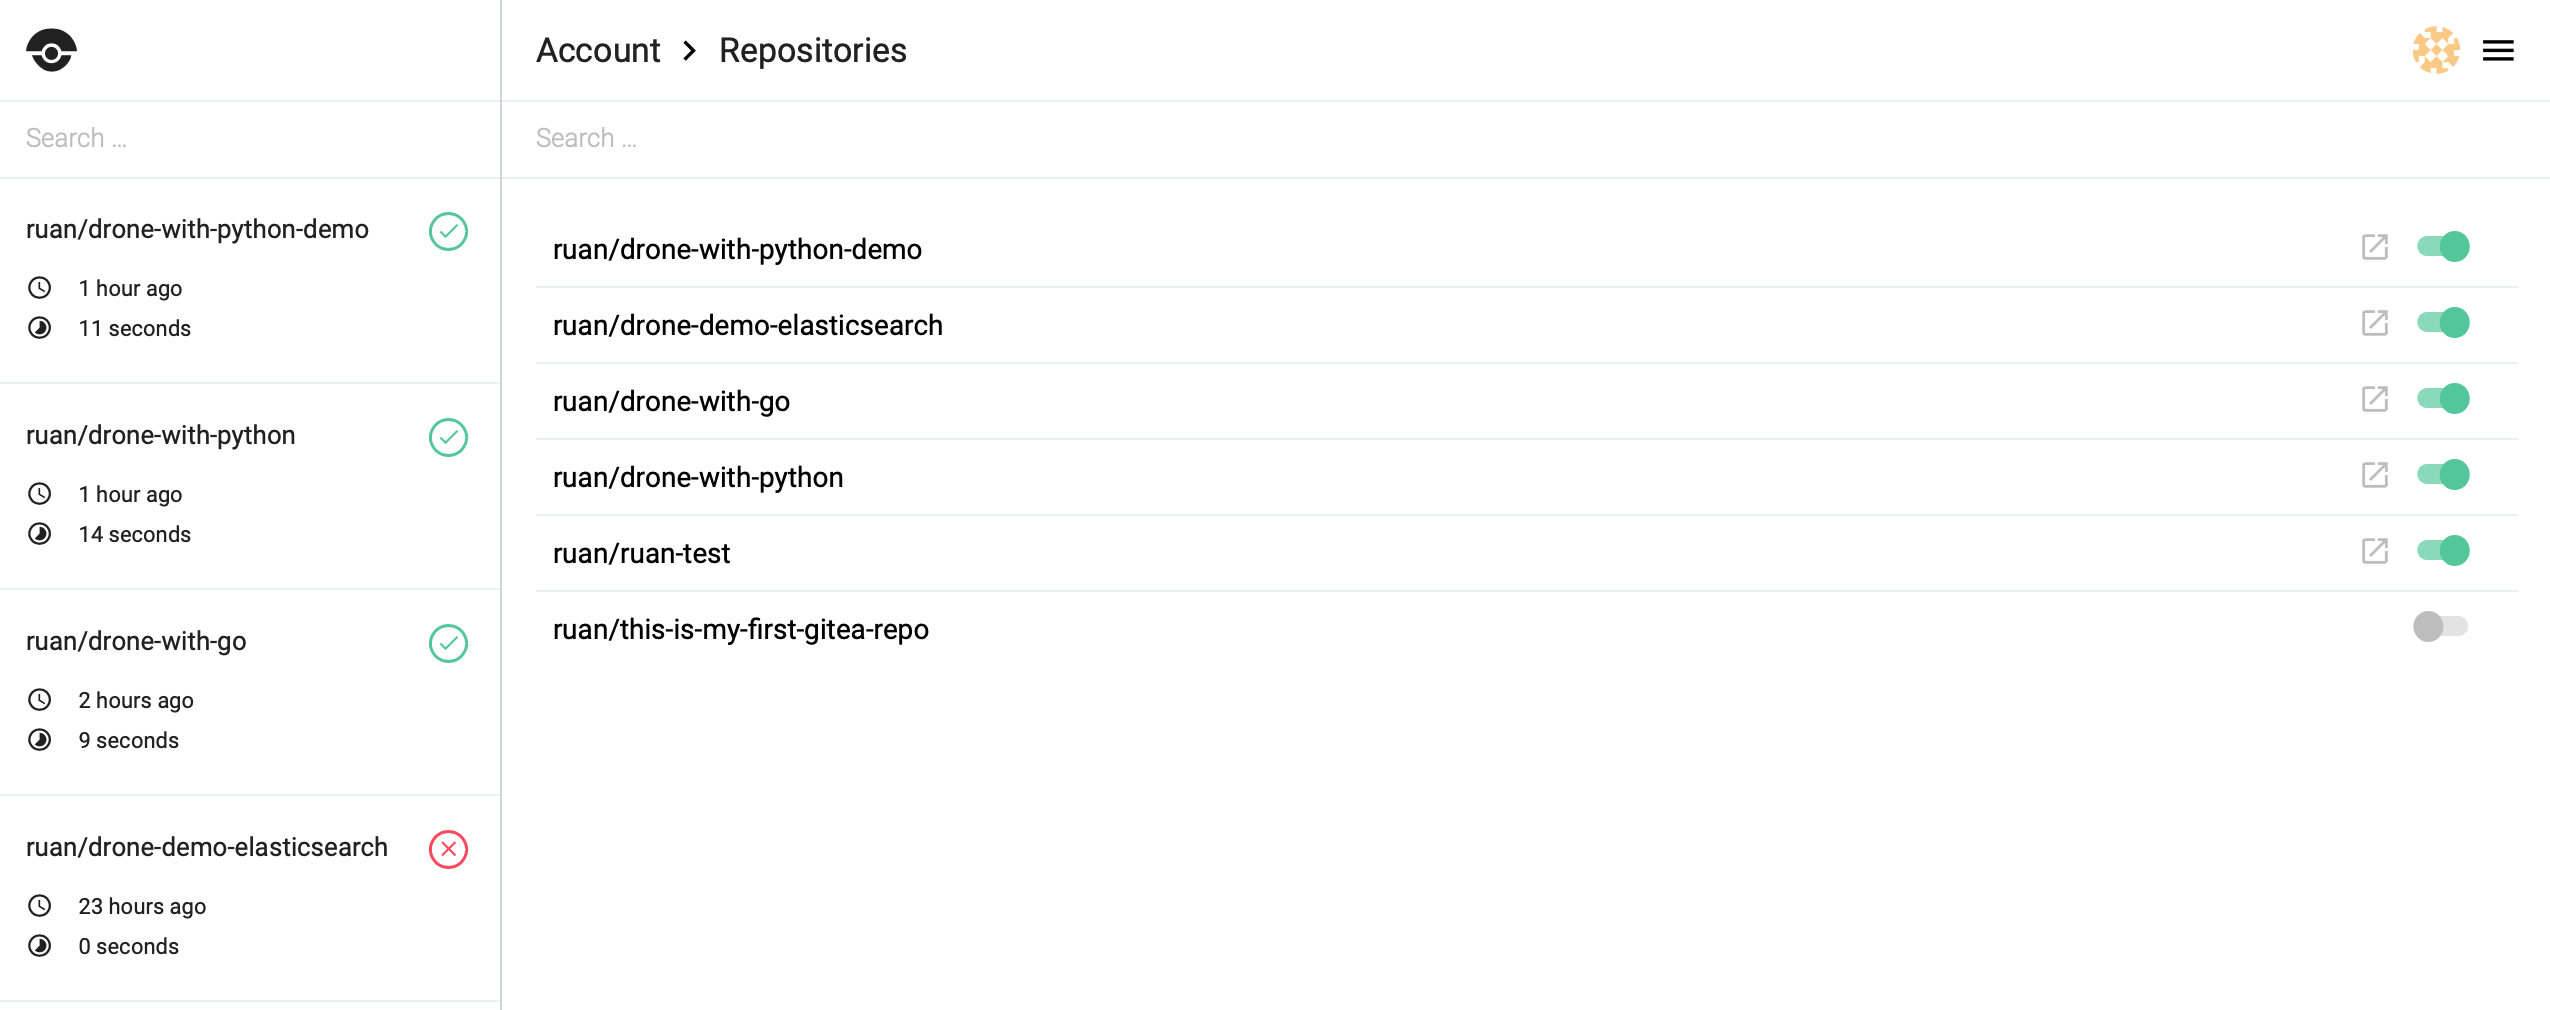
Enable Repo on Drone
Head over to drone and select the repositores on the right hand side http://:80/account/repos and enable your repository by toggline the selector, it should look more or less like this:
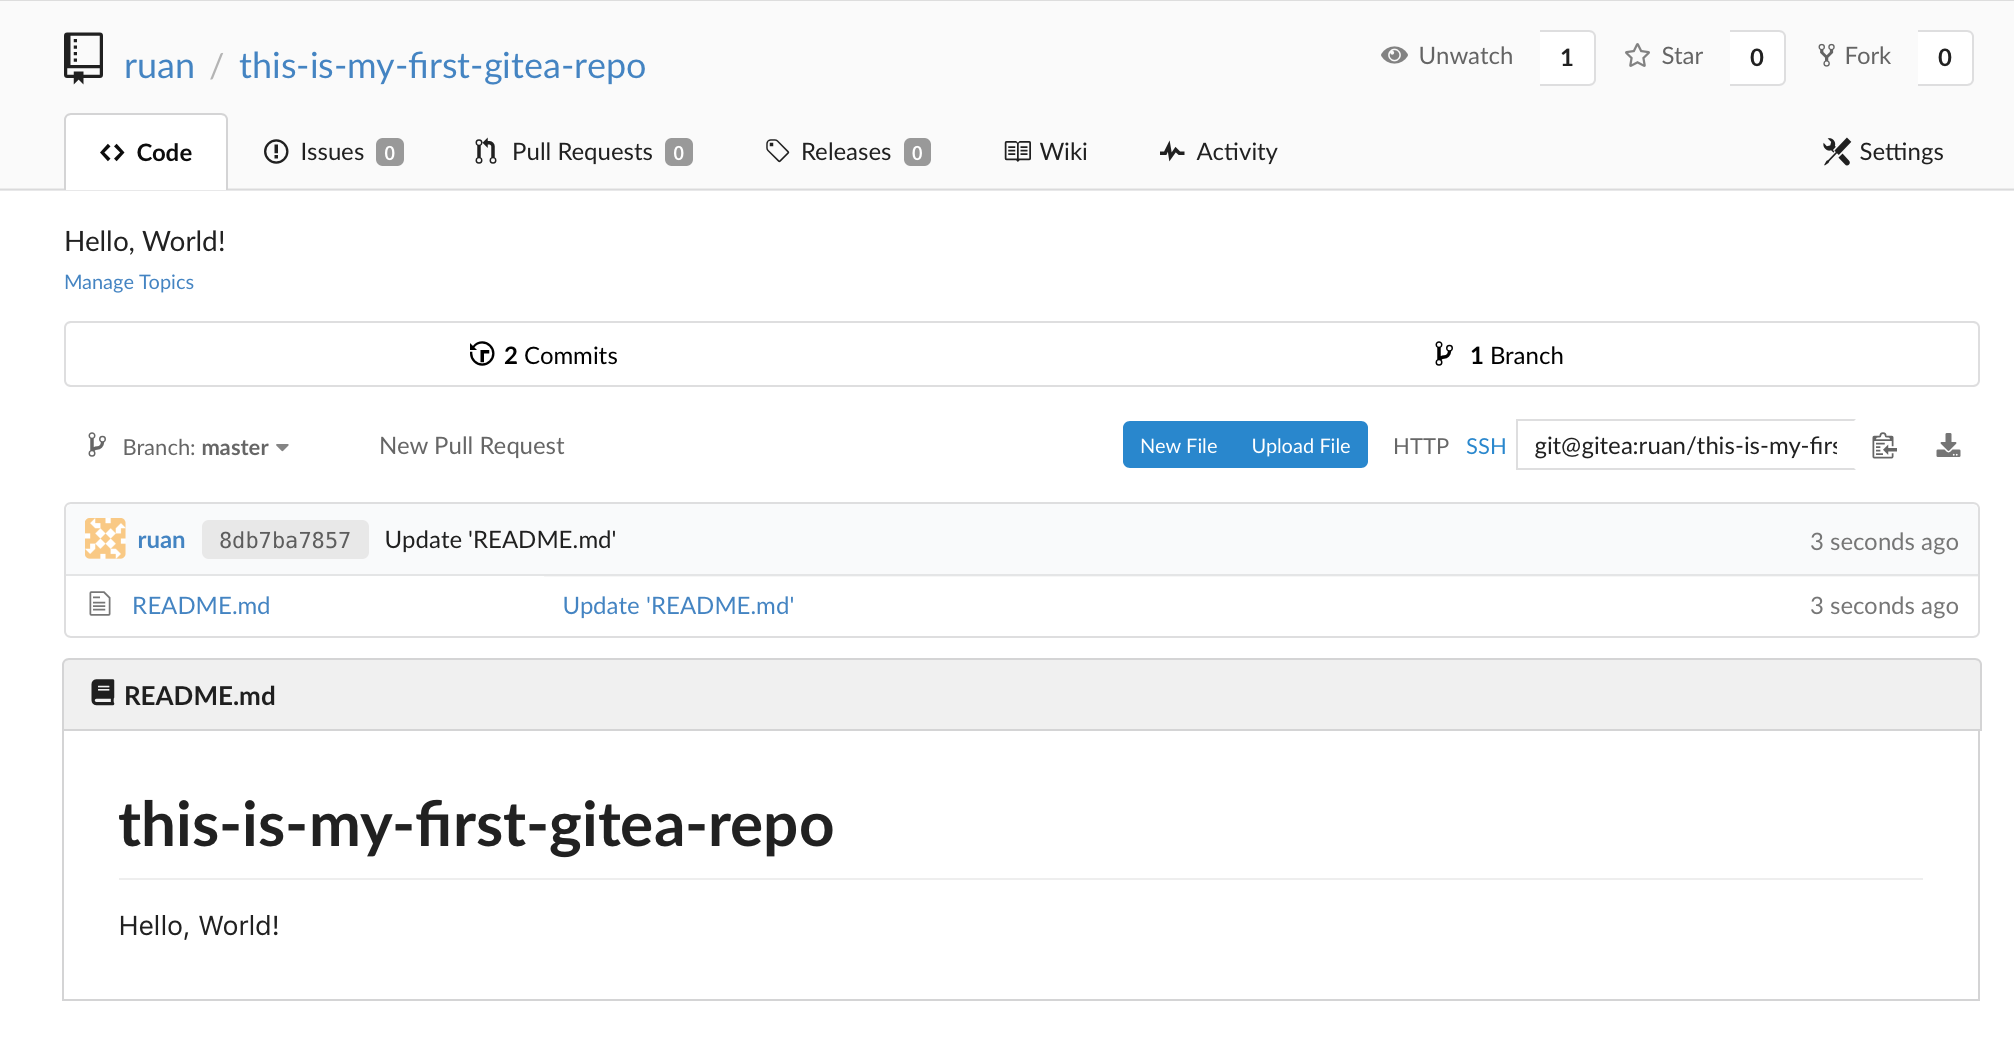
Once its enabled head back to gitea.
Clone the repository
On your repository select ssh and copy the ssh link for your repository:

Then from your terminal add your private ssh key to your ssh agent and clone the repository:
$ eval $(ssh-agent)
$ ssh-add ~/.ssh/id_rsa
$ git clone git@your-docker-ip:your-user/your-repo.git
Add Example Python Flask app to git
I will use a basic python flask application with some tests.
Let's first add our pipeline definition for drone, so that drone understands how the pipeline should be run when gitea receives a commit:
$ touch .drone.yml
Our pipeline:
pipeline:
  build:
    image: python:3.5.1-alpine
    commands:
      - pip install --upgrade pip setuptools wheel
      - pip wheel -r requirements.txt --wheel-dir=wheeldir --find-links=wheeldir
      - pip install --no-index --find-links=wheeldir -r requirements.txt
      - flake8 app
      - mkdir -p coverage
      - nosetests -v tests/
Lets add that to git:
$ git add .drone.yml
$ git commit -m "initial add of our pipeline"
$ git push origin master
Our drone file should be in git, now our requirements dependency file for python:
flask
nose
flake8
Our blank file to make our application a module:
$ mkdir app
$ touch app/__init__.py
And our flask app:
from flask import Flask
app = Flask(__name__)


@app.route("/")
def hello():
    return "Hello, World!"
Our tests directory and our python init file:
$ mkdir tests
$ touch tests/__init__.py
Now that we have all our files ready, commit and push to git:
$ git add .
$ git commit -m "add python app"
$ git push origin master
Look at Drone Running
Head over to drone and look at the builds, you should see your build running at http://<docker-ip>:80/<user>/<repo-name>:
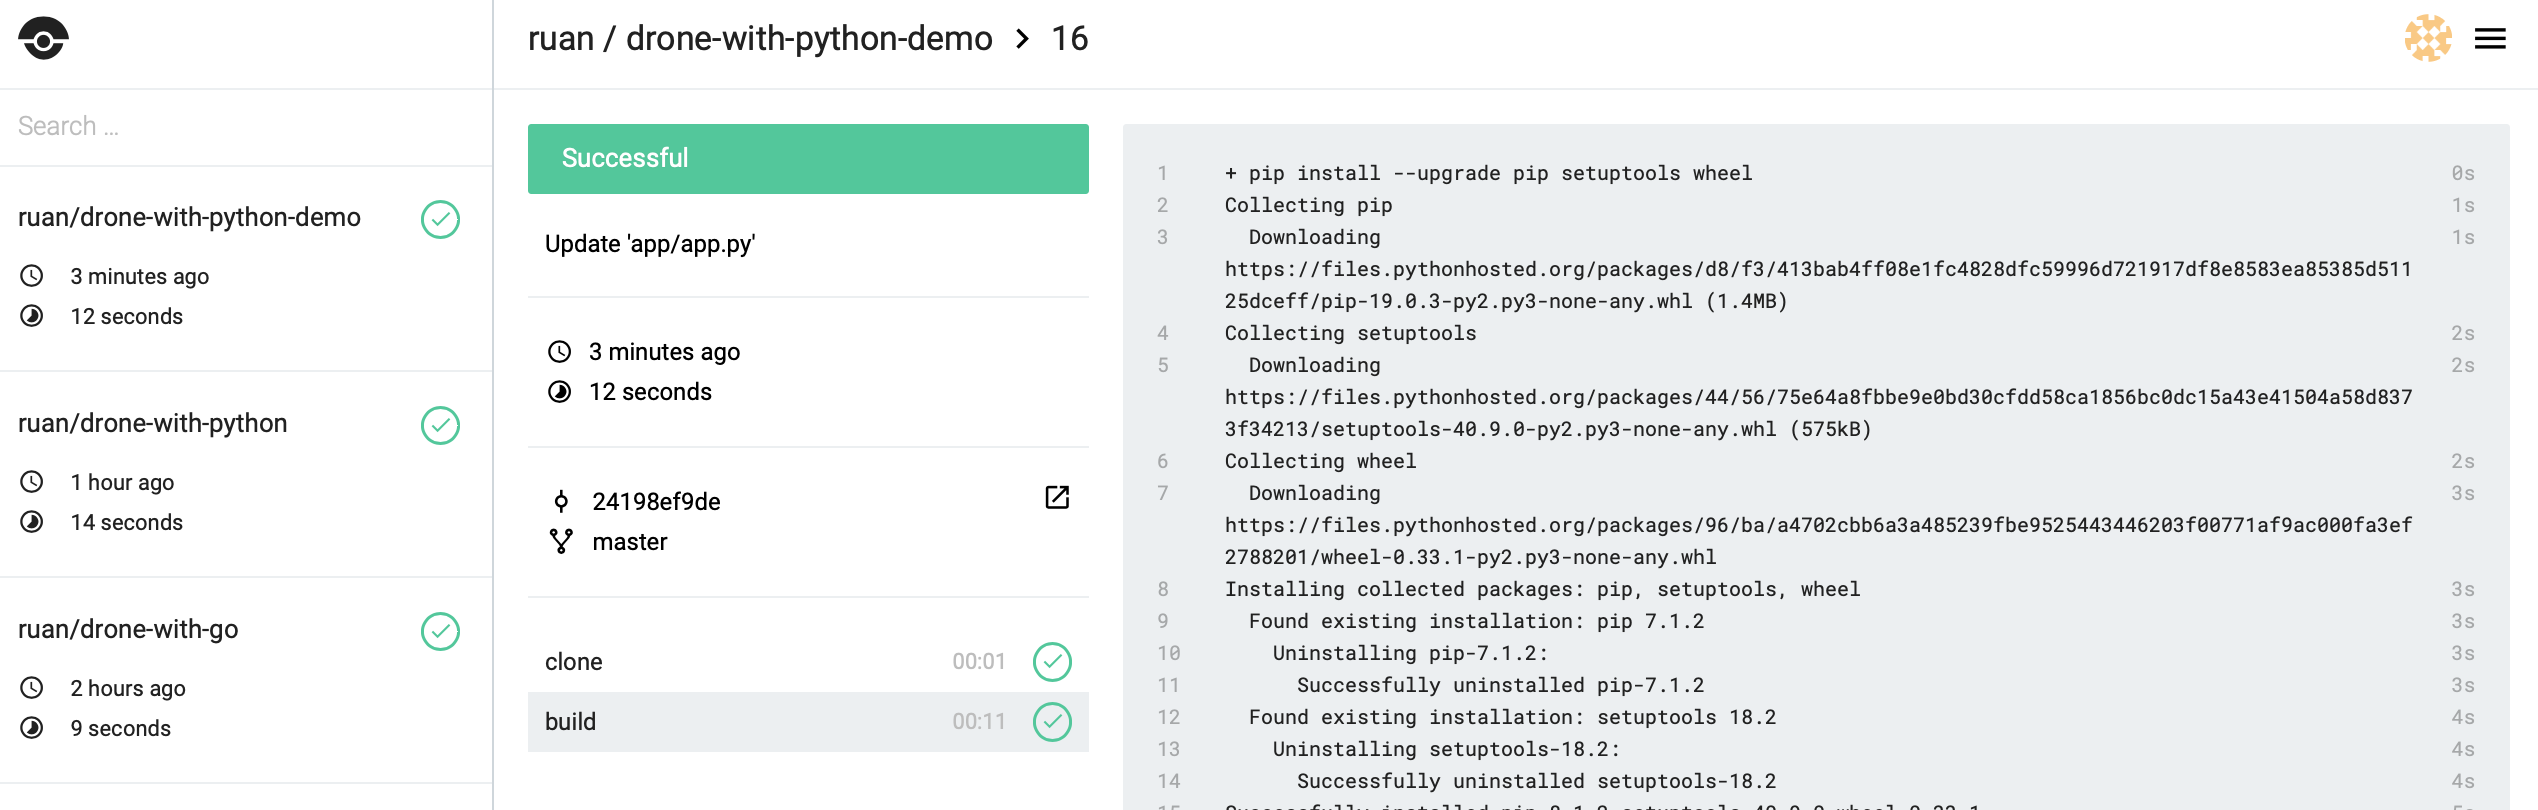
If everything ran as expected you should see that it passed.
Build Status Badges
You can also include the build status badges from drone which will look like:
You can use the drone api: http://drone-ip:80/api/badges/<your-user>/<your-repo>/status.svg
[
[](https://microbadger.com/images/gitea/gitea "Get your own image badge on microbadger.com")
[](https://github.com/go-gitea/gitea/releases/latest)
[](https://www.codetriage.com/go-gitea/gitea)
[](https://opencollective.com/gitea)
Overall gitea and drone is really amazing and quite impressed with it, especially from the low memory footprint and that its so easy to work with.
Resources
Have a look at this for more resources:
Docs:
- https://github.com/drone/drone
- http://plugins.drone.io/drone-plugins/drone-docker/
- https://docs.drone.io/reference/server/drone-user-create/
- https://docs.gitea.io/en-us/install-with-docker/
Examples:
- https://hackernoon.com/build-your-own-ci-cd-pipeline-with-drone-e43d7190989b
- https://github.com/drone-demos/drone-with-python
- https://github.com/drone/awesome-drone
- https://github.com/juliantellez/drone-ci-pipeline
- https://github.com/sguter90/docker-compose-gitea
- https://gist.github.com/joffilyfe/1a99250cb74bb75e29cbe8d6ca8ceedb
- https://florian-latifi.at/2018/02/21/using-drone-to-build-and-deploy-a-jekyll-site/
- https://angristan.xyz/host-your-own-ci-cd-server-with-drone/
Comments