This tutorial is a step-by-step walkthrough on how to create a ECS Cluster with a ECS Container Instance running your docker container. I will also demonstrate how to setup a ALB to route incoming traffic to your ECS Service.
There's easier and faster ways to provision this with IaC tooling, but its intended for people who would like to see what all steps are involved.
Security Groups
Head over to EC2/SecurityGroups and create 2 security groups:
- ecs-dev-ec2-sg
- ecs-dev-alb-sg
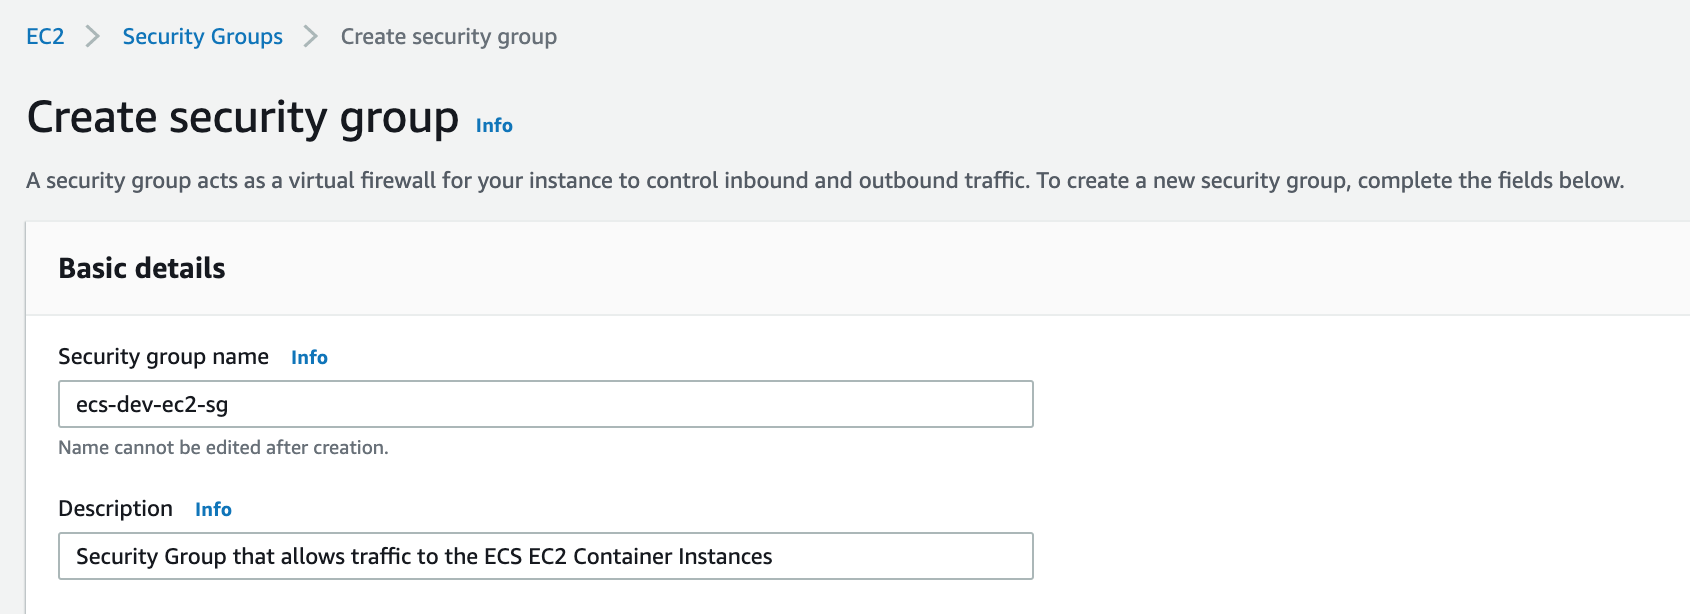
Provide the security group name and description, also create a Name tag. We can skip the rules for now as we will come back to this step. Example of the ec2-sg:
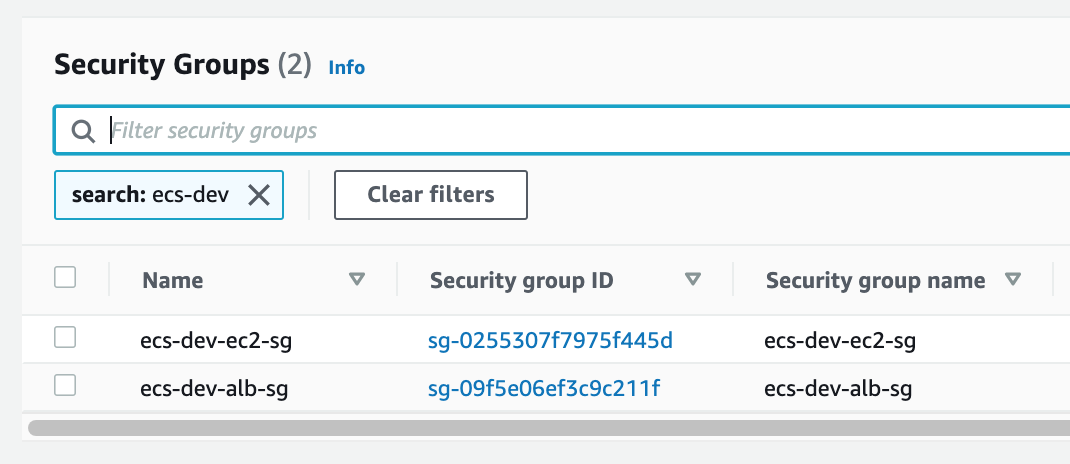
Once you are done you should see the following 2 security groups:
IAM Role
Head over to IAM and create a ECS Container Instance role, which grants the ecs-agent access to make calls to the AWS API's, select the trusted entity as EC2 and attach the IAM Policy AmazonEC2ContainerServiceforEC2Role, provide a name ie EC2ContainerServiceRole and click create.
Create a Task IAM Role, which will provide AWS Access to Tasks, head over to roles, create a role, select the trusted entity as ecs-tasks, provide a name ie. ECSTasksExecutionRole. Attach or create a IAM Policy and associate it to the role, in my case I only require ECR access:
{
    "Version": "2012-10-17",
    "Statement": [
        {
            "Effect": "Allow",
            "Action": [
                "ecr:BatchCheckLayerAvailability",
                "ecr:BatchGetImage",
                "ecr:GetDownloadUrlForLayer",
                "ecr:GetAuthorizationToken"
            ],
            "Resource": "*"
        }
    ]
}
Create a ECS Cluster
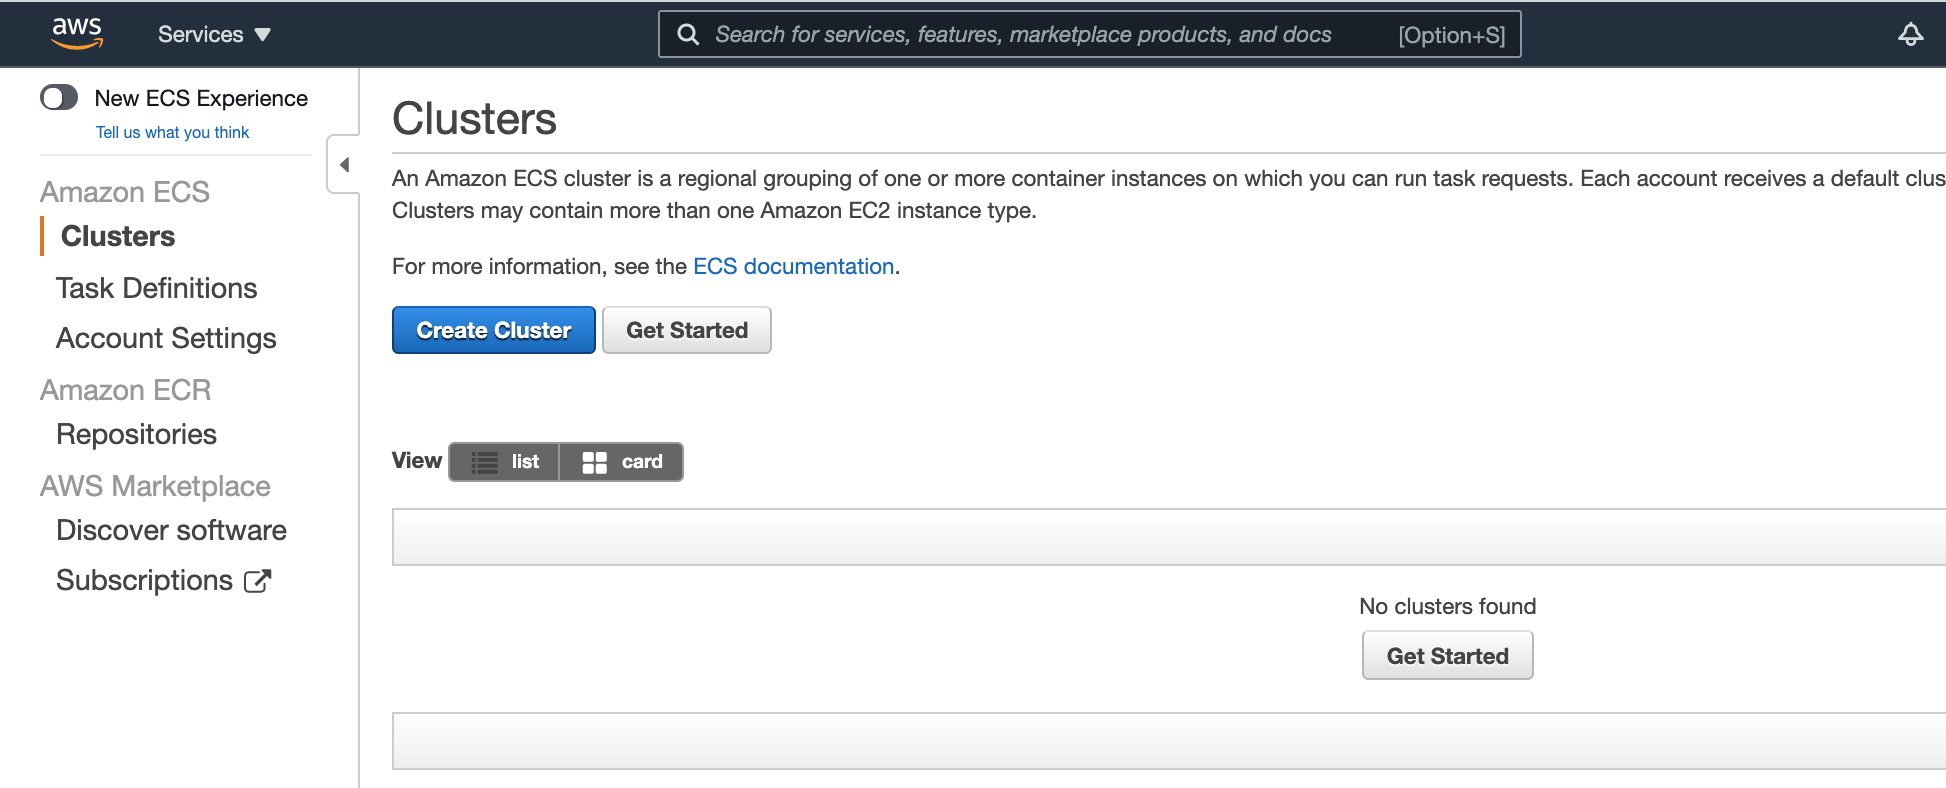
Head over to the ECS / Clusters page and if you have no running clusters you should see this:
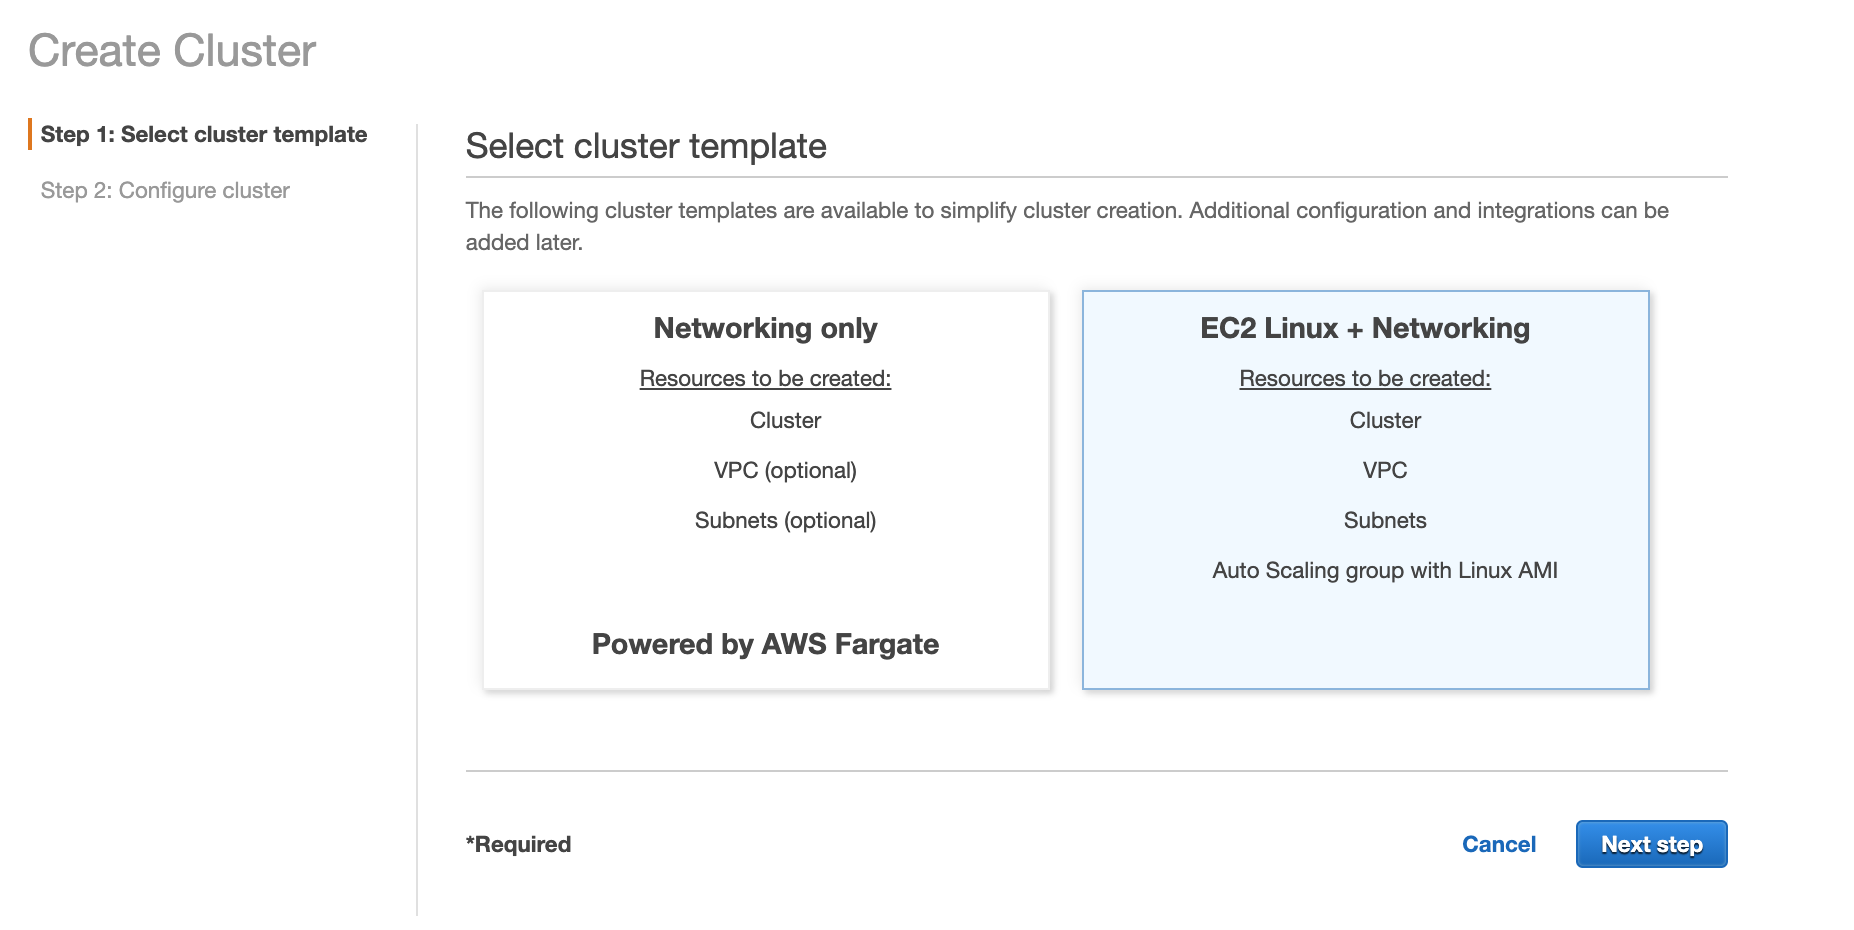
Go ahead and click create cluster and select EC2 Linux as we are creating a ECS Cluster with EC2 Container Instances:
Then select "create a empty cluster", provide a cluster name, then select create:
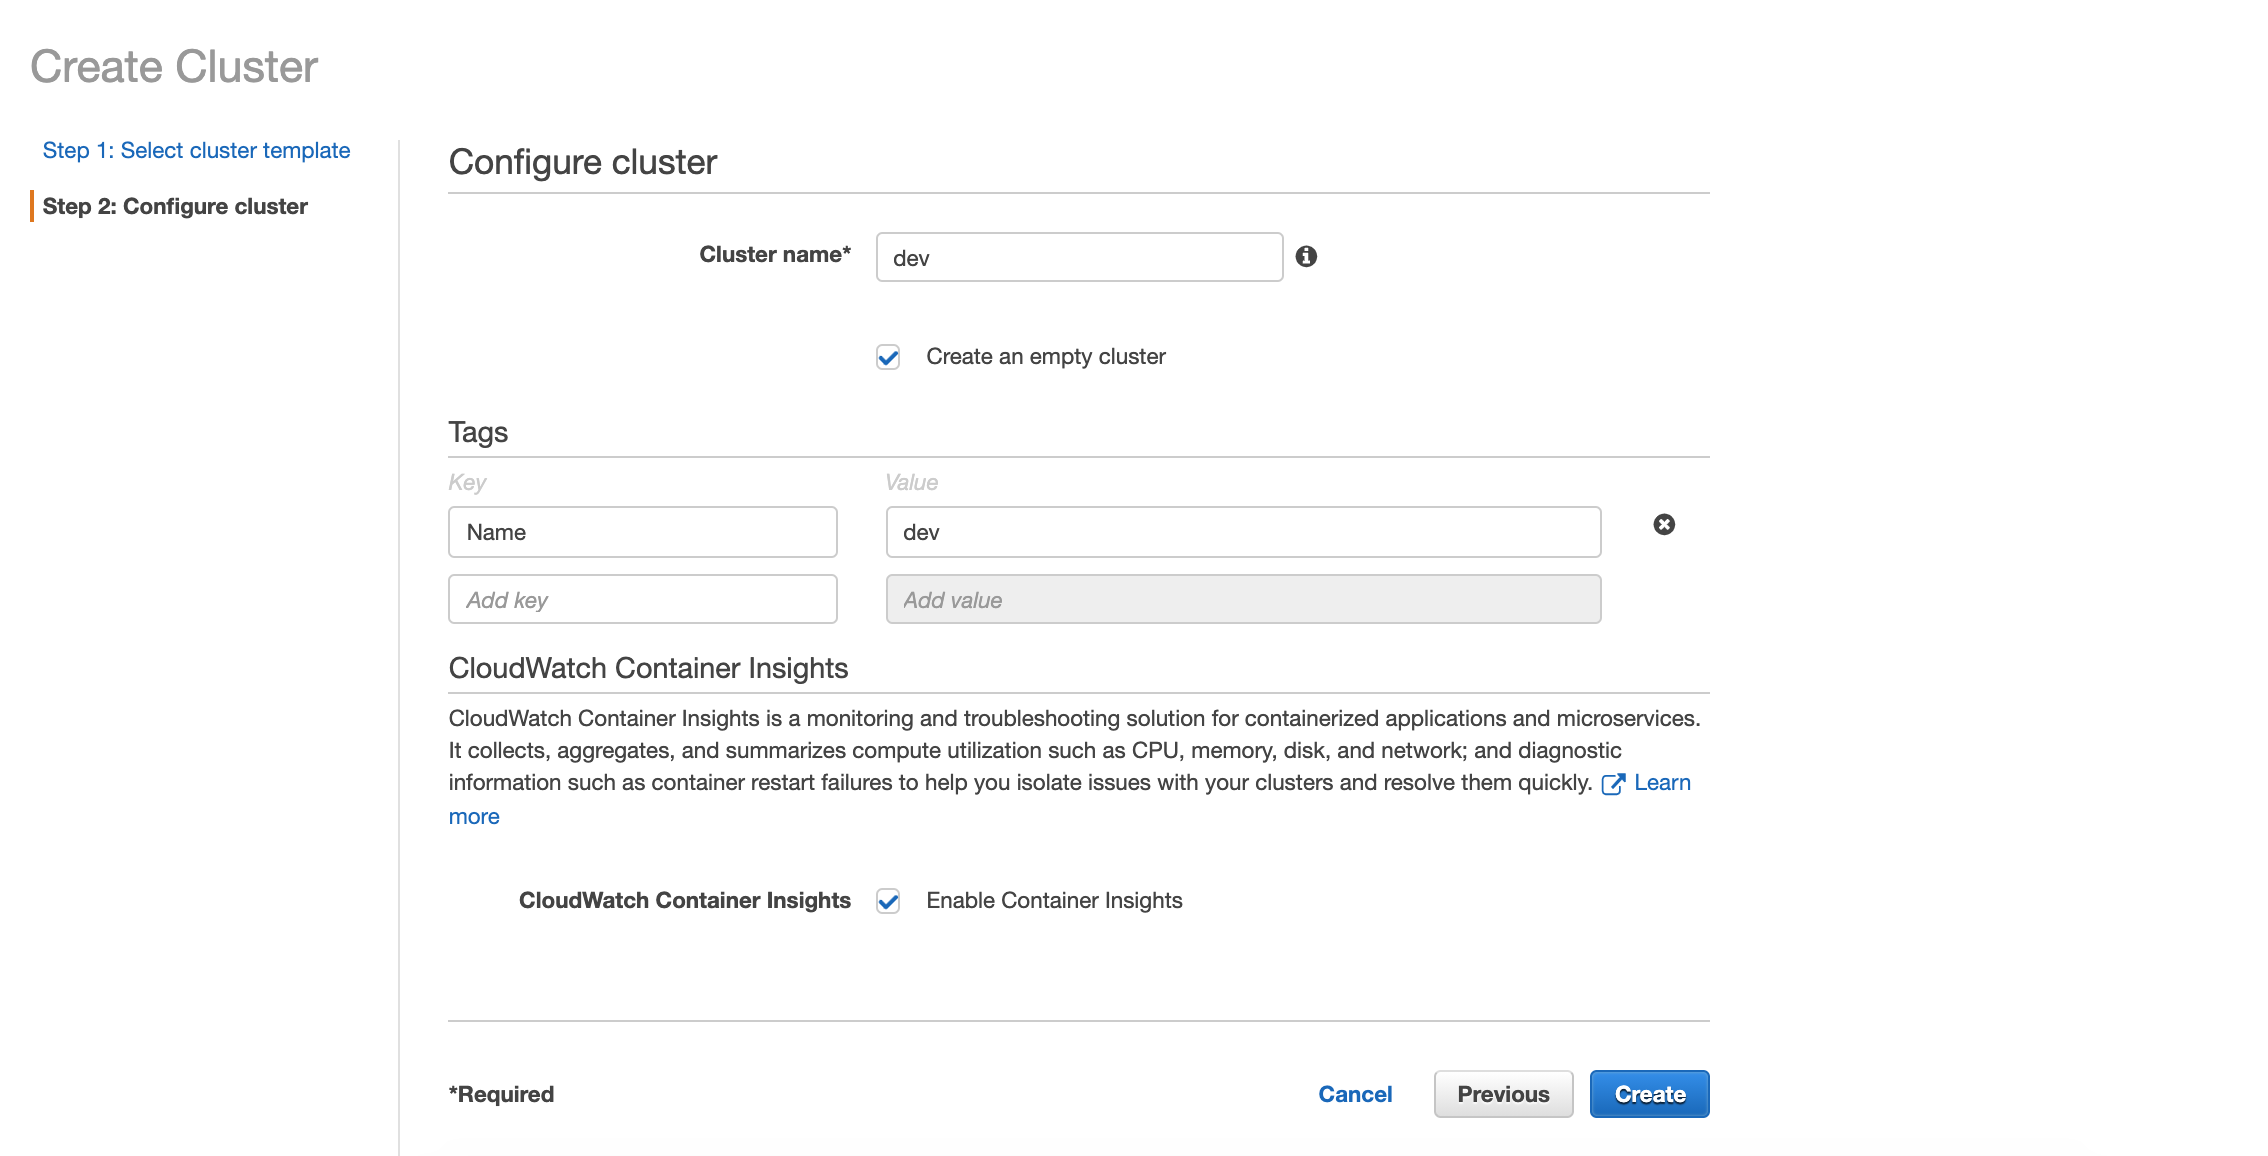
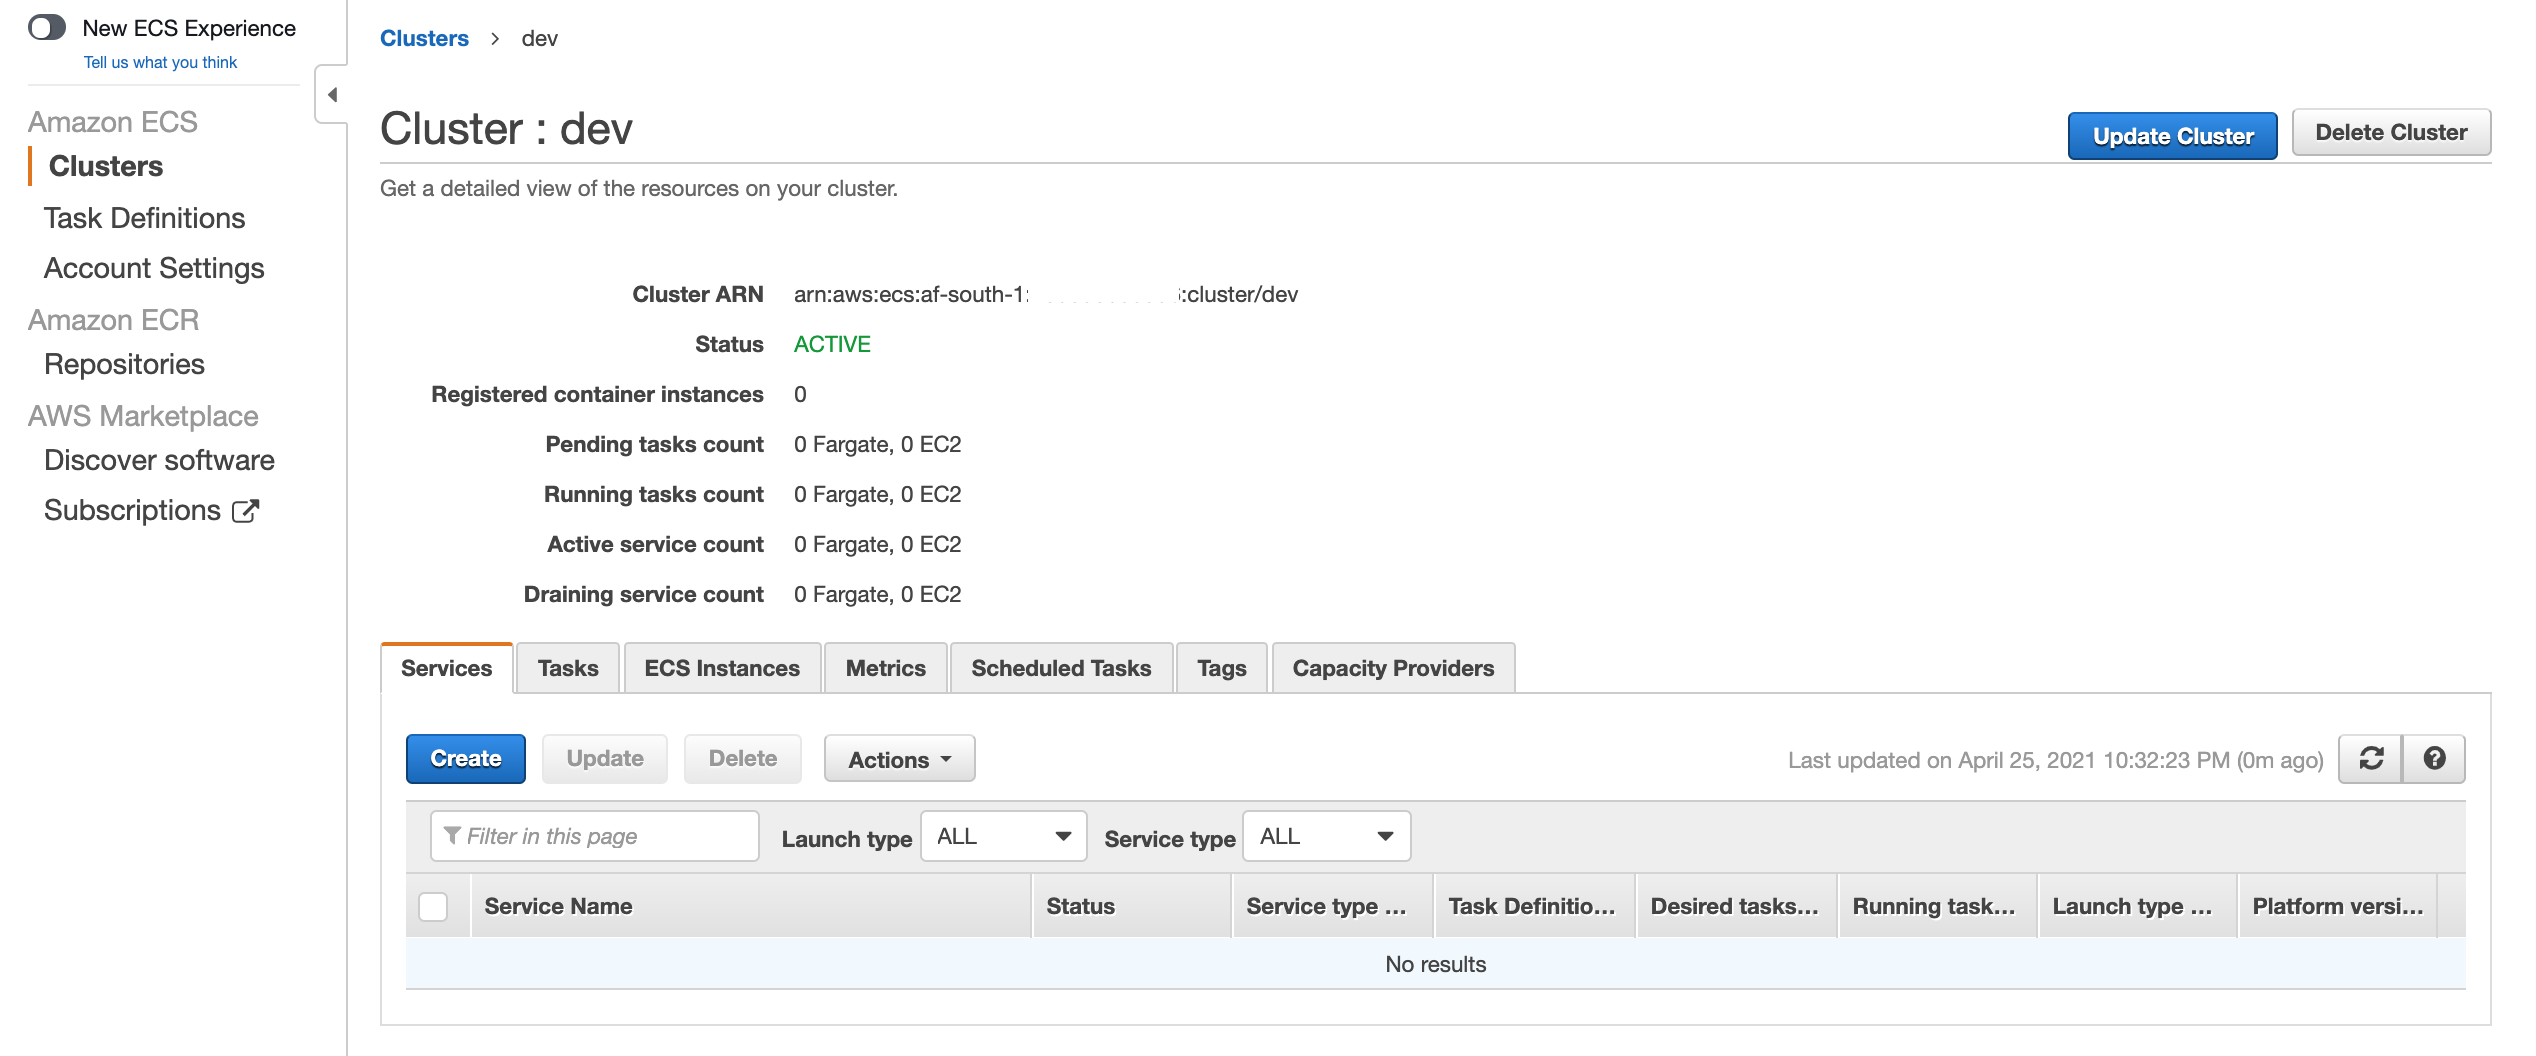
You now should have a empty ECS cluster with zero nodes at this point:
Create a ECS Container Instance
Head over to EC2 Instances and click "Launch Instance", then to get the latest ECS AMI you can follow this aws page to get the latest ECS Optimized AMI, in my case for af-south-1 region the AMI ID at this time of writing is ami-0572e71003a2534a3, so in my case when I search for this AMI ID on the AMI page of the Launch Instance wizard, showed me the following:

Select next and select the instance type of your choice, for this demo I will be going with the t3.micro:

On the "Configure Instance Details" select the IAM Role associated to the instance as EC2ContainerServiceRole and a important step, as we will be using the user-data section to join this container instance to the ecs cluster, by default it will be blank, but we will provide the following user-data, most important is defining the ECS Cluster name:
#!/bin/bash
cat << EOF > /etc/ecs/ecs.config
ECS_AVAILABLE_LOGGING_DRIVERS=["json-file","awslogs"]
ECS_LOGLEVEL=info
ECS_CLUSTER=dev
EOF
So our user-data section will look like this:
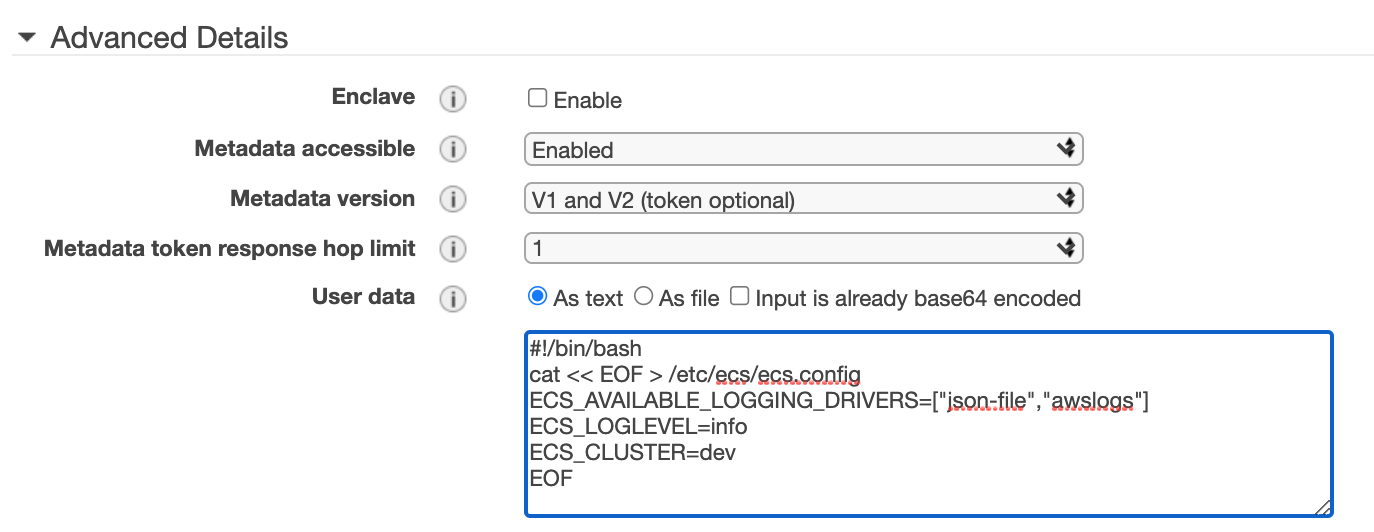
Select next, review the disk storage size, select next, set the tags that you want to assign to the instance, select next and select the security group that we created earlier: ecs-dev-ec2-sg then review, select your ssh keypair and launch the instance.
Once your instance has been provisioned you should see it in the EC2 instances page:

When you head over to the ECS Cluster, select the created cluster and select the ECS Instances tab, you should see your ECS Container Instance:
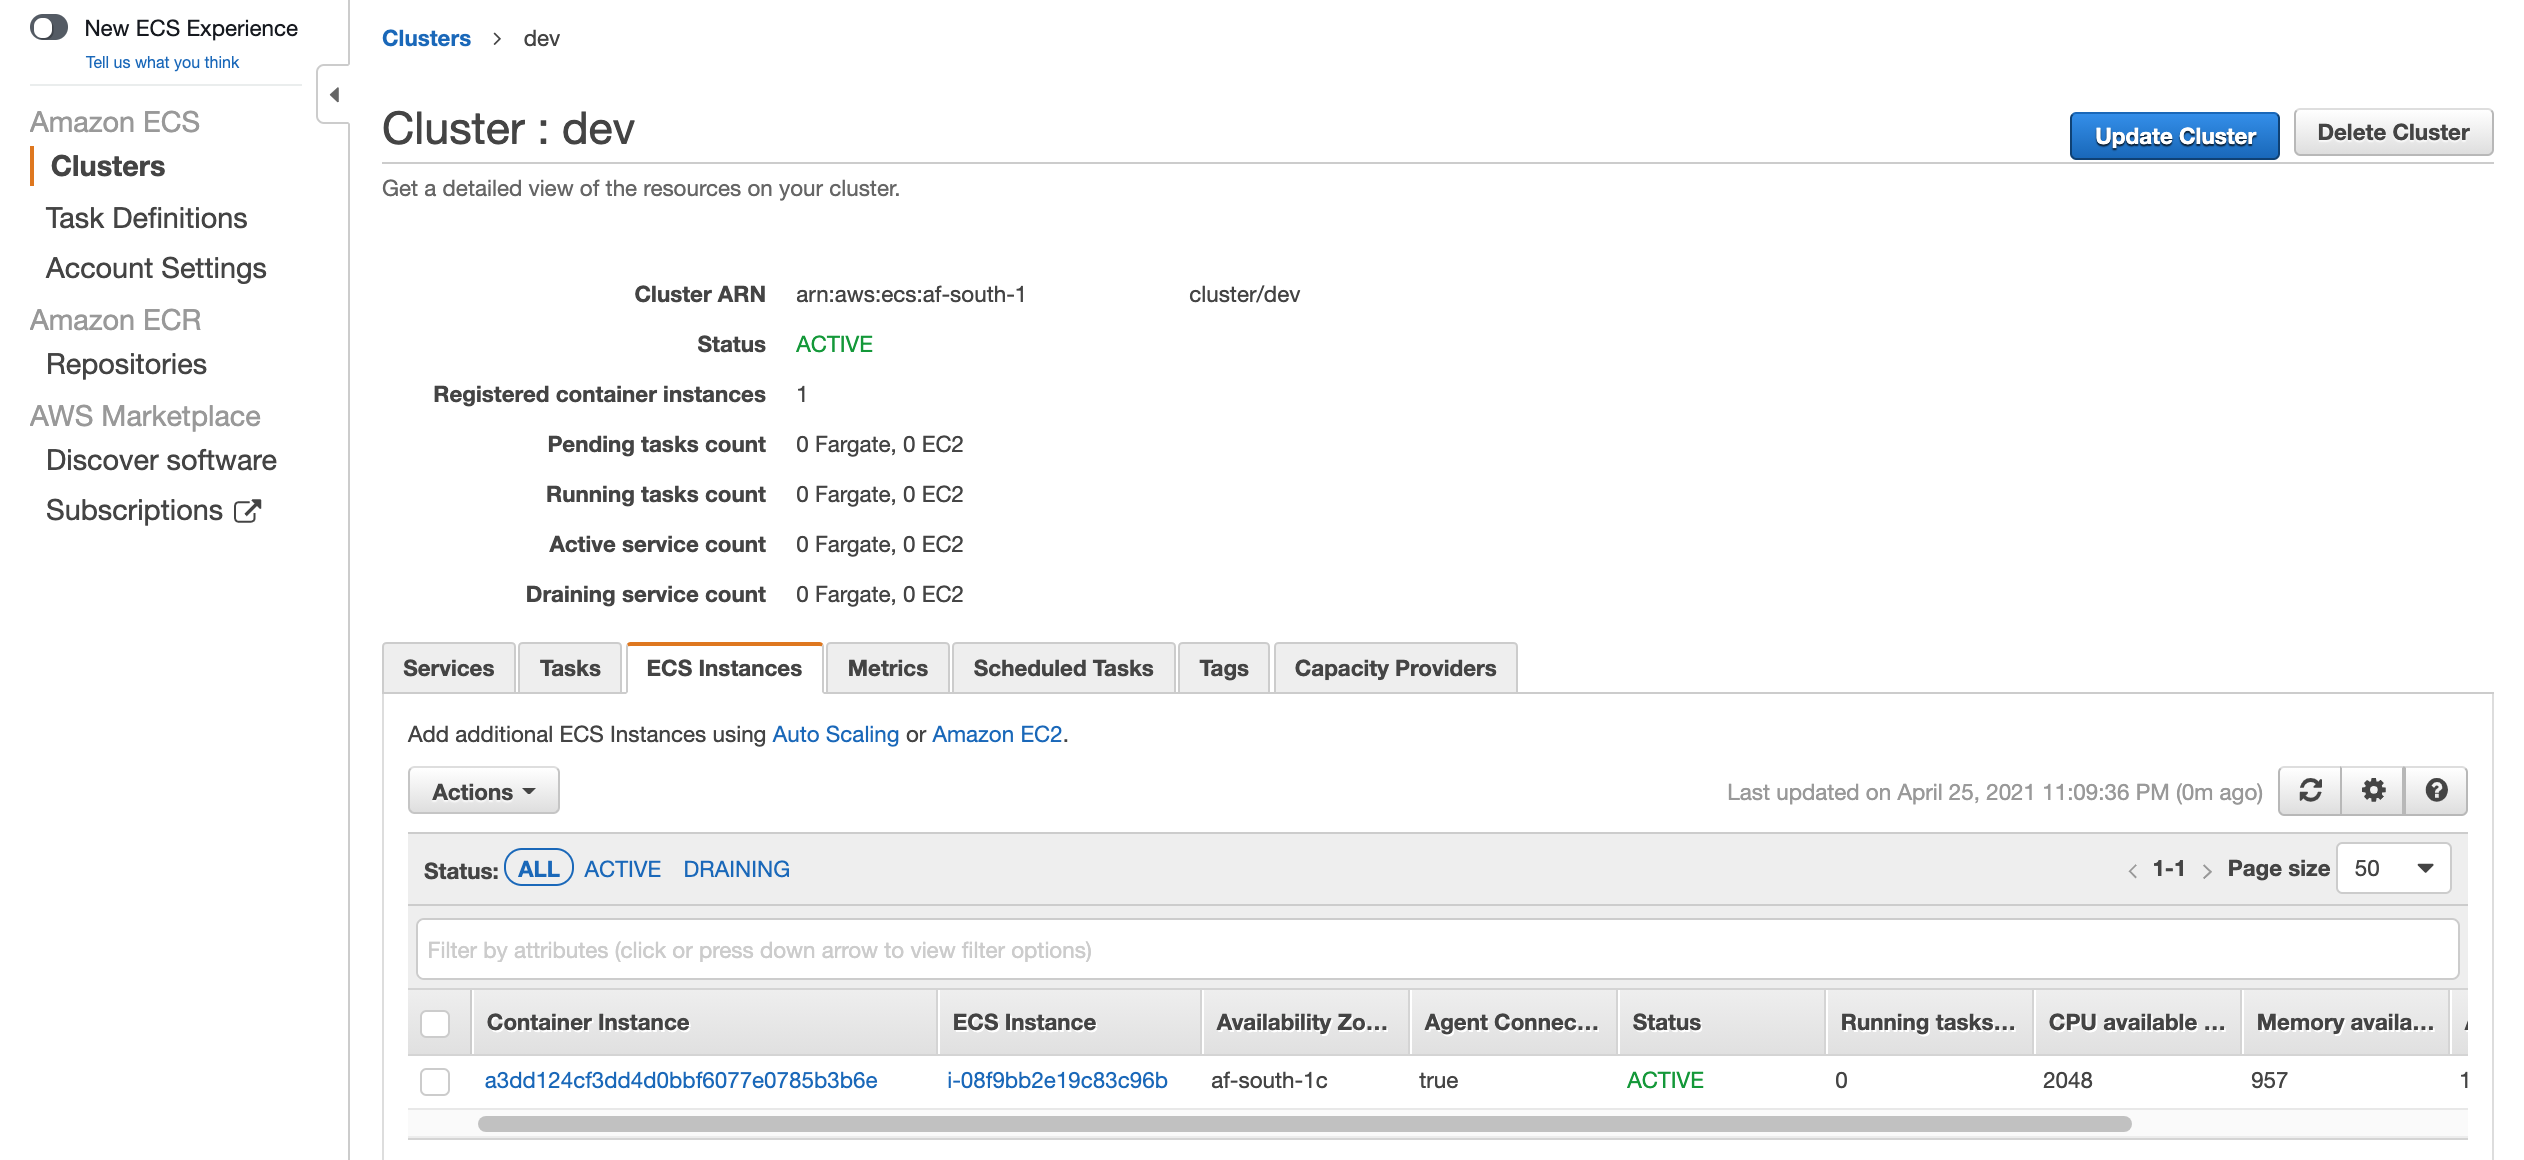
Create a ECR Repository
Head over to ECR and create a repo, in my case go-hostname:
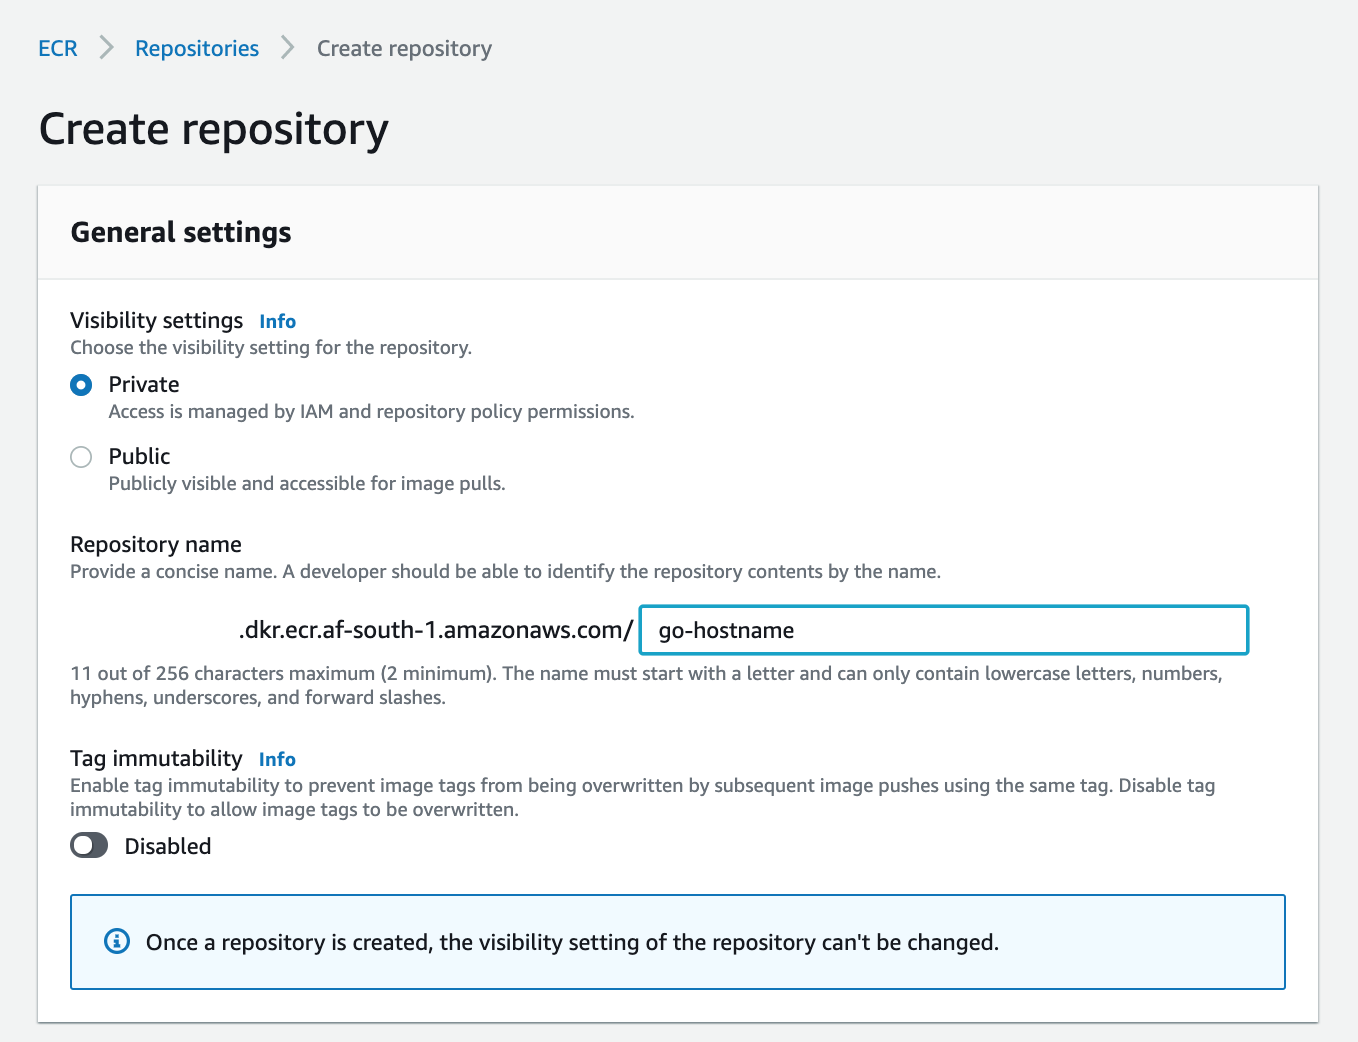
On the ECR page you now should see the repo that we created, you can also copy the ECR Image Repo URI when we require it when we push our docker image to this repo:

Push to ECR
Clone this repository:
$ git clone https://github.com/ruanbekker/go-hostname
Then change to the directory:
$ cd go-hostname
Login to ECR (requires aws-cli ), I am using AWS CLI v2, so it will be:
$ aws ecr get-login-password --region <aws-region> | docker login --username AWS --password-stdin <aws-account-id>.dkr.ecr.<aws-region>.amazonaws.com
Login Succeeded
If you use AWS CLI v1:
$ $(aws ecr get-login --region af-south-1 --no-include-email)
Now build and push the image to ECR, ensure to replace the aws account id and region
$ export ECR_REPOSITORY_URI=000000000000.dkr.ecr.af-south-1.amazonaws.com/go-hostname
$ docker build -t $ECR_REPOSITORY_URI:latest .
$ docker push $ECR_REPOSITORY_URI:latest
Create a Load Balancer
Head over to EC2 and select Load Balancers, and create a Application Load Balancer:
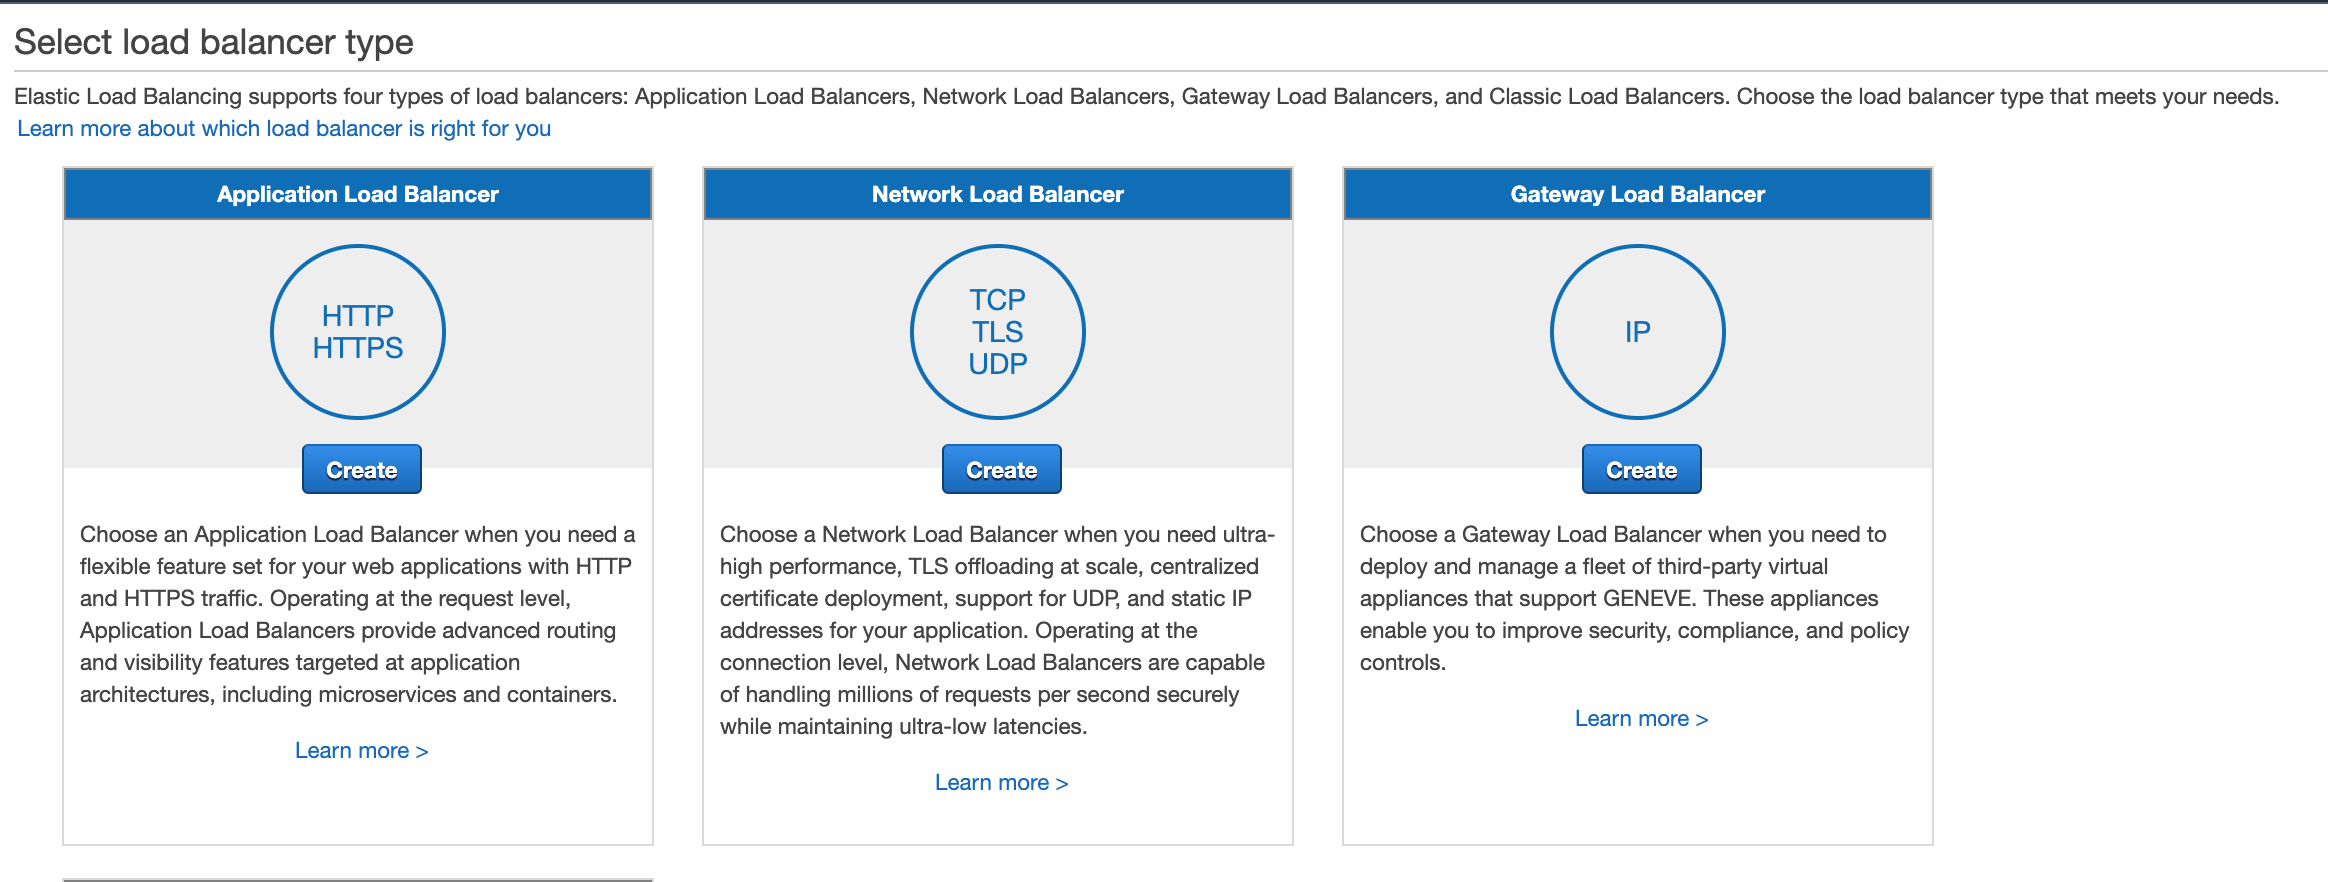
Ensure its a internet-facing load balancer and that we have a HTTP Listener:
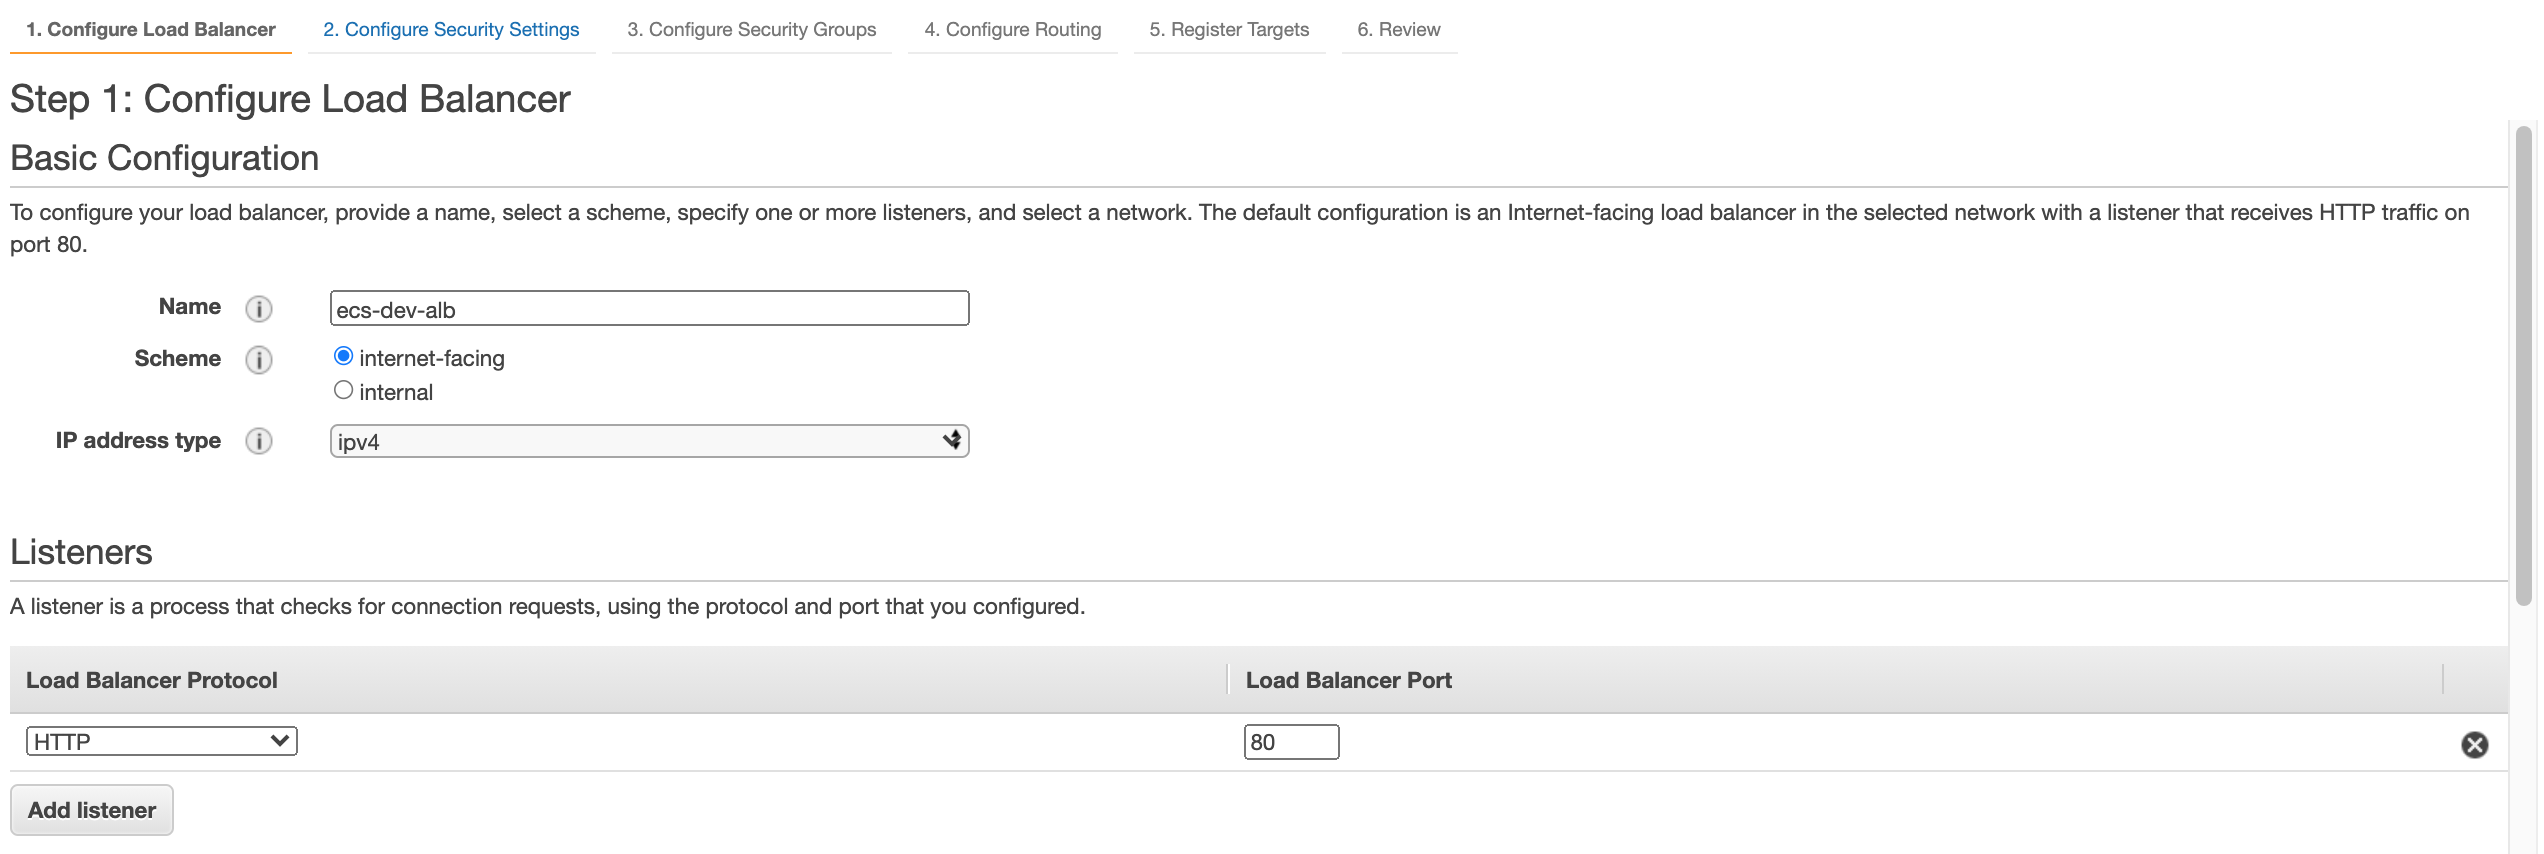
Select the public subnets from your VPC under the availability zone section, assign the tags of your choice and select next. Then associate the security group that we created earlier: ecs-dev-alb-sg to the load balancer.
Next we need to create a Target Group which will do health checks against your service on ECS and routes traffic from the ALB to your service on ECS. In my case I will name my Target Group ecs-go-hostname-tg and the target port will be 8000 as my application is listening on port 8000 and the health check path is configured on /:
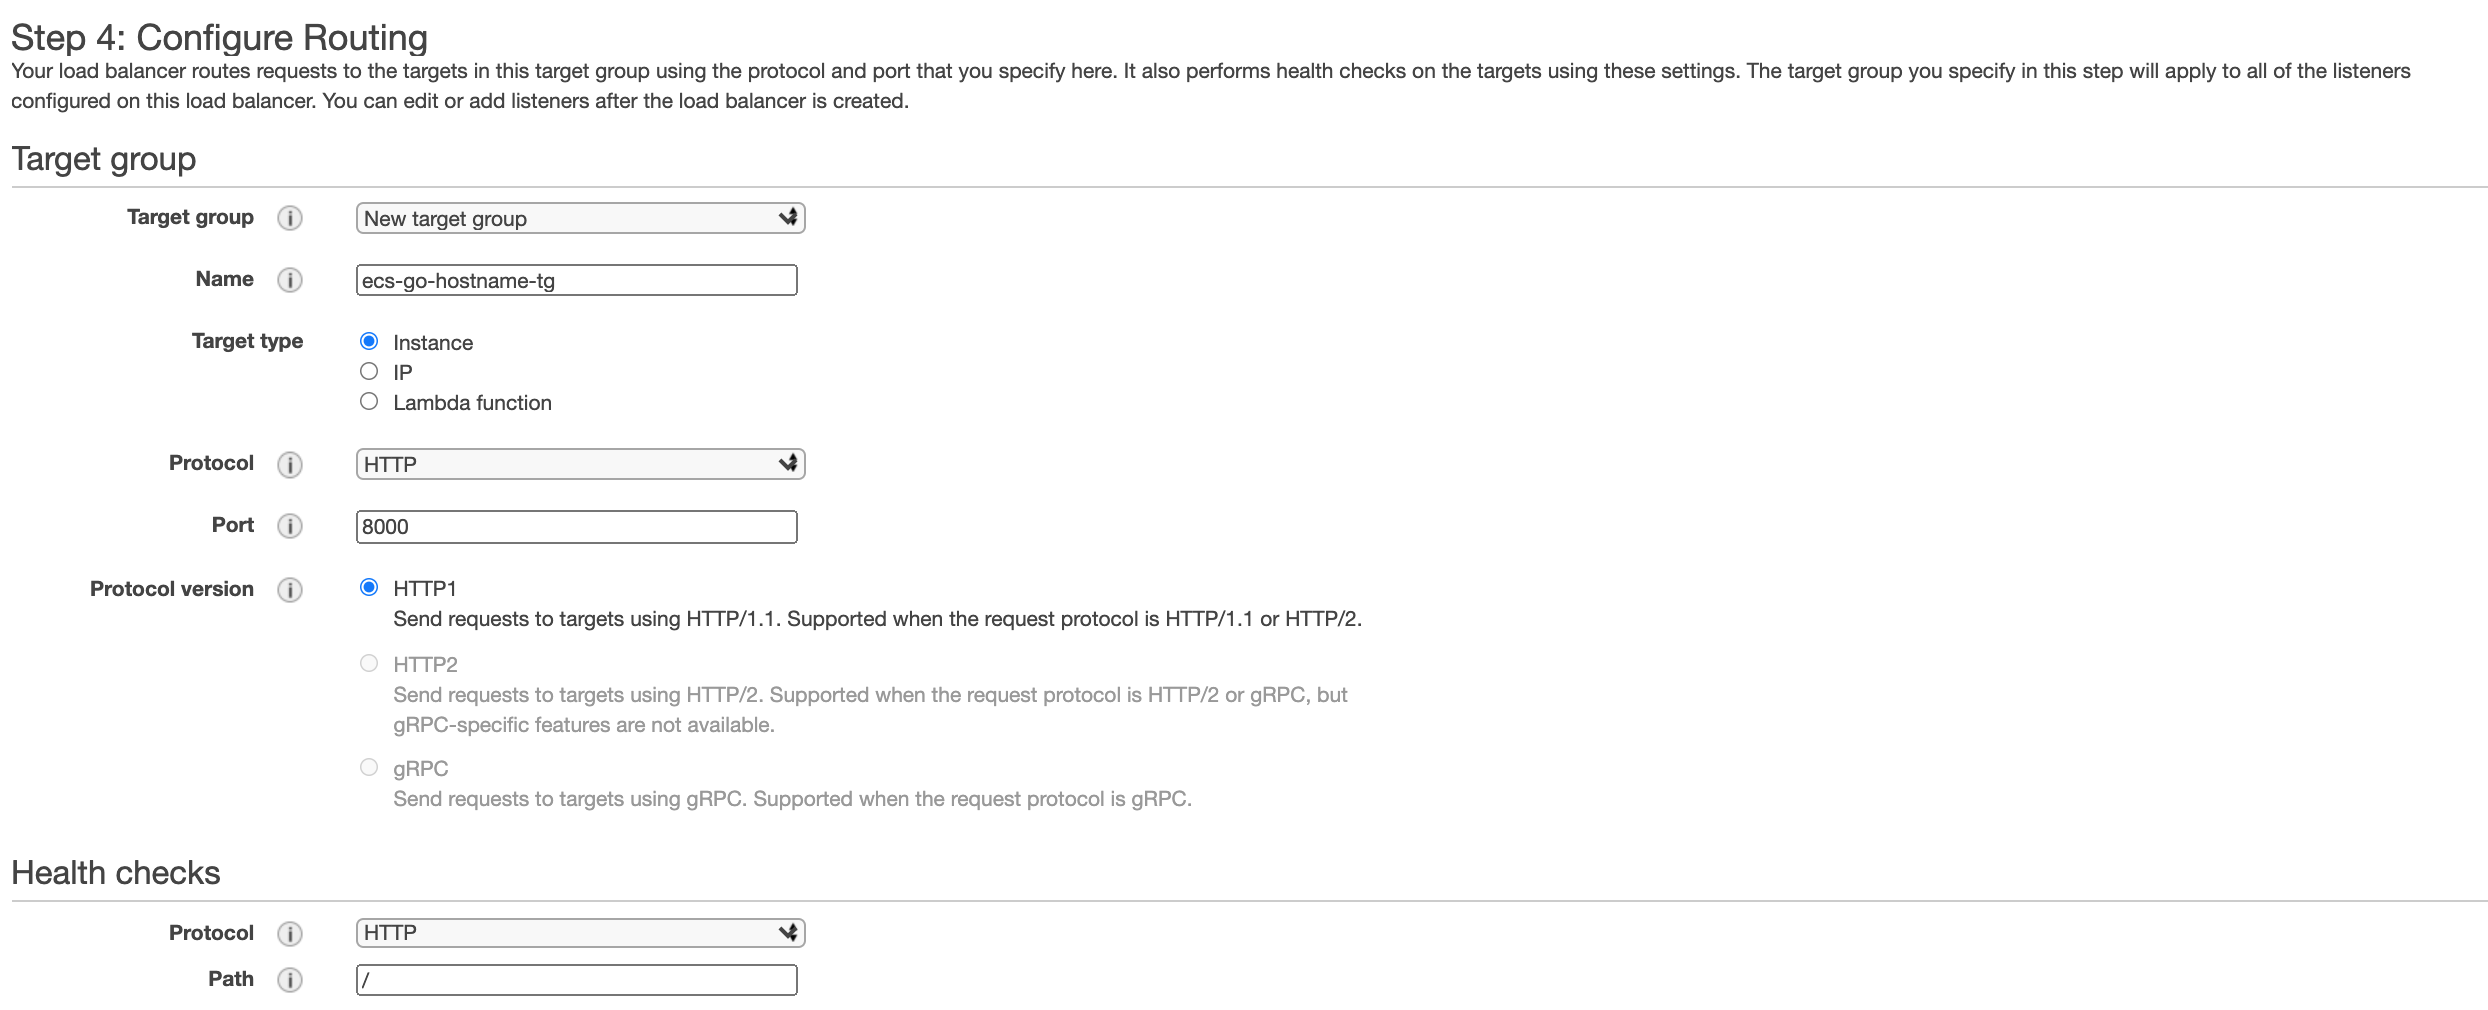
If the TG fails to get 200 response codes from the configured health check endpoint, the traffic will not be routed to the endpoint.
On the "Register Targets" section we will skip the registration, as we want ECS to manage this section:

Review the configuration and select create.
Create ECS Service
In order to create a ECS Service we need a task-definition. A task definition describes how your task should be run, where to get the image, environment variables etc.
Head over to the ECS page, and select Task Definitions on the left:

Select create a new task definition and select EC2, provide a family name which will be identified as the task definition, select the IAM Role:
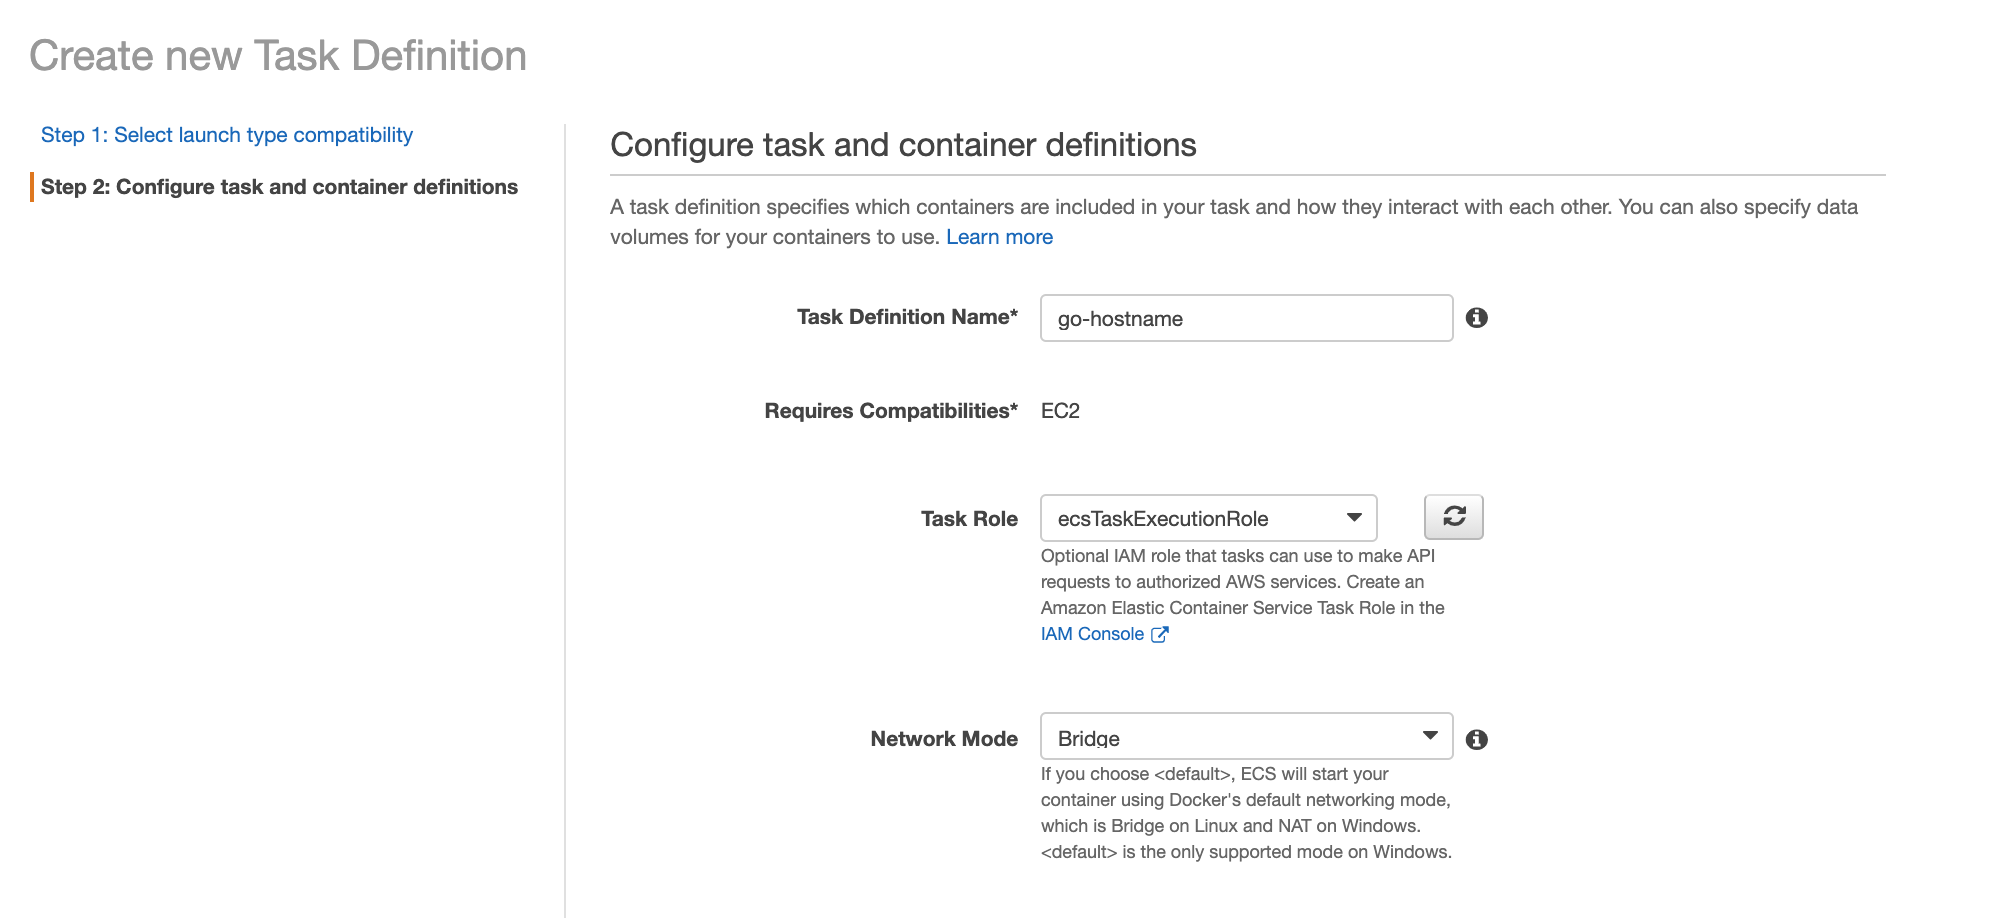
Select the Task Execution Role:

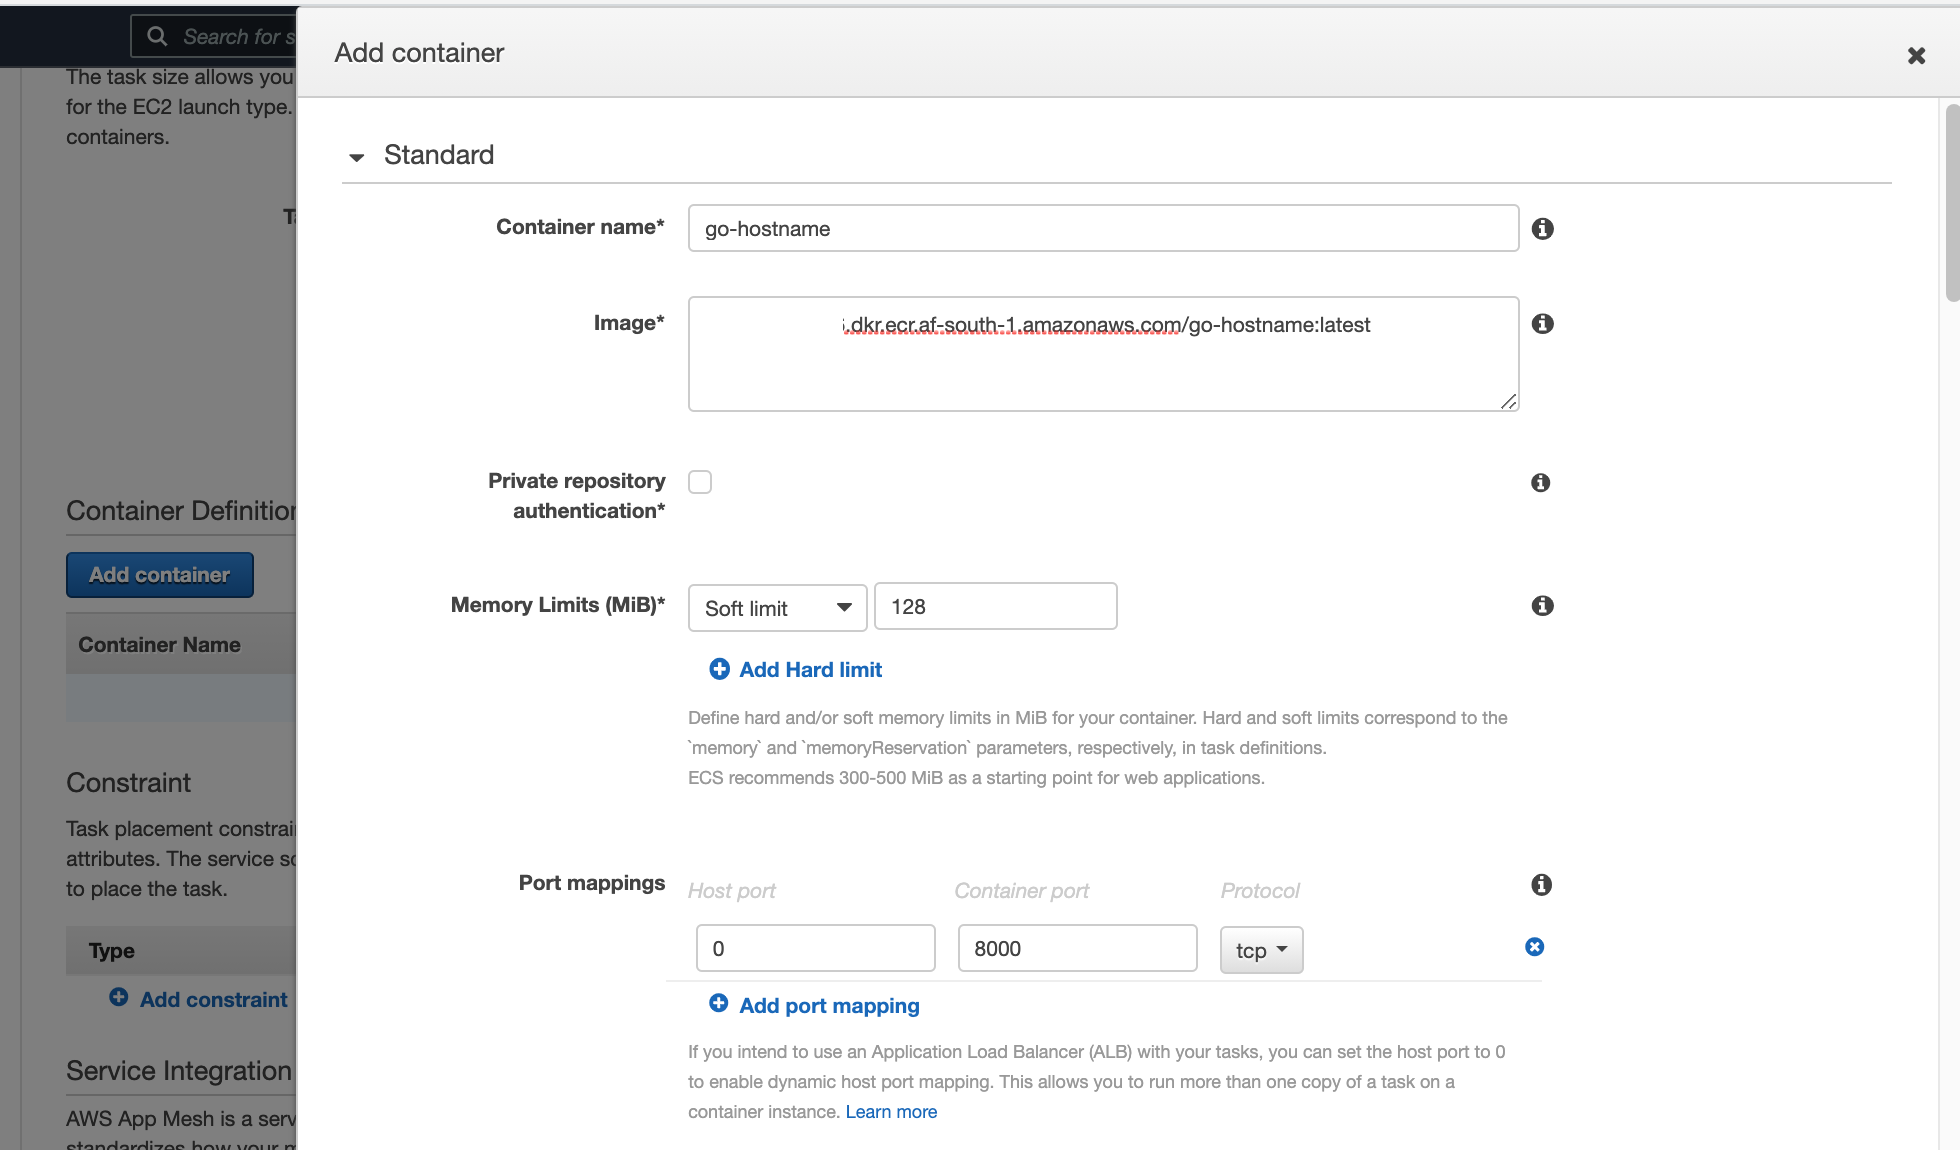
Add container definitions, for the image, container name, port mappings (0 on the host as the host will create a random listener port and will be mapped to the container port 8000) and provide soft/hard limits:
Then select "Add" and "Create" and you should see something like this:
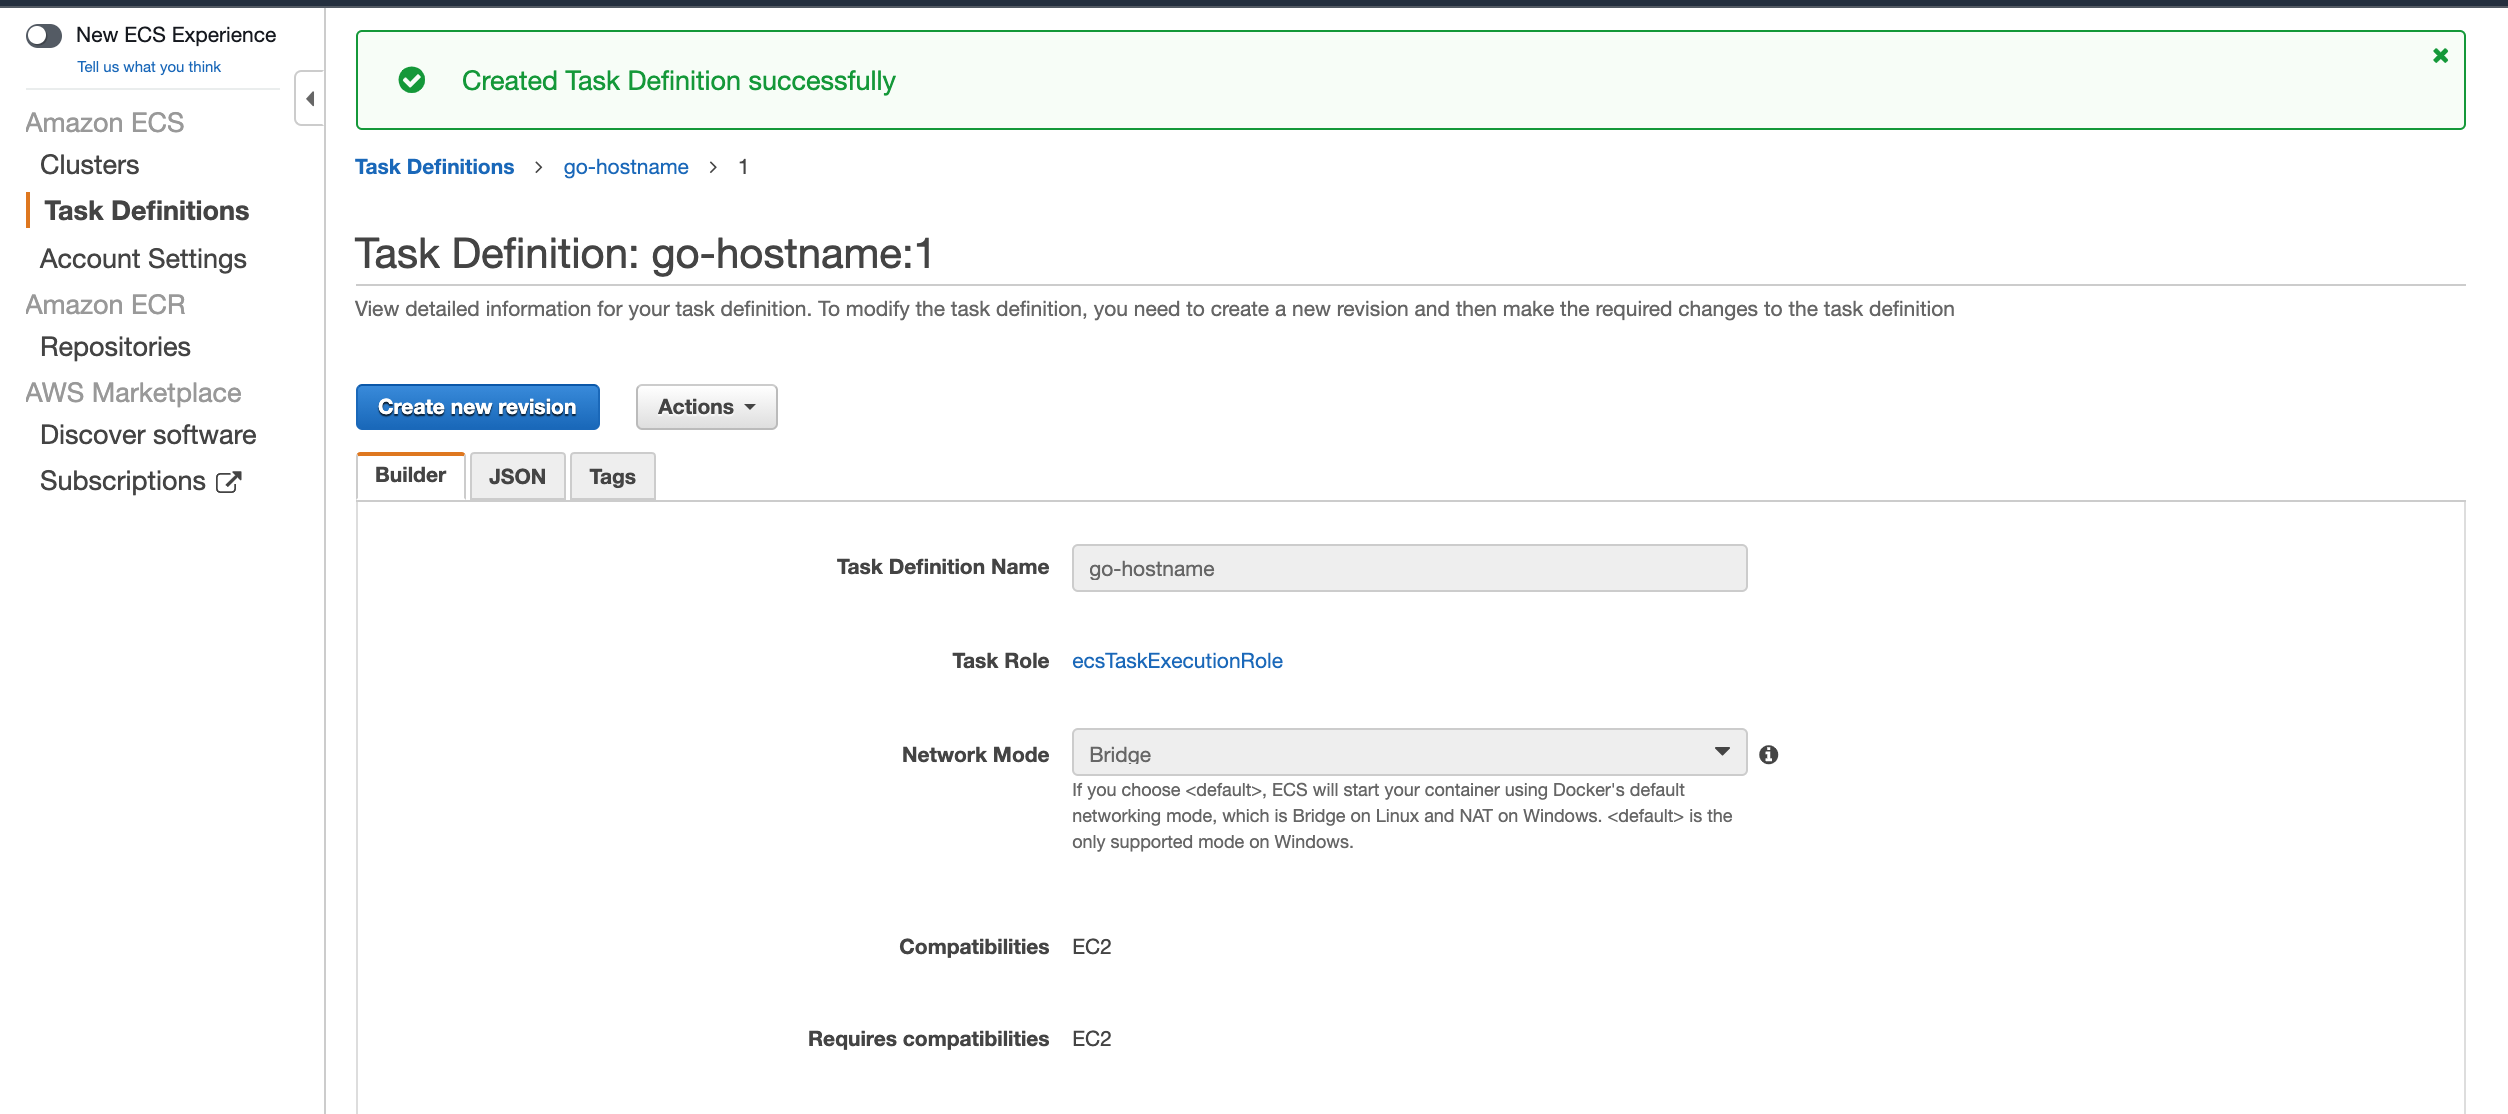
You can copy the json data from the json tab, to use for future service creations.
Head over the the ECS Cluster:

Click "Create" to create your ECS Service, provide a service name, EC2 as the launch type, select replica and provide the number of replicas:
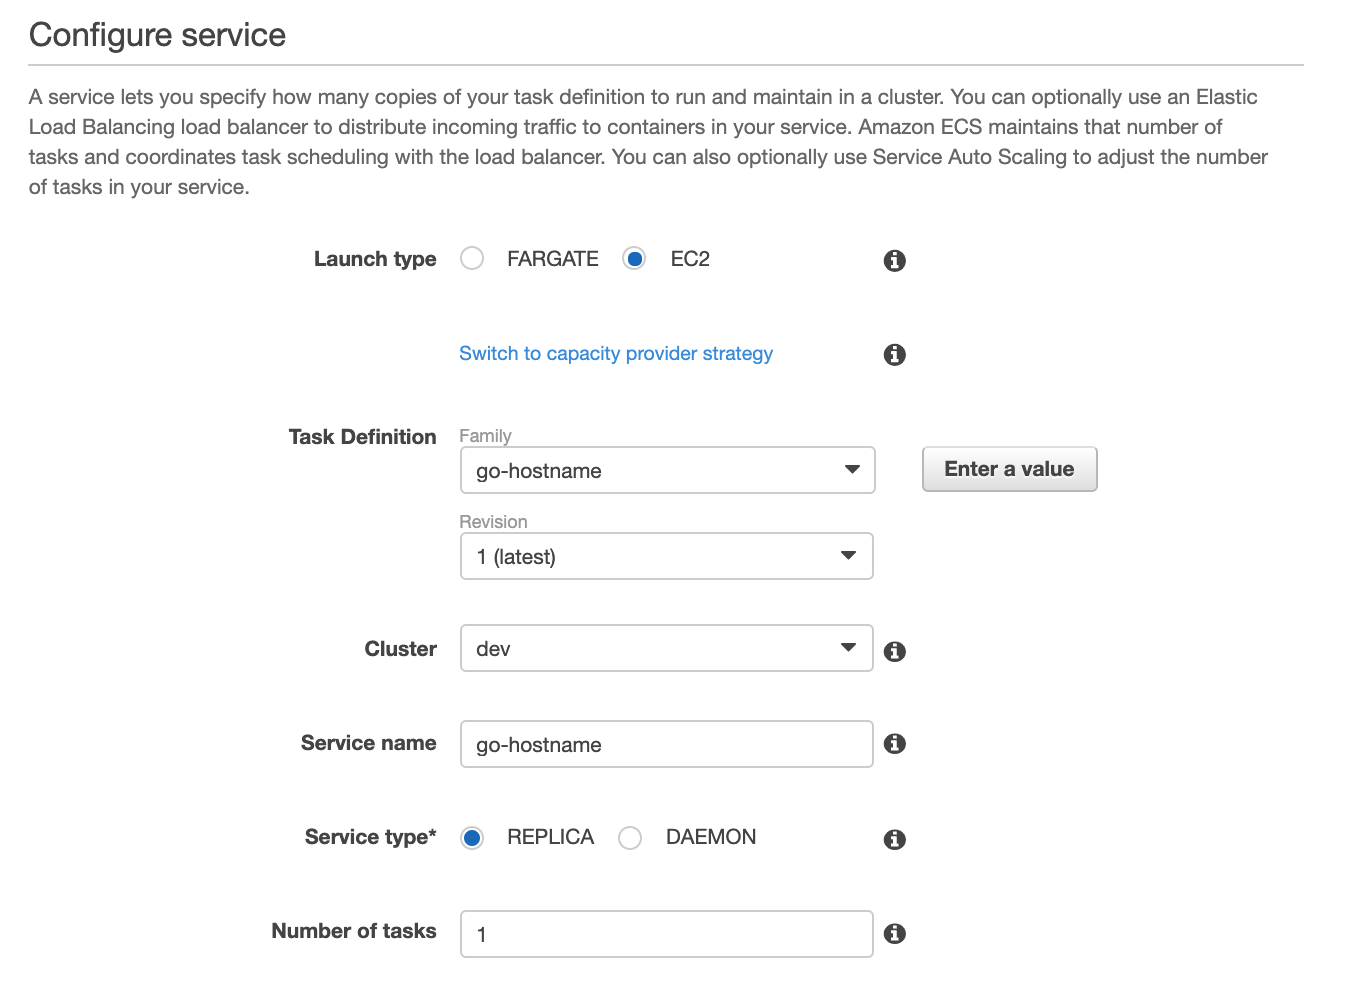
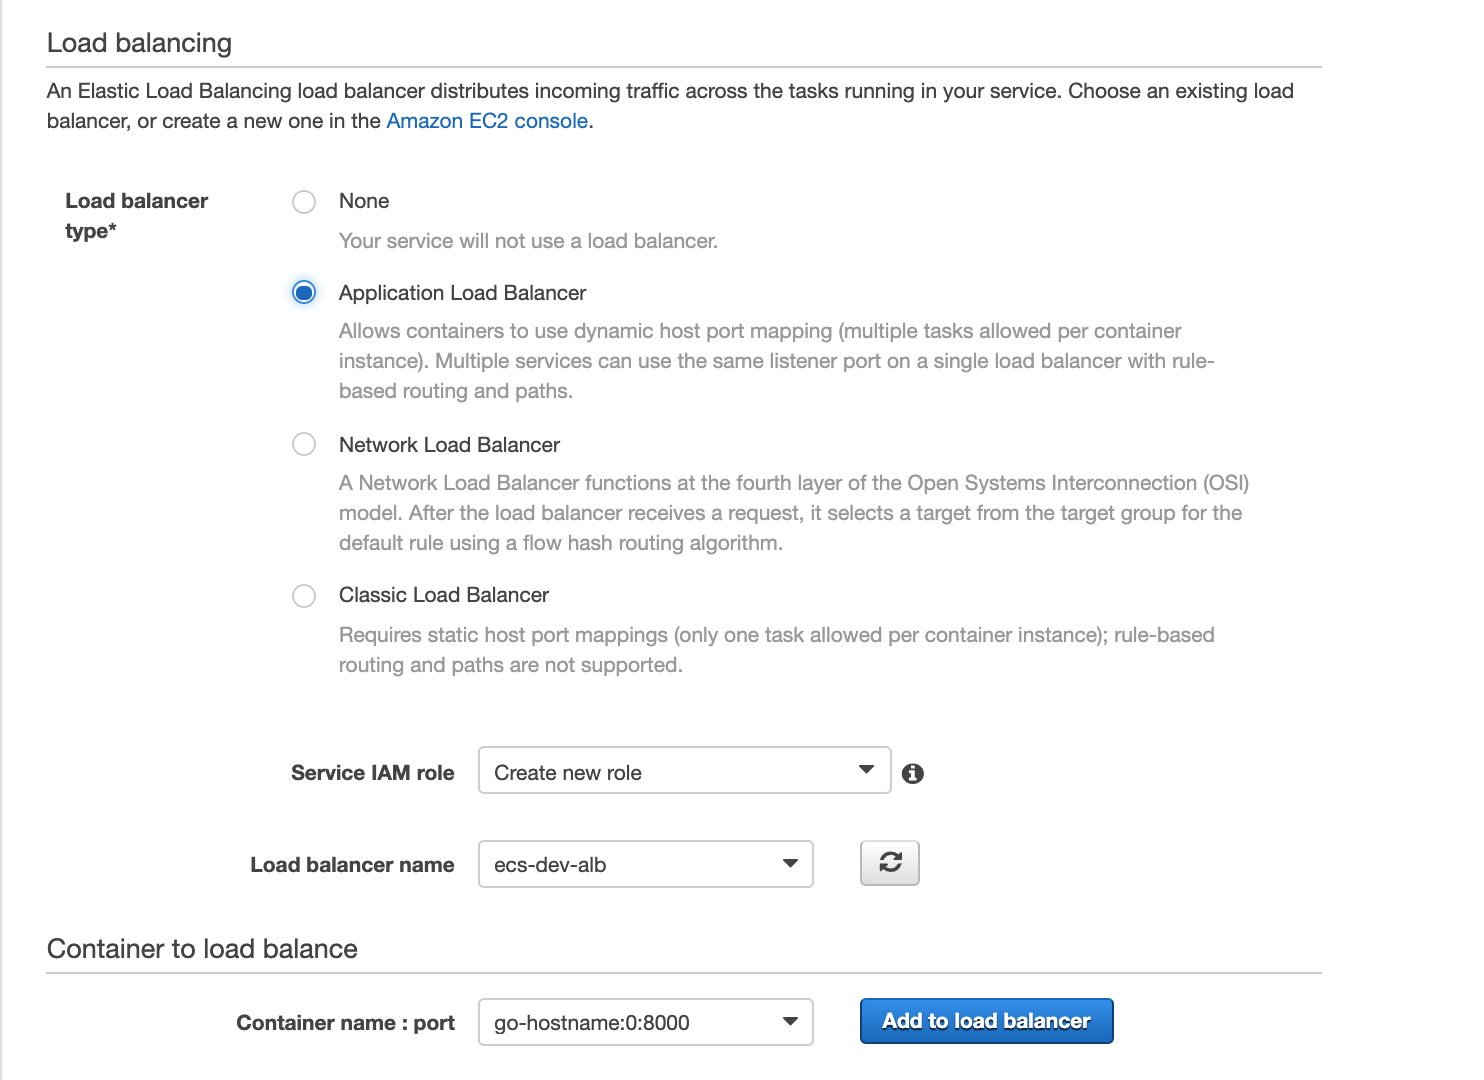
Select "Next", under "Load Balancing", select the ALB and select the container to load balance:
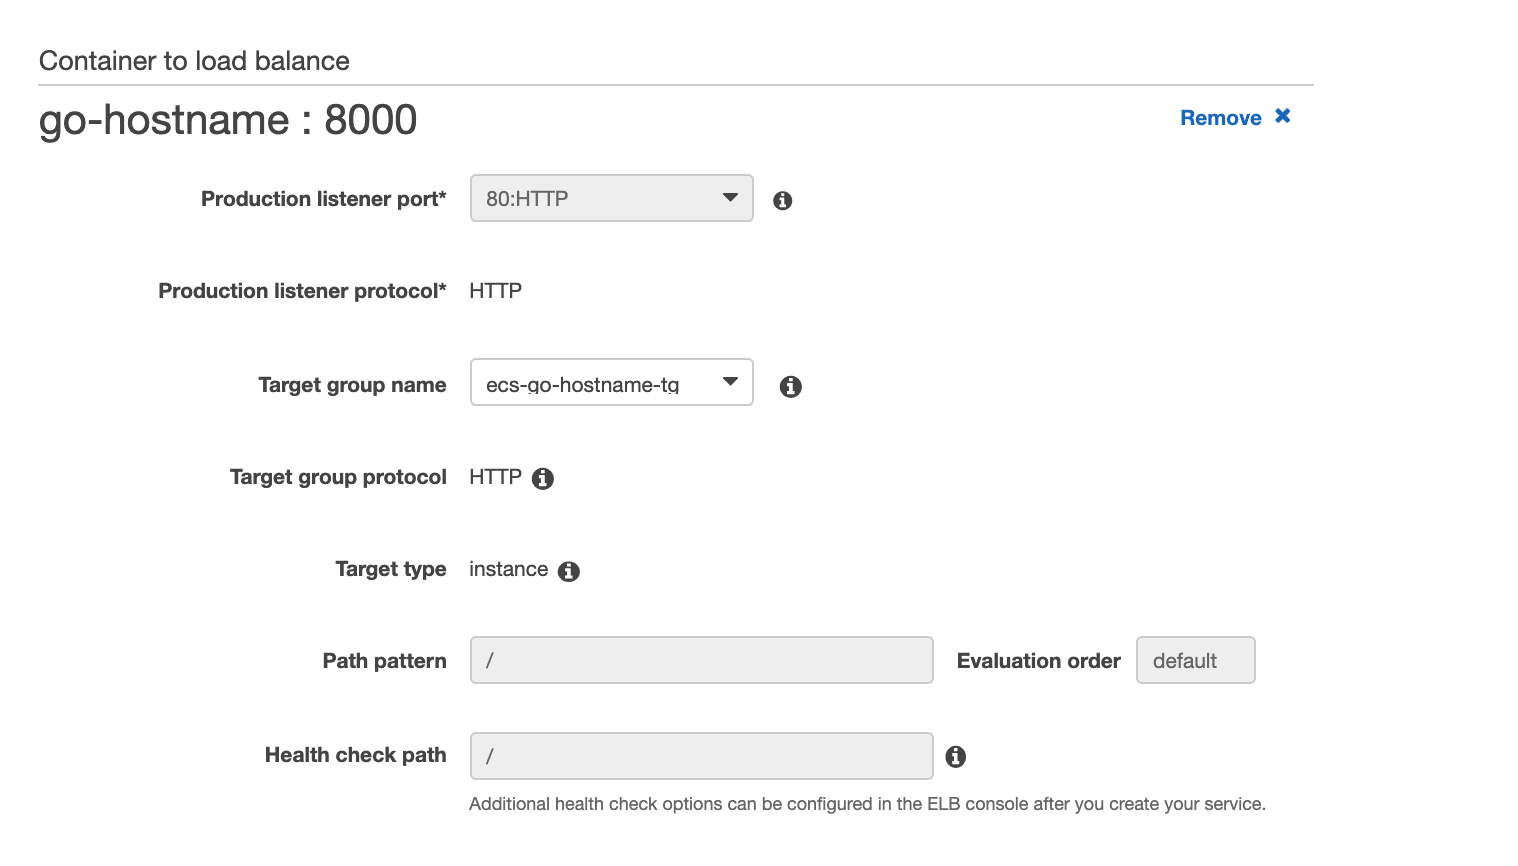
Then click "Add to load balancer", then select the Target Group that we created earlier:
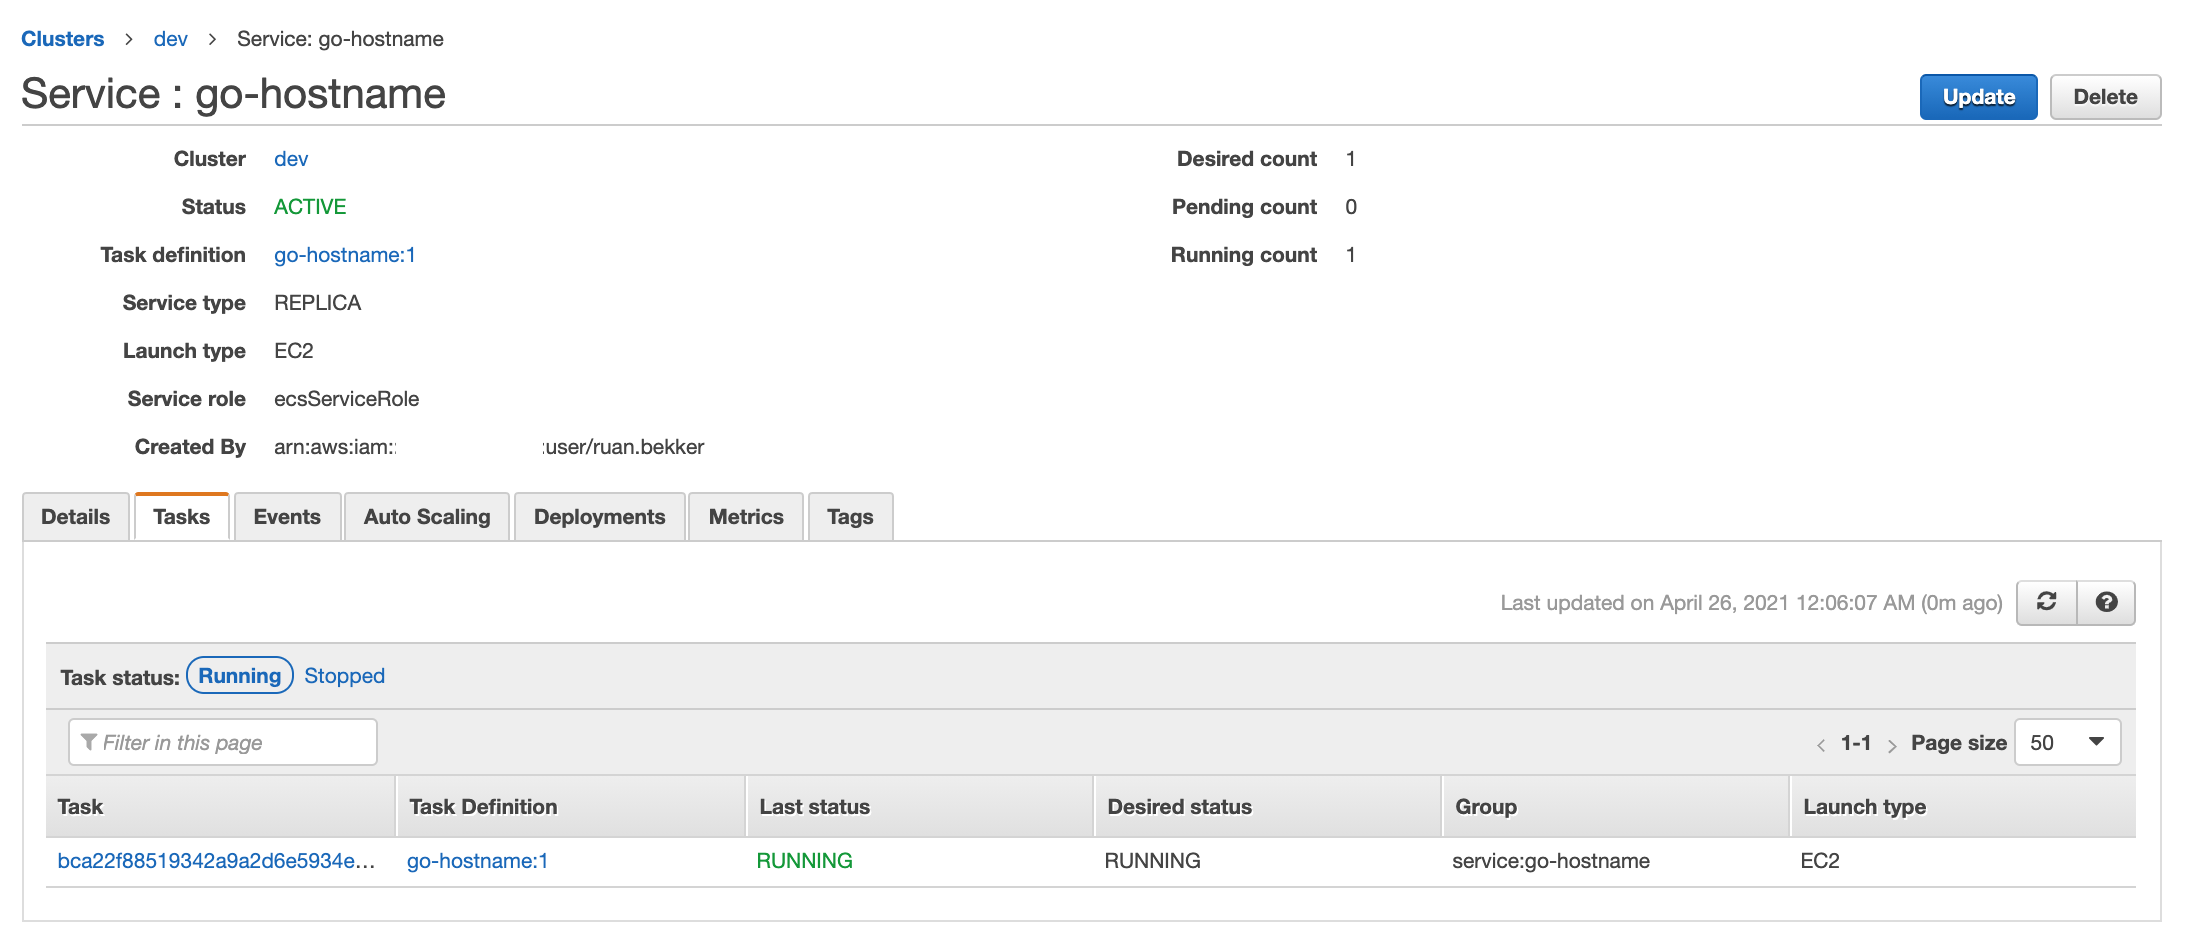
Select next and create service, once the image has been pulled and the container has been placed on the container instance you should see the following:
Authorize Security Group Access
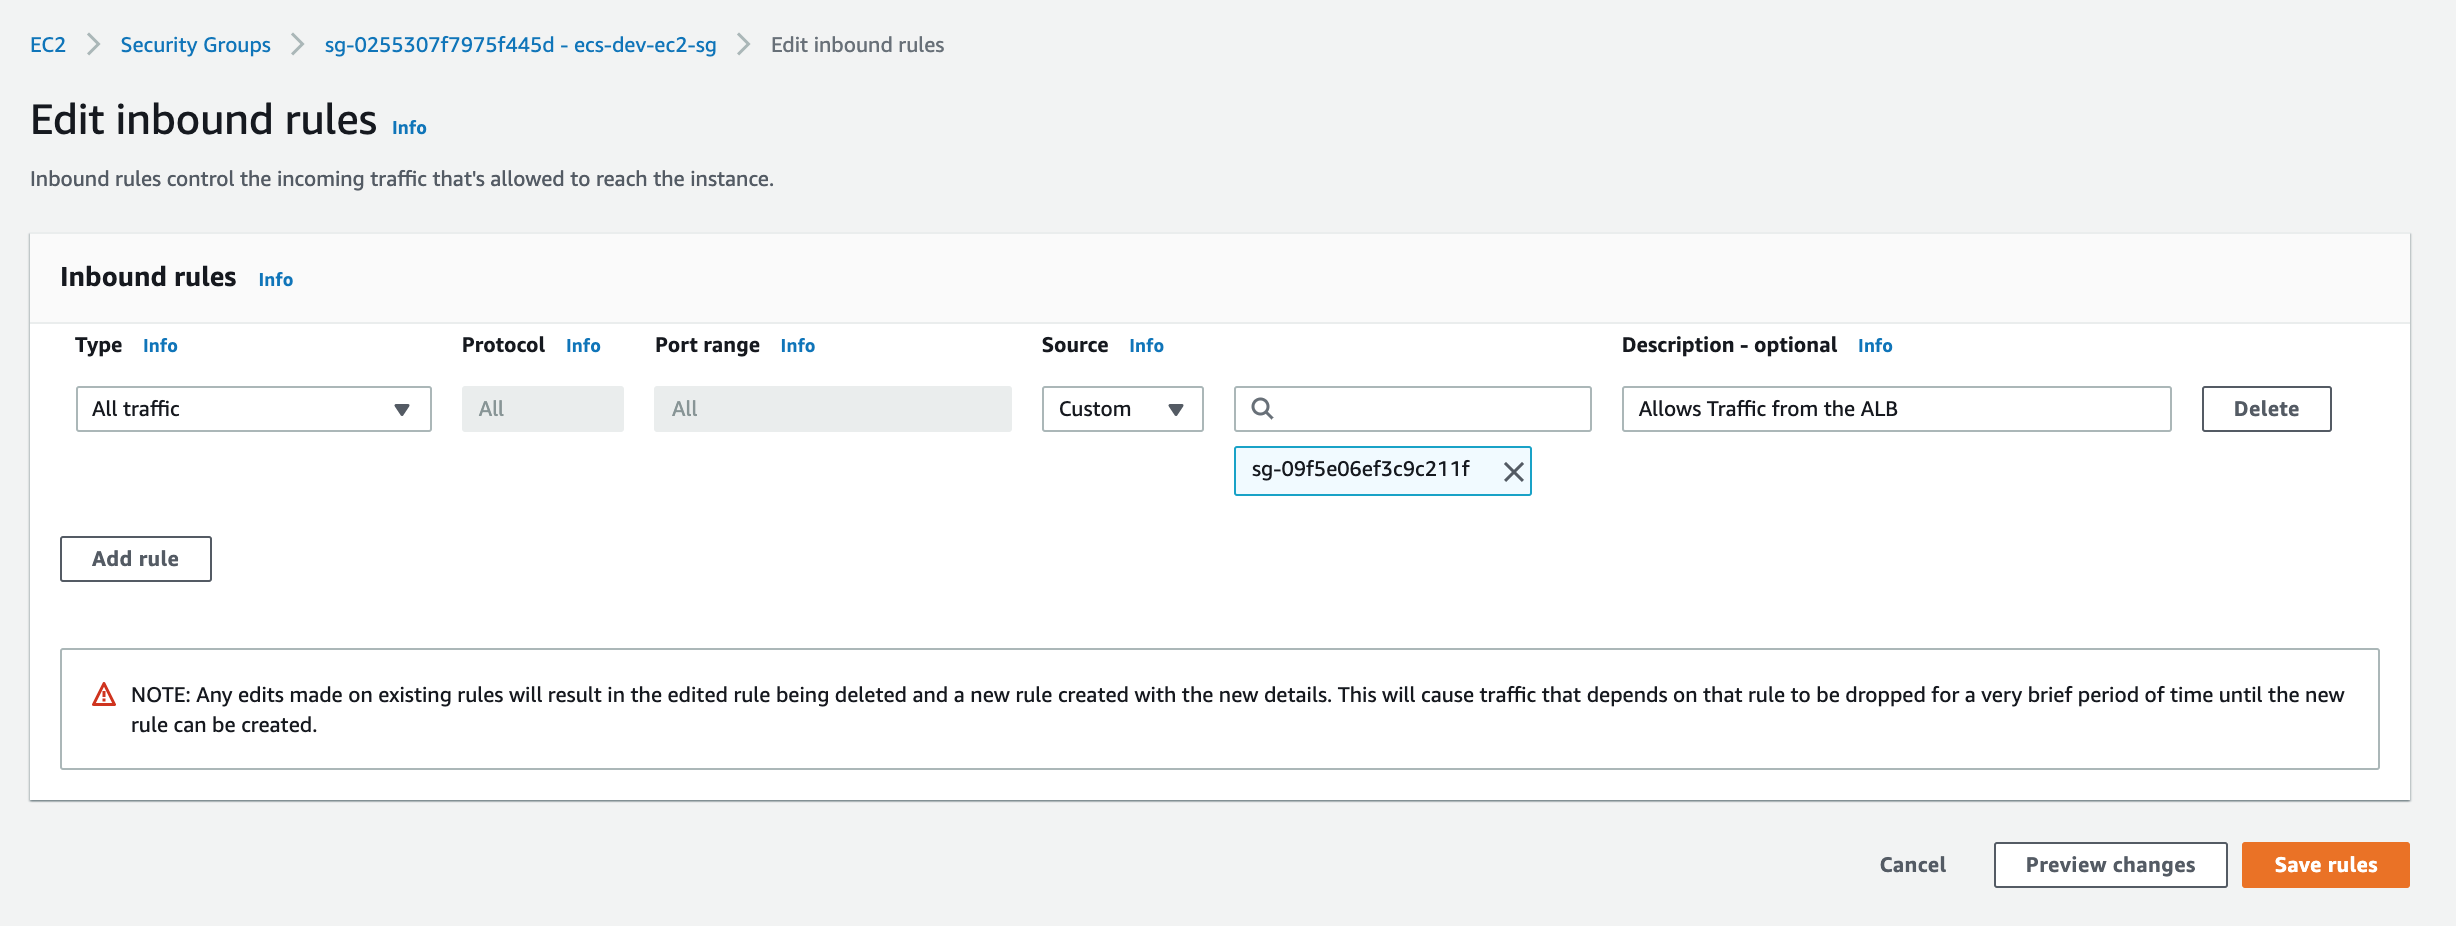
Head over to the ecs-dev-ec2-sg and allow all access from the ecs-dev-alb-sg:
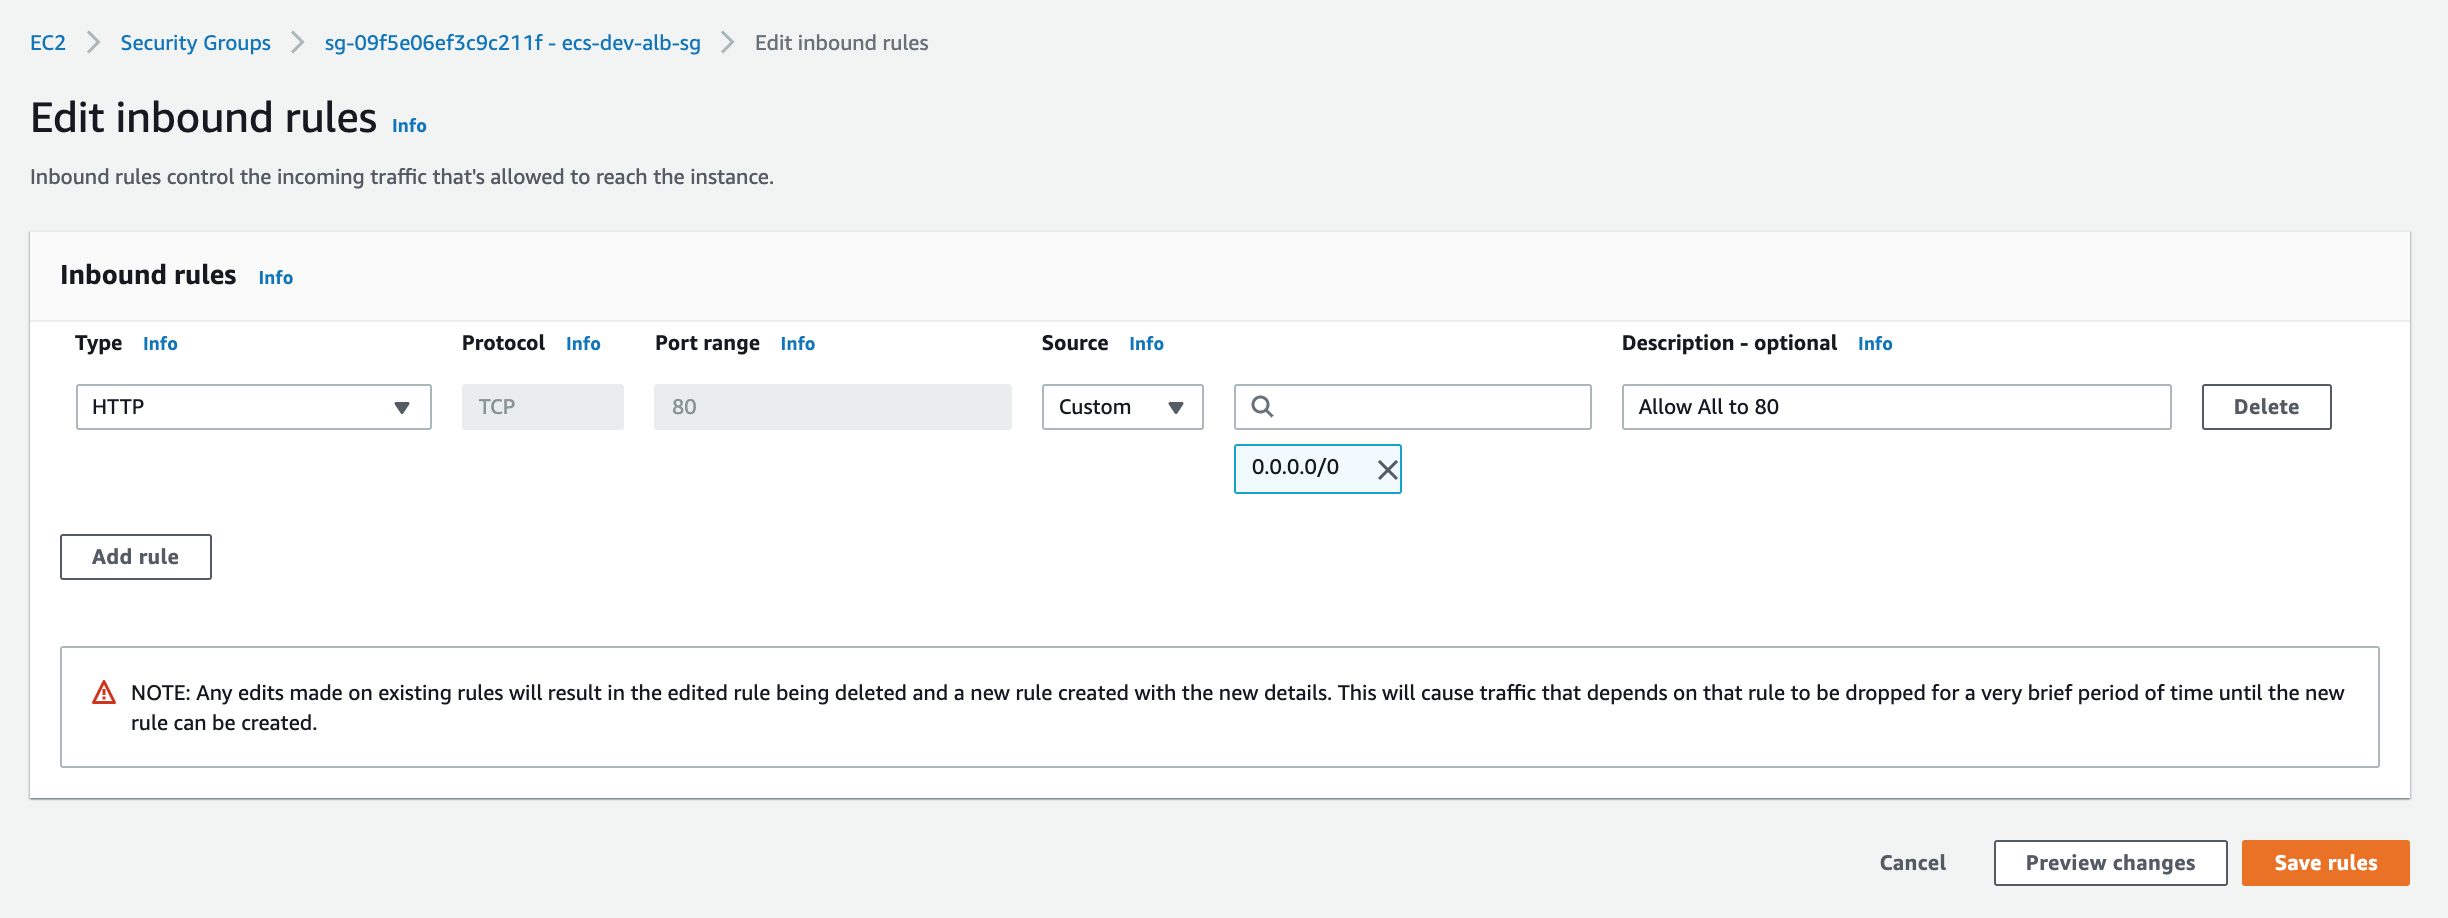
Then head to the ecs-dev-alb-sg security group and allow port 80 from 0.0.0.0/0:
Test
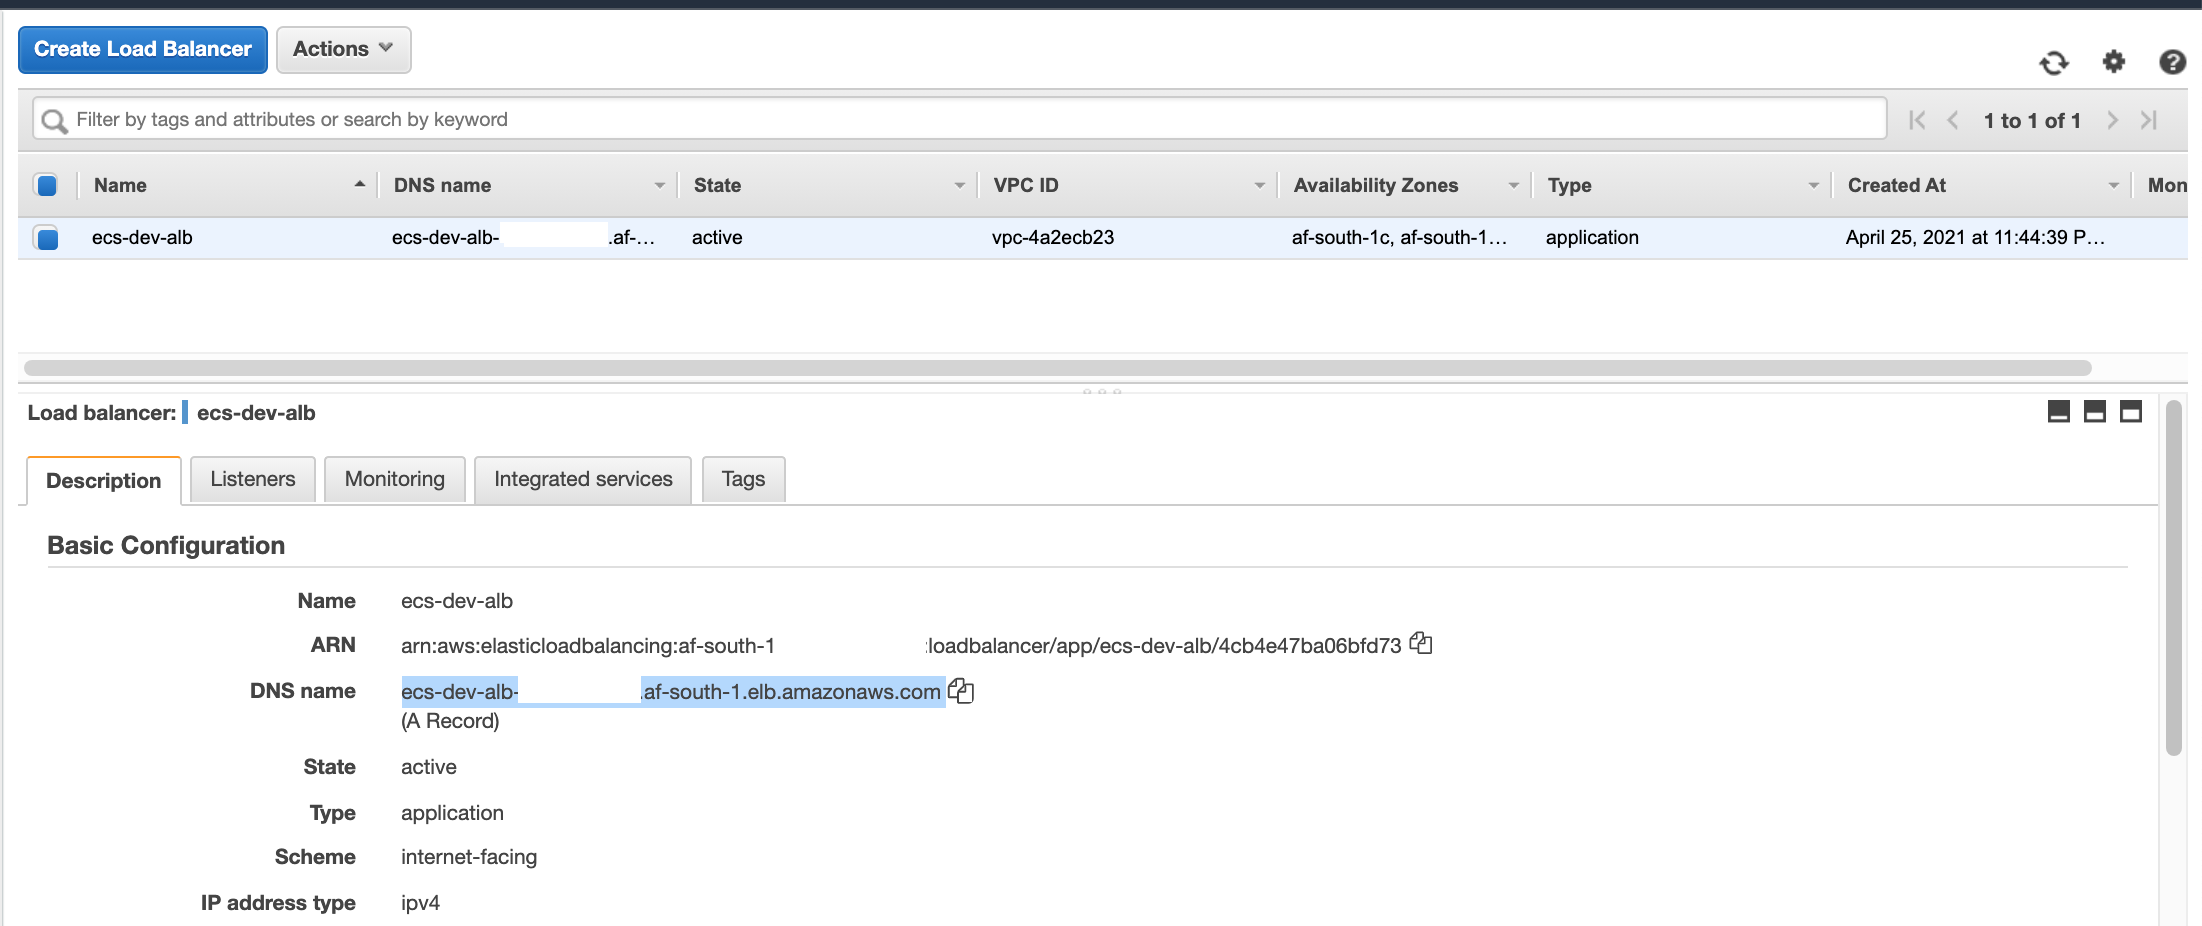
Head over to the EC2 and select Load Balancers, select the ALB and you will see the DNS name:
Make a http request:
$ curl -i ecs-dev-alb-xxxxxxxxxx.af-south-1.elb.amazonaws.com
HTTP/1.1 200 OK
Date: Sun, 25 Apr 2021 22:13:15 GMT
Content-Type: text/plain; charset=utf-8
Content-Length: 23
Connection: keep-alive

Hostname: 5e067915b16e
Scale the Service
Head over to the ECS Service, select update and update the container replicas to 2, and select update:

You will notice that the service now has 2 tasks, we can verify by making 2 requests:
$ curl ecs-dev-alb-xxxxxxxxxx.af-south-1.elb.amazonaws.com
Hostname: bd7e788ab58a

$ curl ecs-dev-alb-xxxxxxxxxx.af-south-1.elb.amazonaws.com
Hostname: 5e067915b16e
If you would like to limit incoming traffic to only be routed to the service if the host header and/or the source ip matches, you can configure that from the load balancer listener rules:

Then select view/edit rules, add a rule and add a condition, in this example when the host header matches mywebservice.example.com then forward it to the target group ecs-go-hostname-tg:
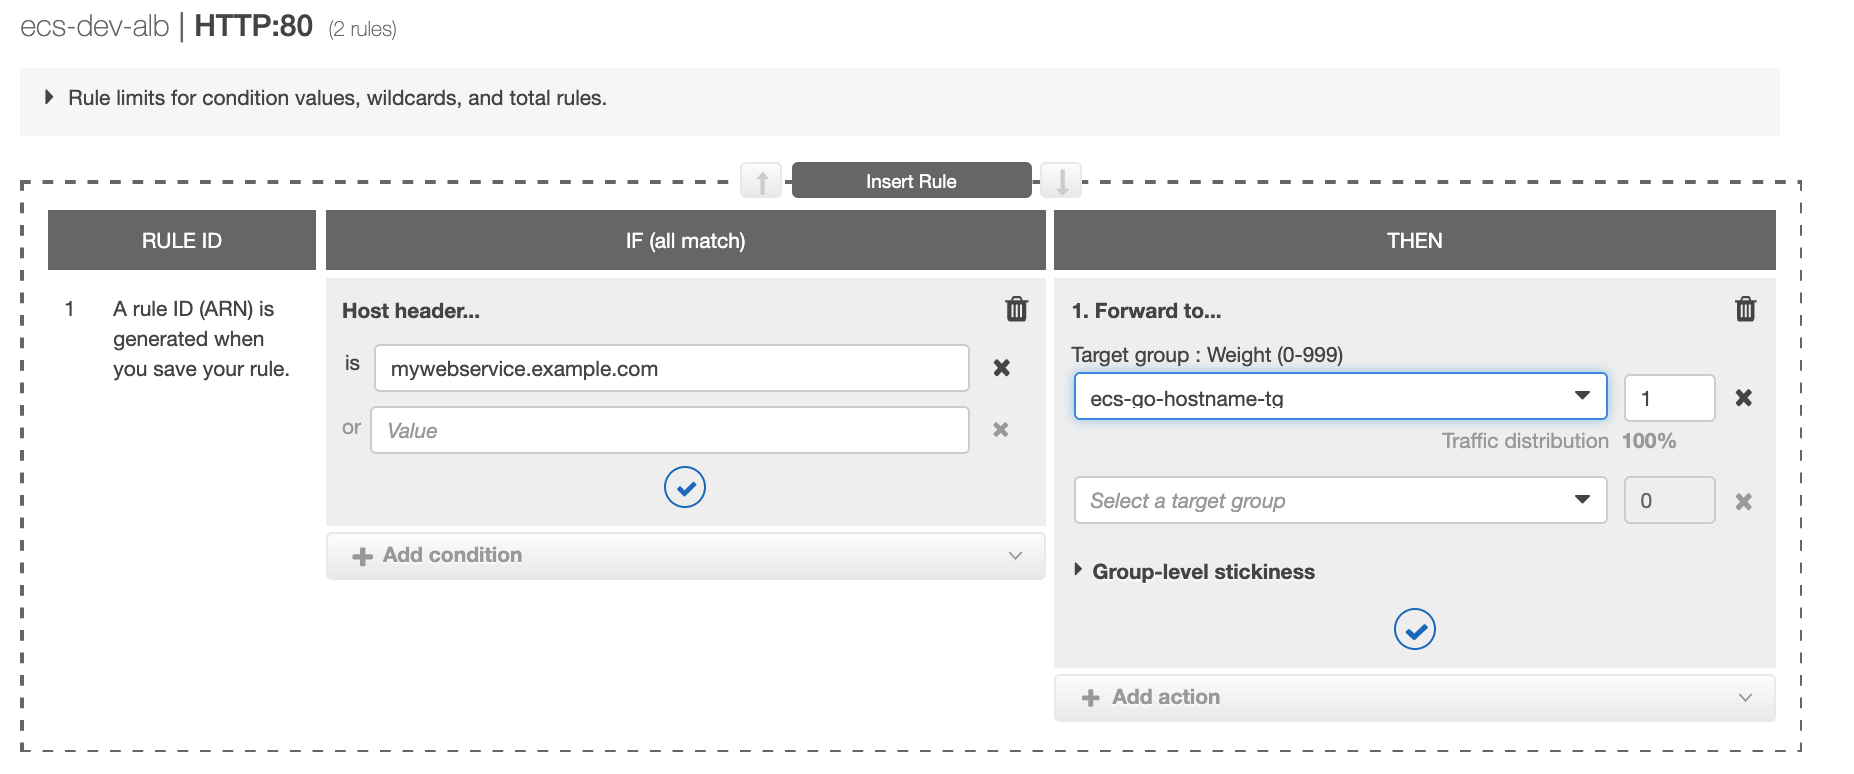
Then just make sure that the hostname has an entry on your DNS to be CNAME'd to the ALB's DNS.
Comments