
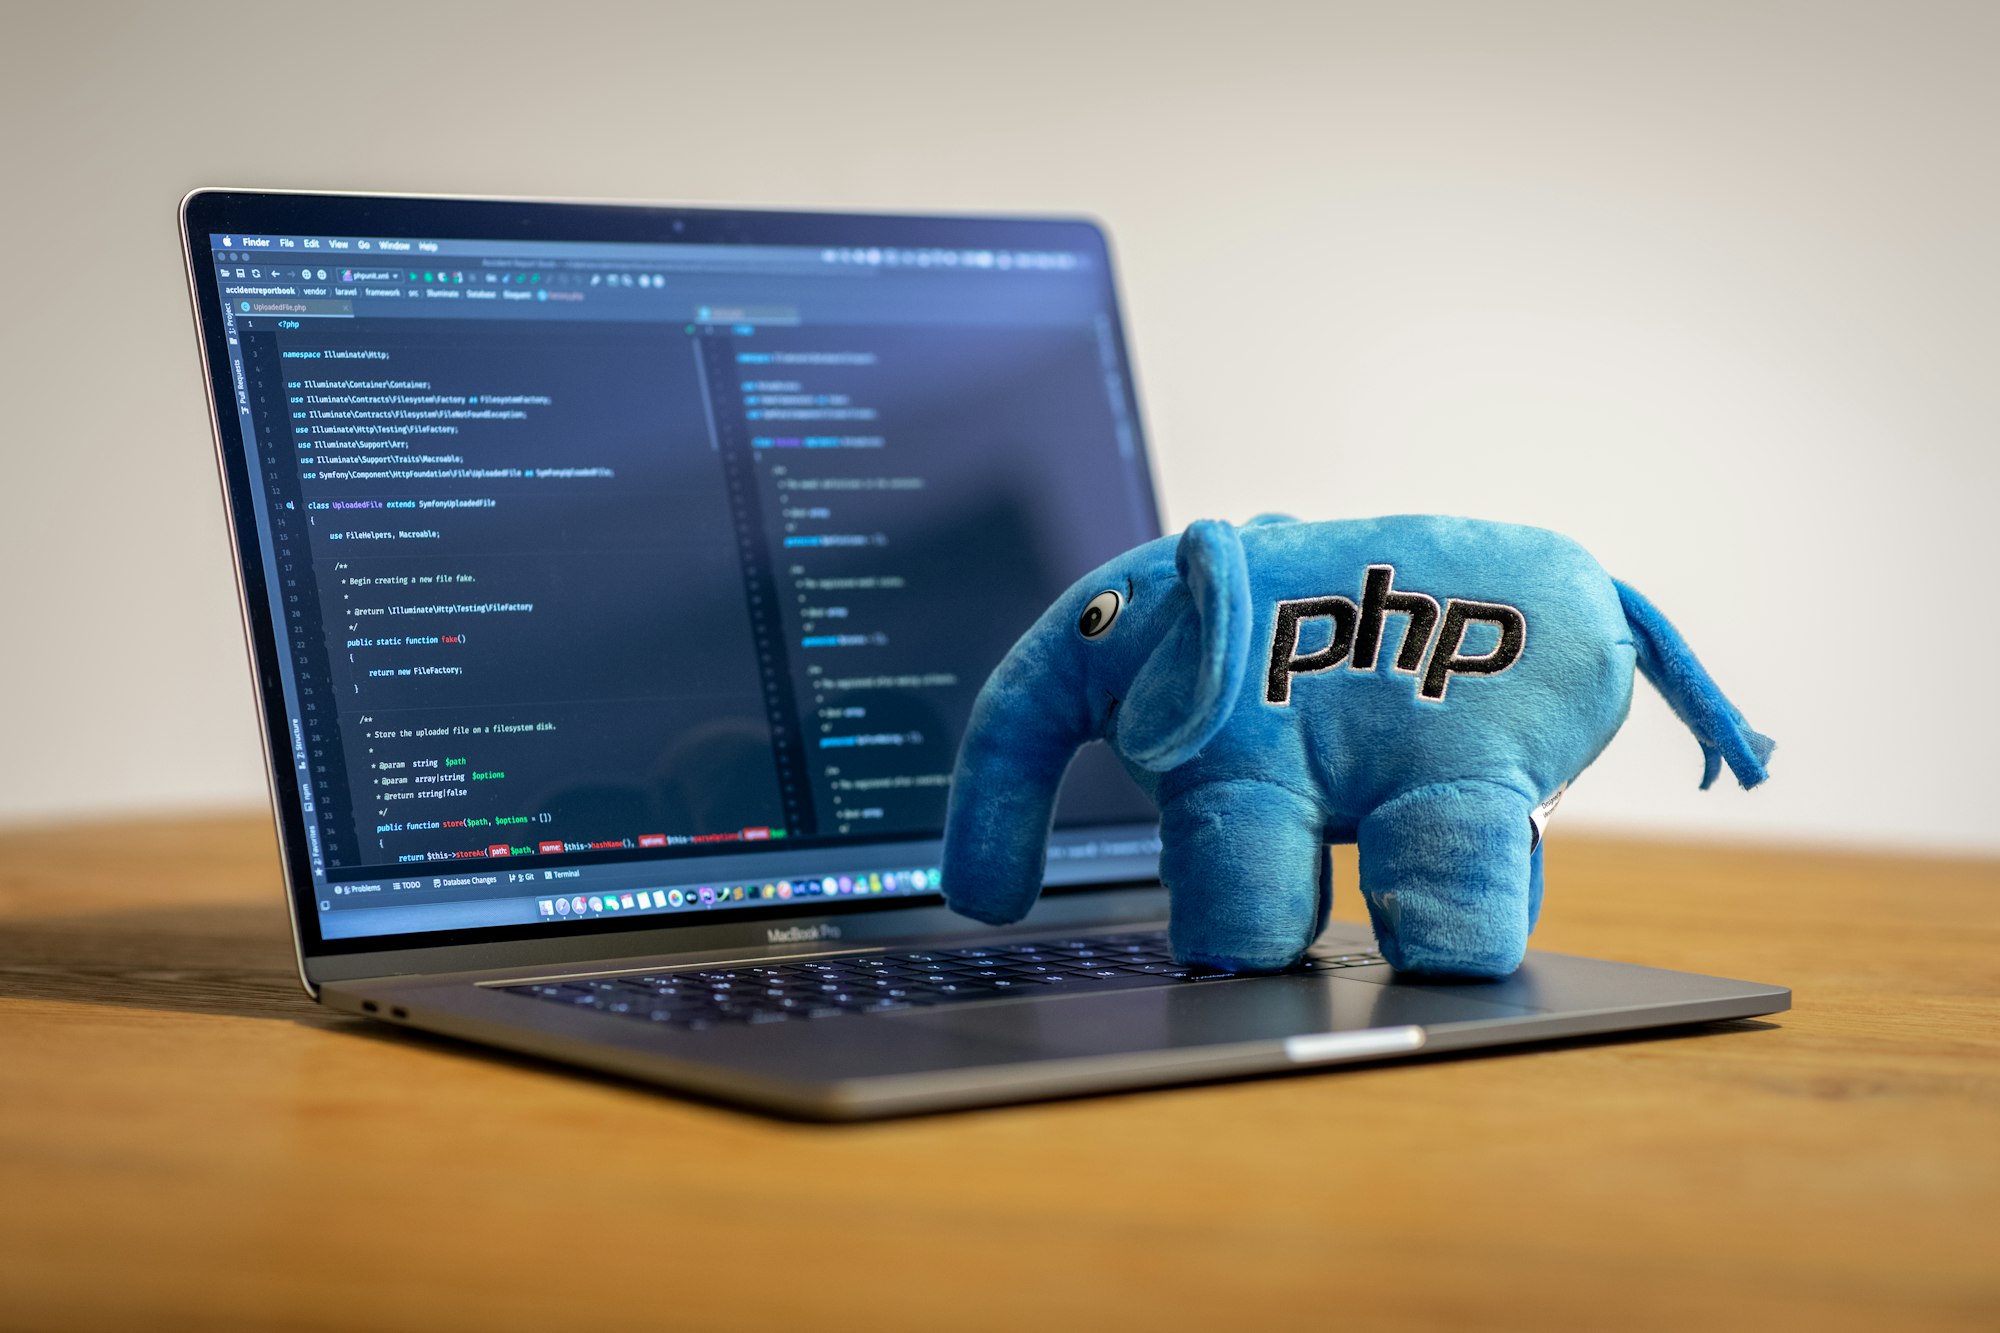
In this tutorial we will setup and configure a LEMP stack, which enables us to serve dynamic content with PHP and MySQL.
The term LEMP stands for:
- Linux
- Nginx (pronounced "En-gin-ex")
- MySQL
- PHP
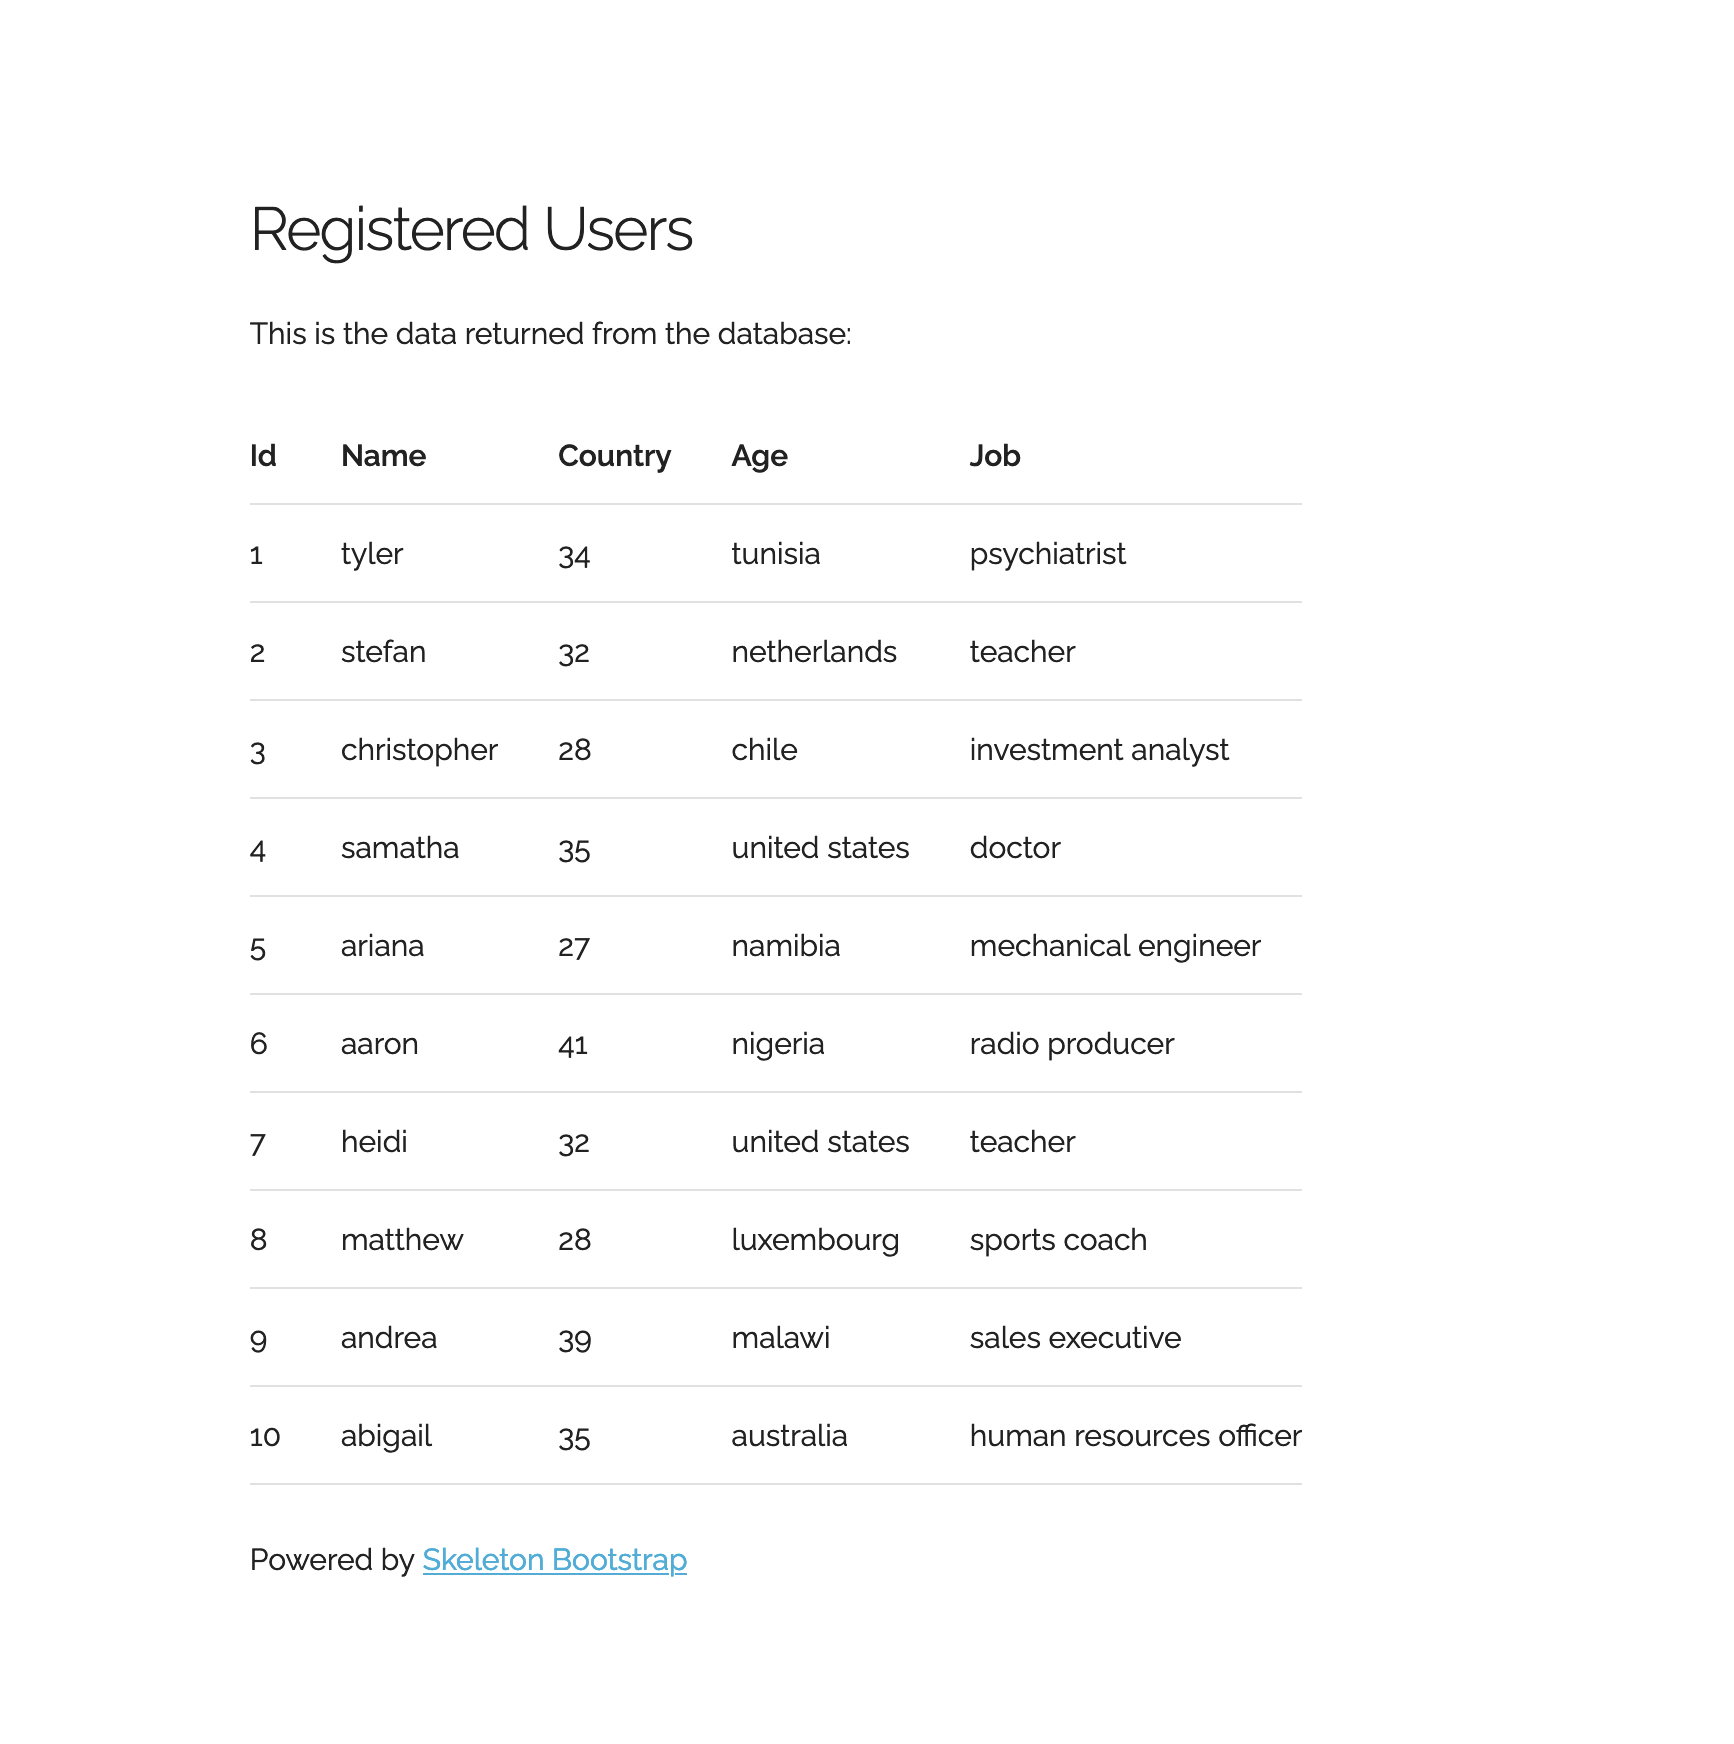
Once we installed our LEMP stack we will also run our PHP and MySQL website which will return 10 users from our MySQL database and return the content in a table and css provided using skeleton bootstrap.
Dependencies
First we need to update our apt repositories:
$ sudo apt updateThen we will need to install our required packages:
$ sudo apt install mysql-server-8.0 nginx php-fpm php-mysql git -yFirewall Rules
With Ubuntu 22.04 installed software like Nginx which listens on port 80 are blocked by default for the public, and that can be allowed with UFW but since I'm an avid iptables fan, I will be using iptables.
We will allow any source to connect to port 80 on our ubuntu server:
$ sudo iptables -I INPUT -p tcp --dport 80 -j ACCEPTWe will need to persist our firewall rules after reboots, so we need to install this package:
$ sudo apt install iptables-persistent -yEnsure that the service is enabled to start on boot:
$ sudo systemctl enable netfilter-persistentIt will auto prompt to save the existing rules to /etc/iptables/rules.v4 which you can do, but I will run the command manually just in any case:
$ sudo iptables-save > /etc/iptables/rules.v4MySQL Database
First we need to set a root password as the root password by default is blank, connect to the mysql database:
$ sudo mysqlThen update the root password, this is just for demonstration purposes, so I will be using a dummy password, but always ensure you choose a strong password:
ALTER USER 'root'@'localhost'
IDENTIFIED WITH mysql_native_password by 'password';
Then exit by running exit; , now we will continue the mysql installation by running:
$ sudo mysql_secure_installationThis will prompt you a couple of questions, which you can answer, these were my prompts and responses:
Securing the MySQL server deployment.

Enter password for user root:
Would you like to setup VALIDATE PASSWORD component?
Press y|Y for Yes, any other key for No: Y
Please enter 0 = LOW, 1 = MEDIUM and 2 = STRONG: 0
Using existing password for root.
Change the password for root ? ((Press y|Y for Yes, any other key for No) : N
Remove anonymous users? (Press y|Y for Yes, any other key for No) : Y
Success.
Disallow root login remotely? (Press y|Y for Yes, any other key for No) : Y
Remove test database and access to it? (Press y|Y for Yes, any other key for No) : Y
Reload privilege tables now? (Press y|Y for Yes, any other key for No) : Y
Success.
Now we need to create our application user that will be used to connect to our database, we will be creating a user called appuser with the password apppassword:
Connect to the mysql database:
$ mysql -u root -ppasswordThen create the user:
mysql> CREATE USER 'appuser'@'%' IDENTIFIED BY 'apppassword';
mysql> create database mydb;
mysql> GRANT ALL PRIVILEGES ON mydb.* TO 'appuser'@'%';
mysql> FLUSH PRIVILEGES;
mysql> exit
We can verify that the newly created user can read data from the database:
$ mysql -u appuser -papppassword -e 'select version();'
+-------------------------+
| version()               |
+-------------------------+
| 8.0.29-0ubuntu0.22.04.2 |
+-------------------------+
Nginx and PHP Config
First we will need to create our virtual host config /etc/nginx/sites-available/app:
server {
    listen 80;
    server_name _;
    root /var/www/app;

    index index.html index.htm index.php;

    location / {
        try_files $uri $uri/ =404;
    }

    location ~ \.php$ {
        include snippets/fastcgi-php.conf;
        fastcgi_pass unix:/var/run/php/php8.1-fpm.sock;
     }

    location ~ /\.ht {
        deny all;
    }

}
Then we can symlink our file to the sites-enabled directory, where nginx is configured to look for config (set in /etc/nginx/nginx.conf):
$ sudo ln -s /etc/nginx/sites-available/app /etc/nginx/sites-enabled/appThen unlink the default config:
$ sudo unlink /etc/nginx/sites-enabled/defaultThen clone my sample php application:
$ git clone https://github.com/ruanbekker/docker-php-nginx-mysql /tmp/gitMove the application to the path provided in the config:
$ sudo mv /tmp/git/app /var/www/appNow seed the data from my sql dump:
$ mysql -u appuser -papppassword mydb < /tmp/git/database/data.sqlWe can take a peek at the data in our mysql database:
$ mysql -u appuser -papppassword mydb -e 'select * from users limit 1;'
+----+-------+-----+---------+--------------+
| id | name  | age | country | job          |
+----+-------+-----+---------+--------------+
|  1 | tyler |  34 | tunisia | psychiatrist |
+----+-------+-----+---------+--------------+
In our /var/www/app/connection.php you can see we are fetching the database connection details from our environment:
try {
    $host = getenv('MYSQL_HOST');
    $db   = getenv('MYSQL_DATABASE');
    $user = getenv('MYSQL_USER');
    $pass = getenv('MYSQL_PASSWORD');
    $port = getenv('MYSQL_PORT');
    $conn = new PDO(
        "mysql:host=$host; dbname=$db", $user, $pass
    );

    $conn->setAttribute(PDO::ATTR_ERRMODE, PDO::ERRMODE_EXCEPTION);

} catch(PDOException $e) {
    echo "Connection failed: "
        . $e->getMessage();
}
Therefore we need to set this in our /etc/php/8.1/fpm/pool.d/www.conf under the [www] directive:
env[MYSQL_HOST] = 'localhost'
env[MYSQL_PORT] = '3306'
env[MYSQL_DATABASE] = 'mydb'
env[MYSQL_USER] = 'appuser'
env[MYSQL_PASSWORD] = 'apppassword'
Now restart php-fpm and nginx:
$ sudo systemctl restart php8.1-fpm
$ sudo systemctl restart nginx
Test our PHP Application
When you access your server using your browser on its public address, you should see something like the following:
Thank You
Thanks for reading, feel free to check out my website, read my newsletter or follow me at @ruanbekker on Twitter.
Header Photo by Ben Griffiths on Unsplash
Comments